The Boy Who Bakes

Edd Kimber
  • Home
  • Recipes
  • My Books
  • Blog
  • Recipe Index
  • About
  • Home
  • Recipes
  • My Books
  • Blog
  • Recipe Index
  • About

Recipes

  • All
  • baking
  • Biscuits and Cookies
  • Breads and Quickbreads
  • Bundts
  • Cakes
  • Chocolate
  • Dessert
  • drinks
  • Holidays
  • Pastry
  • Scones and Quickbreads
birthday cake slice (1 of 1).jpg

Devils Food Cake

Edd Kimber June 7, 2018

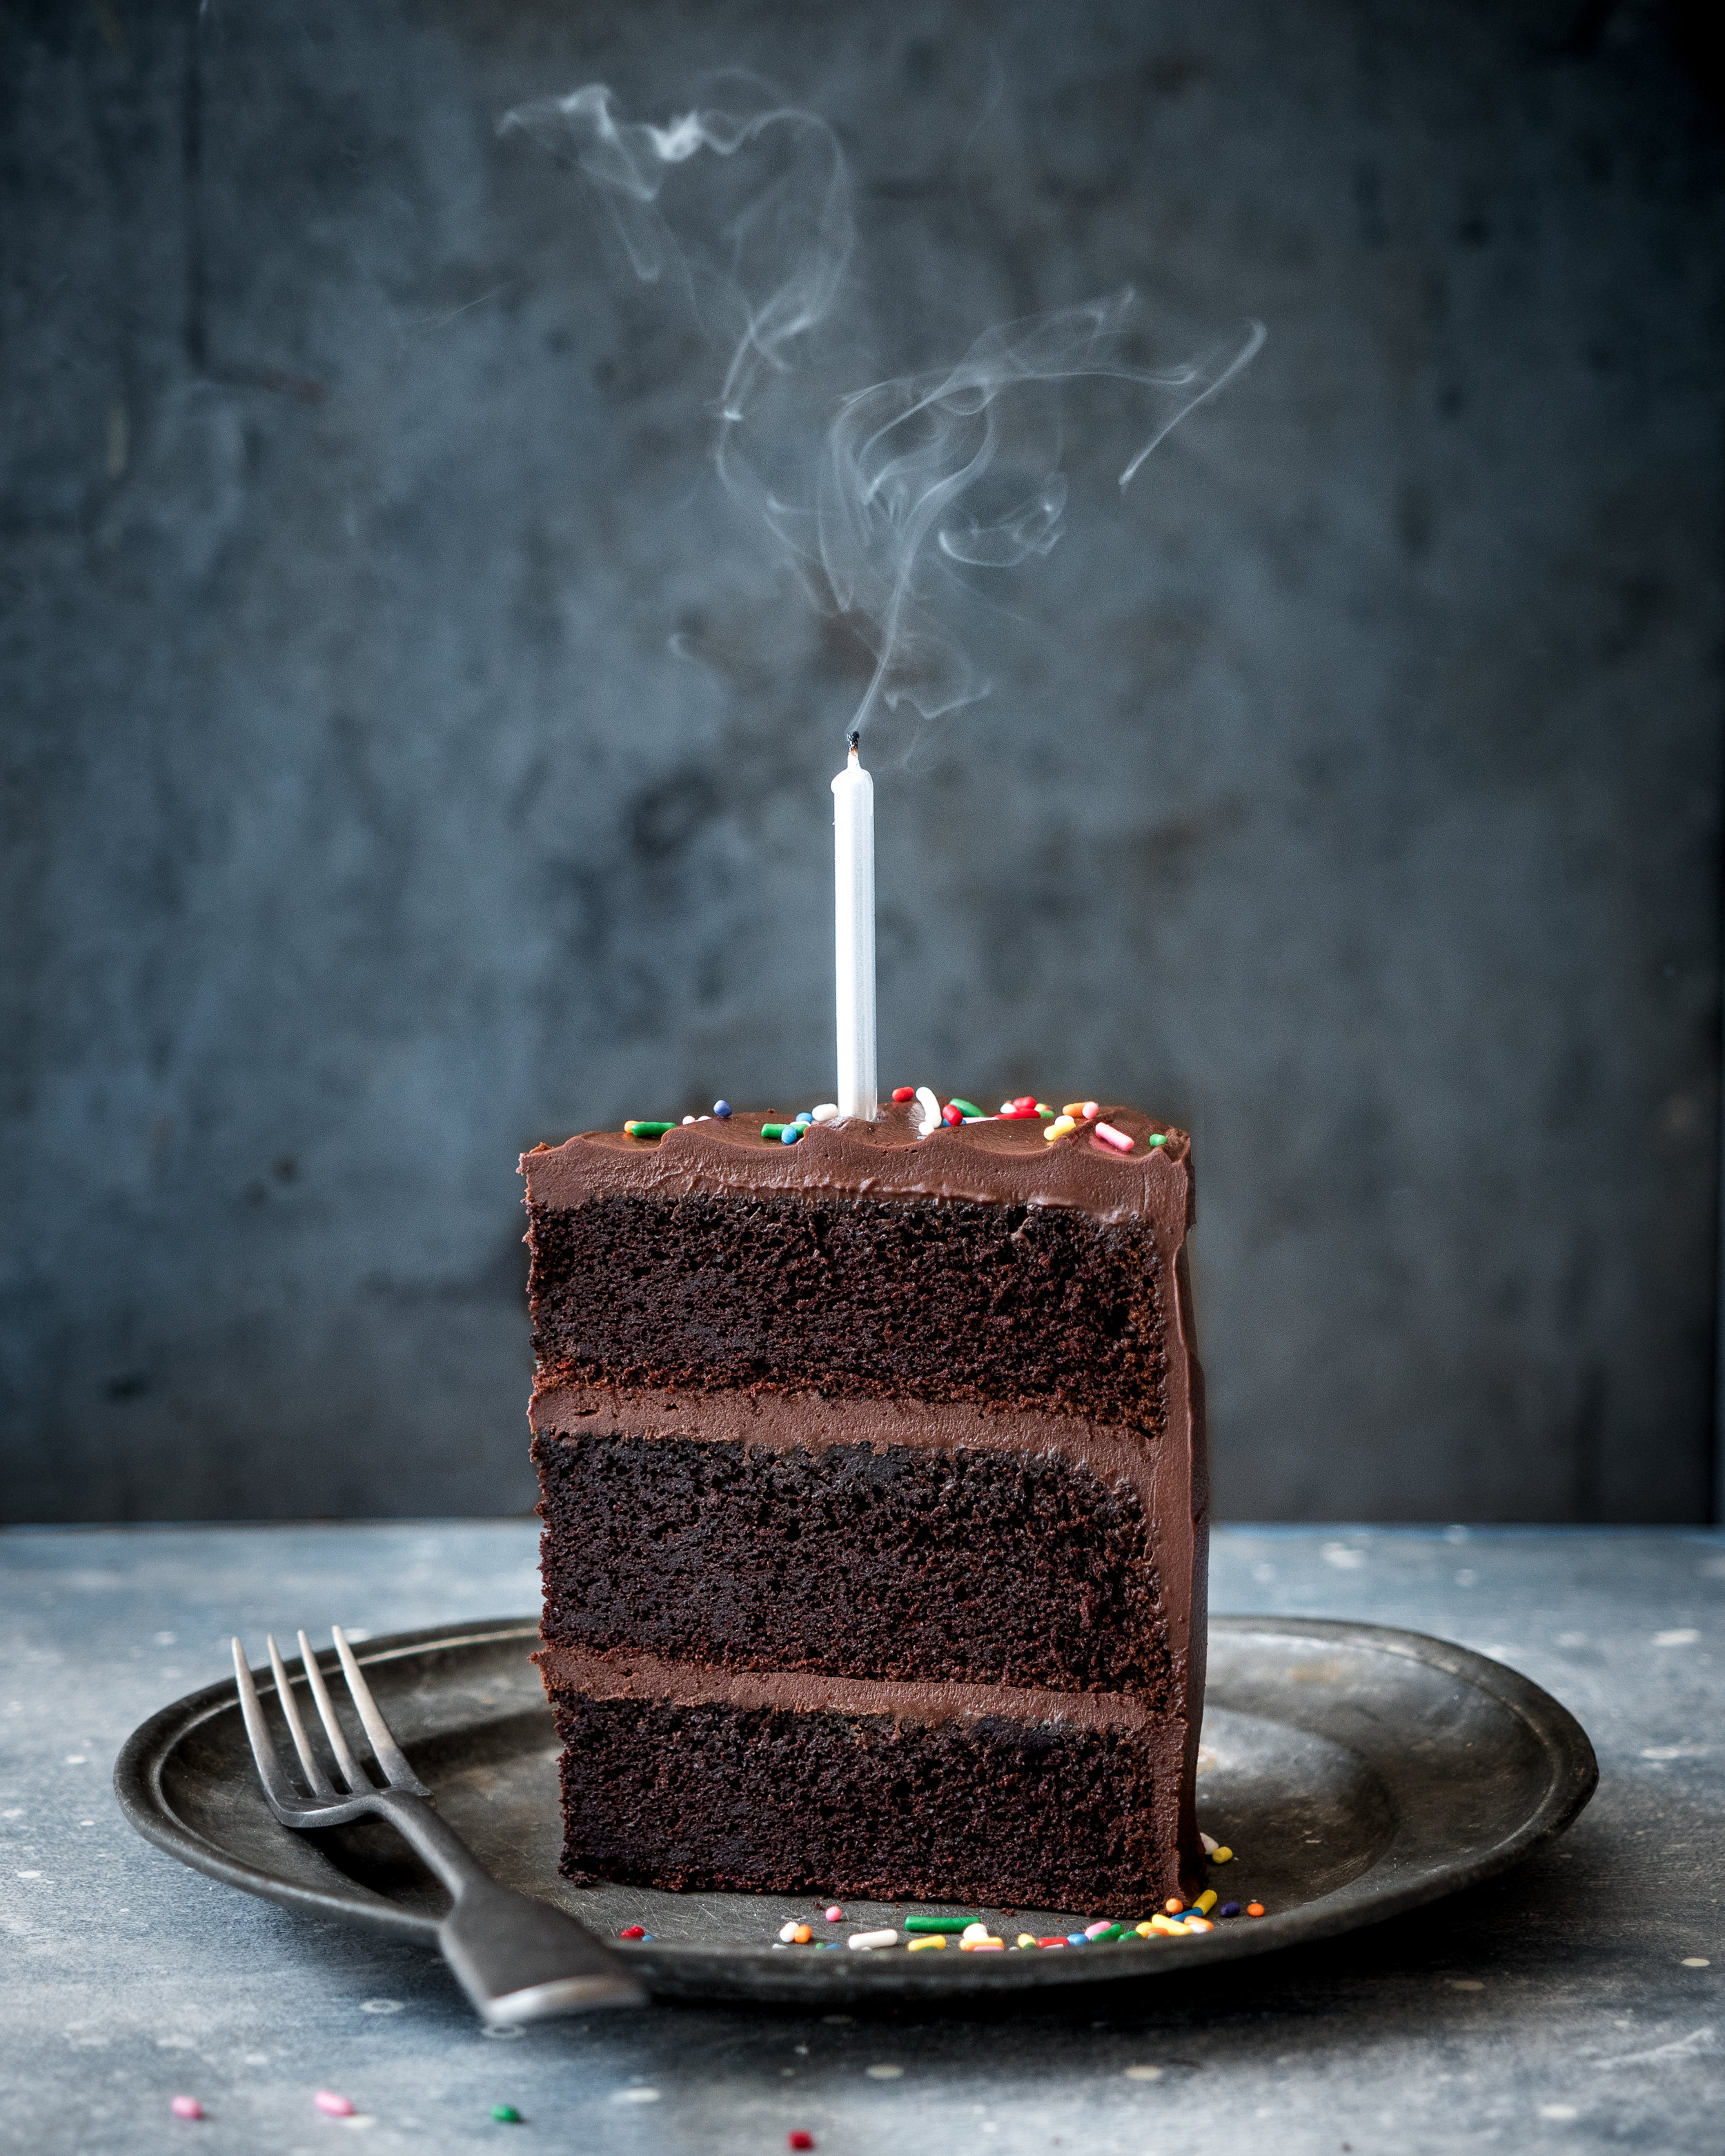
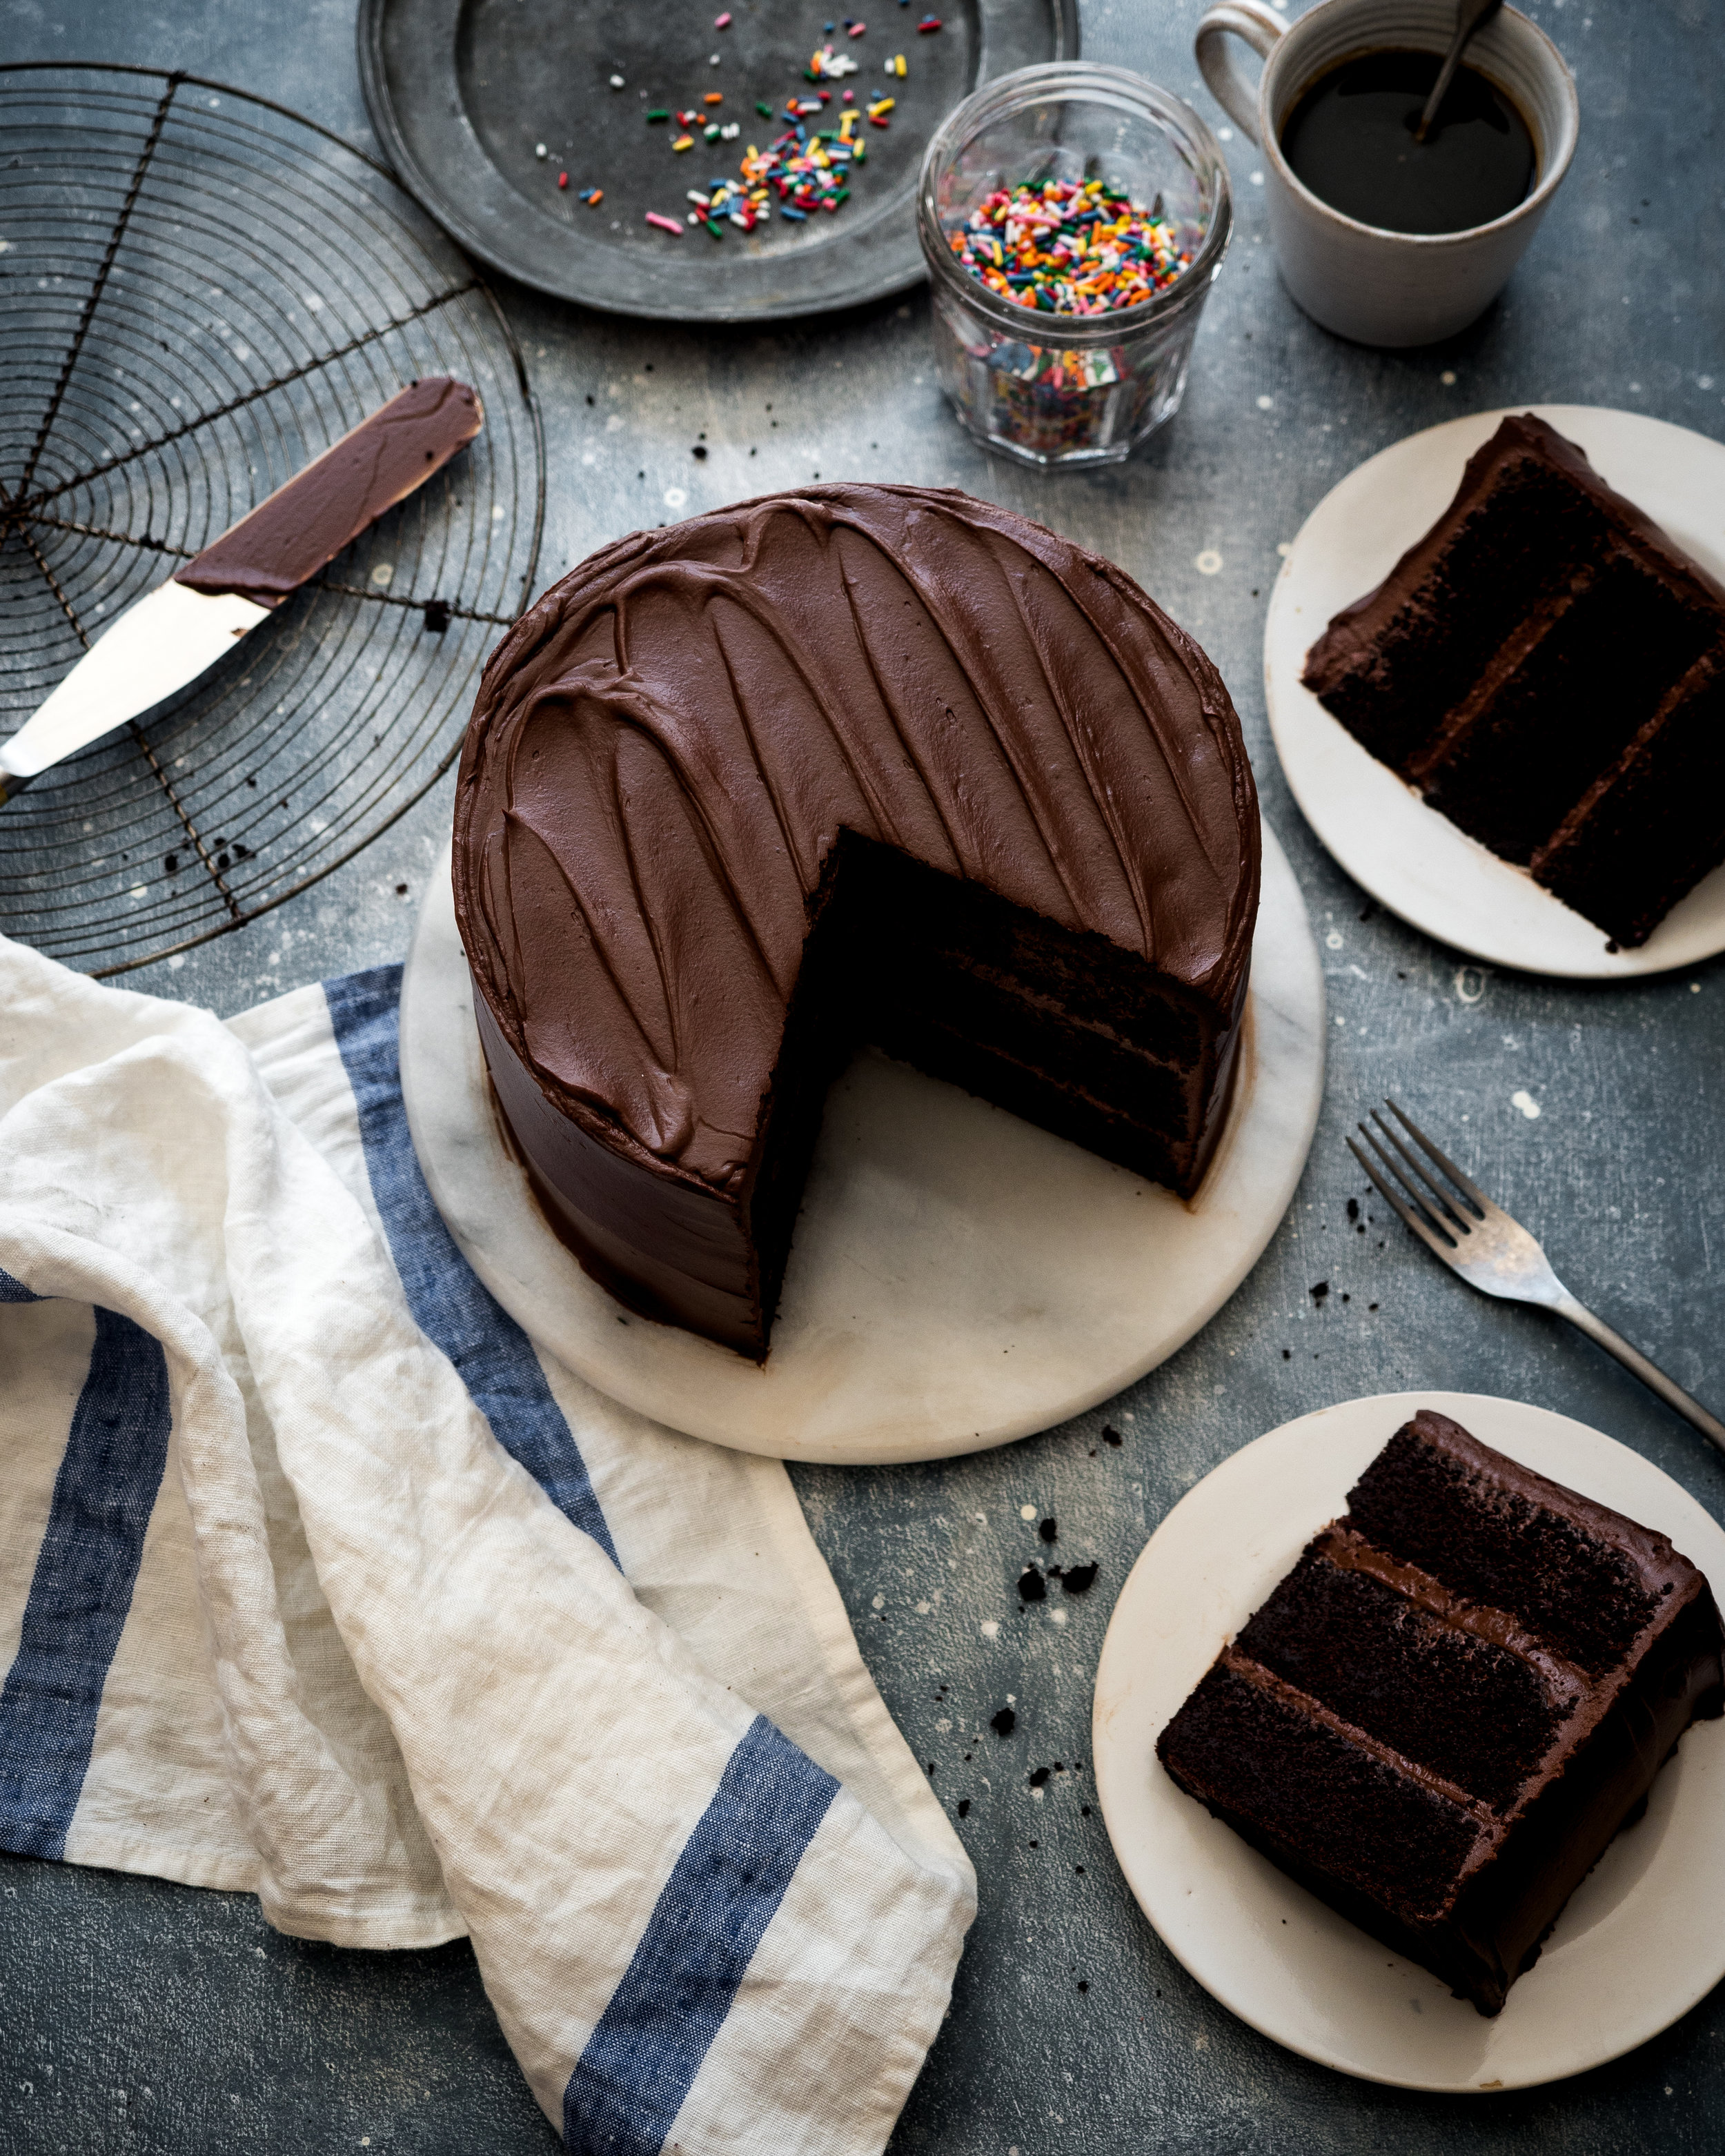
What is the birthday cake of your dreams, the one you had as a kid and secretly crave every year. It has to be the Devils Food Cake right? A rich, moist layer cake that packs a hell of a chocolate punch and fulfils all your childhood nostalgia needs, it’s the perfect chocolate cake and the one I make time and time again. I have been playing around a lot with chocolate cakes recently, trying to develop something extra special and whilst I was playing around in the kitchen I saw the recipe for Stella Parks’, aka Bravetart’s, Devils Food Cake. At first glance it looked to me like the perfect example of a devils food, the perfect crumb, the perfect colour and layers that stood tall and proud. I was doubly sold on the recipe once I realised it was basically an all in one method, no stand mixer needed here! The desire to bake it was stuck in my head so I got in the kitchen and gave it a whirl and guys, it is one of the easiest and best chocolate cakes I have ever made, so much so that I had to share it with you (and you know how rarely I post other peoples recipes). 

The recipe comes from Stella’s incredible book BraveTart, a dream of a book that was clearly written over a long period of time with a hell of a lot of testing, which is sadly not as common as you would think for baking books. If you love baking you have to get this book, I think it is one of the best baking books in years! But back to the cake. A classic Devils Food needs to be frosted with something nostalgic, something like a quick fudge frosting (which I generally find a tad too sweet), so I decided to use a sour cream ganache frosting that I had originally developed for a different cake. It has the gloss and texture of the lightest buttercream but the full on chocolate flavour you get from a ganache. In my version I only use a portion of sour cream to double cream simply because I find versions made with 100% sour cream have too much tang that gets in the way of the chocolate flavour, just a little tang however really helps to lift the flavour and balance out the sweetness in the cake. 

If you don't already go and follow Stella on Instagram and check out her book BraveTart, she is also resident pastry wizard over at SeriousEats so make sure to check out all her new recipes on there too.

Devils Food Cake
Recipe by Stella Parks, aka Bravetart from her brilliant book BraveTart

340g unsalted butter
340ml brewed black coffee
85g dutch-process cocoa powder, I used Guittard
170g dark chocolate, around 72% cocoa solids
455g light brown sugar
1 tbsp vanilla extract
6 large eggs, cold from the fridge
3 large egg yolks, cold from the fridge
255g plain flour
1 tbsp baking soda
1/2 tsp fine salt

Chocolate Sour Cream Frosting
Recipe by Edd Kimber

400g dark chocolate, around 70% cocoa solids
50g unsalted butter
75g light brown sugar
large pinch flaked sea salt
400ml double cream
150g sour cream

To make the cake preheat the oven to 180c (160c fan) and lightly grease 3x20cm round cake pans and line the base with parchment paper, Stella recommends deep tins 3 inch deep pans instead of the more common sandwich tins as with shallower tins the cakes are more likely to dome and rise less. 

Place the butter and coffee together in a large bowl and set over a pan of simmering water and heat, stirring occasionally, until the butter is fully melted. Remove the bowl from the heat and add the cocoa powder and chocolate and mix together until the chocolate is melted. Add the light brown sugar and vanilla and mix together until combined, as brown sugar has a tendency to clump make sure to work out any big lumps of the sugar. Add the cold eggs and egg yolks and whisk into the batter until fully combined. Finally mix together the flour, baking powder and salt and sieve over the chocolate mixture, mixing together until just combined. 

Divide the batter between the prepared pans, preferably weighing to make super equal layers, and bake in the preheated oven for about 30 minutes or until the cake is starting to come away from the sides of the pan and springs back to a light touch. Allow the cakes to cool in the pans for 10-15 minutes before inverting onto wire racks to cool completely. 

To make the frosting place the chocolate into a heatproof bowl and set over a pan of simmering water and heat, stirring regularly, until fully melted. At the same time place all the remaining ingredients, except the sour cream, into a small saucepan and place over medium heat and cook, stirring frequently until the the butter and sugar has melted and the mixture is smooth. Remove both from the heat and combine together. As this ganache has a high proportion of liquid I find it useful to make this ganache a slightly different way to what I normally do (this is a more traditional/professional way of making ganache). Pour the cream over the chocolate in three additions, stirring  gently in the middle of the bowl until the two mixtures are combined and a super glossy finish is achieved. Doing it in three additions like this makes sure the emulsion of the ganache is very stable and is unlikely to split. Finally add the sour cream and fold into the ganache. Set this mixture aside until it has thickened enough to spread and use like a regular frosting. 

To assemble the cake first use a serrated knife to level the cakes, if needed. Place the first cake layer onto a plate or cardboard cake round and spread with a small amount of the frosting (I use an ice cream scoop to measure out the frosting so the amount going between each layer is equal) spreading it so it is just peaking out over the sides, but just barely. Repeat with the second layer of cake and then finally add the third cake layer and top with the remaining frosting spreading over the top and sides of the cake, decorating in whatever manner you prefer.

One of the wonderful things about Stella’s Devils Food is that it stays fresh for a surprisingly good amount of time, I have now made this cake multiple times and have served it up to five days after baking and people were still incredibly complimentary which is a big plus for me with this cake.

In Cakes, Chocolate
10 Comments

Chocolate Babka Recipe

Edd Kimber May 24, 2018

Yesterday morning I sadly flew home, back to London after a few days working in Sicily, where I took as much time as I could to eat gelato and enjoy the weather . It was a whirlwind of a trip, travelling across the island, seeing and eating as much as possible. I was busy working so unfortunately didn't get to explore as much as I would normally like but of course I did manage to sneak away from my duties to get hold of some local ingredients to bring home to bake with, I'm talking hazelnuts, lemons, oregano and of course pistachios, possibly one of the most well known Sicilian ingredients. Next time I visit I want to go to the source and explore Bronte. Whilst I was on the island I tried pistachio in gelato, granita (my new favourite thing), cannoli and even in a few savoury dishes. Of course I wanted to use the nuts in a recipe and the one that sprung to mind is one that I have been meaning to share for far too long. Over the last five or so years as the trend for Babka has come and maybe even gone, I totally fell in love with them. A swirled loaf packed full of chocolate and nuts then soaked in syrup, whats not to like? My version is fairly standard, a soft brioche style dough enriched with butter and eggs, swirled together with a mixture of butter and chocolate, covered in pistachios and baked. The dough I use is based on my cinnamon bun dough but with more egg and a touch more butter. I find that using a dough that is light on the additions of butter and egg makes for a much drier loaf because the dough is rolled fairly thin it can have a tendency to dry out so a properly enriched dough really helps make the perfect babka.

When it comes to the filling I have taken a big queue from the recipe for Krantz Cake in Ottolenghi's book Jerusalem. I have tried many versions over the years and his is by far the best so I have based my recipe on that version, although there are a couple key differences but these mainly come down to flavour preference and ease of making. 

Like many recipes for Babka this makes two loaves and while you could of course reduce the recipe in two I love the ability to have one of these loaves in the freezer ready to whip out when needed. 

Chocolate and Pistachio Babka

Babka Dough
600g plain flour
7g dried yeast
2 tsp salt
30g caster sugar
250ml whole milk
3 large eggs
75g unsalted butter

Chocolate Pistachio Filling
100g pistachios, roughly chopped
50g light brown sugar
30g cocoa powder
120g dark chocolate (60-70% cocoa solids)
120g unsalted butter, diced
large pinch flaked sea salt

Syrup
200g caster sugar
125ml water

To make the dough place the flour, yeast, salt and sugar in the bowl of an electric mixer and mix briefly together to combine. Pour in the milk and the eggs and, with the dough hook attached,mix together on low/medium speed for about 10-15 minutes or until the dough is no longer sticking to the sides of the bowl and is elastic. With the mixer still running add the butter and mix until fully incorporated into the dough then continue mixing for a further 10-15 minutes or until elastic and no longer sticking to the bowl. Form the dough into a ball and place into a lightly oiled bowl, cover with clingfilm and refrigerate overnight. 

In the morning start off by making the chocolate filling. Place all of the ingredients except the pistachios into a small saucepan and cook over low heat until fully melted and smooth. Be very careful, stirring constantly, to prevent the chocolate catching on the pan and burning. Set aside for 20 minutes to cool and thicken slightly. 

Remove the dough from the fridge and divide into two equal sized pieces. On a lightly floured worksurface roll out into a rectangle roughly 30x40cm. Spread half of the chocolate mixture all over the dough, leaving a small border around the outside. Roll the dough, along the long edge, into a tight spiral then using a very sharp knife cut through the middle, cutting the dough into two long pieces. Place one piece of dough over the second forming an x then braid together the two pieces of dough. Gently place the babka into a 9x4 loaf pan that has been lightly greased and lined with a strip of parchment paper. Cover the tin with clingfilm and set aside for about an hour and a half or until the dough has about doubled in size. Repeat with the second piece of dough. 

Babka (1 of 1)-2.jpg

Whilst the loaves are rising preheat the oven to 180C (170C Fan). When risen remove the clingfilm and bake for about 30-35 minutes or until the loaves are golden brown on top. Whilst the loaves bake, make the syrup by placing the sugar and water into a small saucepan and bringing to a simmer. Once the sugar has fully dissolved turn off the heat and set aside until needed. Once the babka has baked remove from the oven and brush liberally with the syrup, it will seem like a lot but trust me and use it all. Allow the loaves to cool fully before cutting into them, otherwise the bread will end up doughy and dense. If you are freezing one of the loaves, once cooled wrap in two layers of clingfilm and a layer of foil. When you come to defrost the loaf leave it at room temperature, still wrapped, for a few hours. This way as the babka defrosts the condensation that forms ends up on the outside of the loaf and doesn't effect the quality. Fresh from the oven the babka will keep for about three days. 

In Breads and Quickbreads, Chocolate
37 Comments
Cheesecake Tarts (1 of 1).jpg

Caramelised White Chocolate Cheesecake Tarts Recipe

Edd Kimber May 10, 2018

I think, after doing this job for eight years now, I have come to recognise when I become besotted with an ingredient and it becomes all I want to use. It has happened with cardamon, passion fruit, caramel and a whole host of ingredients far too long to list. But one ingredient has been a constant, my baking companion, the ingredient I turn more than anything else, and of course that is chocolate. I don't discriminate, I love everything from the candy bars I grew up with to the fanciest single estate, rare bean bar. Chocolate is a magic ingredient and I will never tire of using it. Now when it comes to white chocolate, I love it for different reasons. I do love to eat it occasionally, I like its more simple sweetness, its creamy flavour, it’s comforting almost. Sadly, however, it’s hard to deny that the flavour is a little more one-note, none of the complexity of milk and dark chocolate. That is unless you cook it slowly and caramelise it, and you absolutely want to do that!

I’m not sure I can tell you just how good these tarts taste, you really need to bake a batch yourself. Think a white chocolate cheesecake but which someone has completely slathered in salted caramel, do I really need say more? This recipe uses the joy that is caramelised white chocolate, mainly because I have a small obsession with the stuff. It is dangerously easy to make, it takes the flavour of white chocolate up to a ten, adding a full dulce de leche note to the creamy vanilla notes of the chocolate, and it becomes this golden nectar that you could eat with a spoon. To further complement the flavours in this recipe I have also infused the cream for the ganache with a little spice, some fresh ginger, cinnamon and cardamon. The spicing is on the more subtle side but it really rounds out this recipe wonderfully. 

Caramelised White Chocolate Cheesecake Tarts

12 four inch tart shells, fully baked (use 2x recipe here)

Cheesecake Filling
225g cream cheese
75g sour cream
1 large egg
2 large egg whites
85g caster sugar
1 tsp vanilla

Caramelised White Chocolate Topping
150g white chocolate (30-35% cocoa butter content)
150ml double cream
1 inch piece of fresh ginger, sliced
1 cinnamon stick, broken in half
1 cardamon pod, lightly crushed

To start this recipe you first need to make the caramelised white chocolate. Whilst this recipe only uses 150g it is easier to make in bigger batches, normally I don’t make less than 300g, thankfully it keeps for months so you can use the extra in a different recipe. 

Preheat the oven to 120C.

Roughly chop the chocolate and place onto a rimmed baking tray and place into the oven for about an hour, to an hour and a half, stirring every ten minutes until the colour has gone from cream to a rich caramel colour. The darker the colour the stronger the flavour change will be and the more caramel like the chocolate will become. Think of making this chocolate the same way you brown butter, it is the milk solids in the white chocolate that caramelise and add such an amazing flavour. When it comes to the stirring, make sure every ten minutes you give the chocolate a thorough stir, making sure to scrape the chocolate from the bottom of the tray otherwise it may catch and burn. As the chocolate cooks don’t worry if the chocolate seems grainy, when you stir it, the chocolate will liquefy again. Once caramelised scrape into a container and set aside until needed. As the chocolate sets, because you haven't tempered it, the chocolate will look streaky and maybe grainy, this is absolutely fine as you’ll be melting the chocolate for the recipe.

Preheat the oven to 150C.

Before making the cheesecake infuse the cream for the ganache. Add the cream, ginger, cinnamon and cardamon to a small saucepan and set over medium heat and bring to a boil. Turn off the heat and set aside to infuse.

When ready to bake these tarts we first need to prevent the pastry from becoming soggy. Take the two leftover egg yolks and beat together and use a pastry brunch to coat the inside of the tart shells with the egg. Place these tart shells into a hot oven for a few minutes until the egg has set. 

Cheesecake Tarts (1 of 1)-2.jpg

For the cheesecake filling, whisk the cream cheese until smooth then add the sour cream, egg, egg whites, sugar and vanilla until the cheesecake mixture is smooth. Scrape the cheesecake filling into a jug and divide evenly amongst the prepared tart shells, filling about two thirds full. Bake for about 12-14 minutes or until the cheesecake is set around the edges but still has a little wobble in the middle. Remove from the oven and allow to cool to room temperature before transferring to the fridge for 30 minutes.

For the ganache place the cream back over the heat and bring to a simmer. Place the chocolate into a bowl with sieve set over the bowl. Pour the cream through the sieve to remove the spices then set aside for a couple minutes before stirring together to form a smooth silky ganache. Pour the ganache onto the tarts and when the ganache starts to set, sprinkle with a little flaked sea salt.

I find these tarts are best kept in the fridge, which will allow the tart shells to stay crisp longer, around 2-3 days.

In Chocolate, Pastry
9 Comments
April Pics (6 of 8).jpg

How to Make Kouign Amann

Edd Kimber April 26, 2018

I am currently day dreaming about Paris, longing for a lazy morning drinking coffee at my favourite coffee shop in Belleville, wandering the streets of Le Marais going from patisserie to patisserie, finishing the day with a carafe of rosé at my favourite street side wine bar. I get this same feeling every time spring starts to rear its head, when the sun starts to show itself and flowers appear everywhere. Maybe it is because Spring is one of my favourite seasons in Paris or maybe it is when I grow weary of London and need to escape for a while, either way without a trip planned anytime soon I will have to get my francophile fix by making some pastries.

What do you get when take a croissant but as you roll and fold the dough you liberally sprinkle in a layer of sugar? This magical sounding pastry is the kouign amann, which is Breton for butter cake. Butter cake, does anything sound better than that? The folk in the north of France, in the Brittany region, are known for their love of, and the production of, wonderful butter and salt and they put it to very good use in their pastries and confections. If you've had anything salted caramel flavoured then you have Brittany to thank. I happen to think it is the kouign amann though that shows off the flavours of Brittany best, a sweet caramel laced pastry laminated with butter, simple but absolutely delicious. I would say they were elegant but really this is a rustic pastry, that has over the last few years slowly become a trend with the pastry becoming the trademark offering at more than a handful of bakeries (if you ever go to San Francisco both Jane The Bakery and B.Patisserie make world class versions), and these bakeries dont just make the classic version, they have peppered them with flavours as simple as chocolate or apple and flavours as unusual as black sesame. The version below is from my book Patisserie Made Simple and uses a version of my simplified croissant dough, although these are quicker to make than the croissants themselves, if you want to dig further into French baking then make sure you check out my book.

Kouign Amann

60ml whole milk
125g plain flour
125g strong white bread flour
7g active dry yeast (1 envelope)
150g caster sugar
1/2 tsp salt
225g unsalted butter, chilled

Put the milk plus 60ml lukewarm water in a medium bowl and mix to combine, then let sit. Put the flours, yeast, 2 tablespoons of the sugar, and the salt into a large bowl and mix to combine. Dice 125g of the butter into cubes. Add to the bowl and using a pastry blender cut in the butter briefly to form large chunks. This is the most important stage: if the butter is mixed too much into the flour, the dough won’t expand and puff up as it bakes, so it is better to err on the side of caution. If you can’t see chunks of butter, you have blended in the butter too much. 

Transfer the butter and flour mixture into the liquid, and using a spatula, fold the dry ingredients into the liquid, trying to combine everything without making the butter pieces any smaller. Once you have formed a rough dough, transfer to the countertop and very lightly work it into a ball of dough. Form the dough into a flat rectangle, wrap in plastic wrap and put it in the refrigerator for 45-60 minues or until cool and a little firm.

Meanwhile, put the remaining chunk of butter in the freezer to chill it thoroughly (it needs to be hard). Lightly flour a countertop and roll the dough out with the short edge facing you into a long rectangle, about 20x50cm (although the exact measurements are not crucial). Brush off any excess flour. Take the butter out of the freezer and coarsely grate it over the bottom two-thirds of the dough. Fold the top third of the dough over the middle third, then fold the bottom third over the other two-thirds, as if folding a business letter. This is known as the first turn. Wrap the dough in plastic wrap and chill in the refrigerator for 20 minutes. Remove the dough from the refrigerator and turn the dough 90 degrees so that the open ends are facing you, with the seams on the right.

Repeat the rolling process, and before folding, sprinkle the dough with half the remaining sugar. Fold the dough into thirds as before and repeat this a second time. Wrap the finished dough in plastic wrap and chill for 30 minutes before using. Any longer and the sugar will start to liquefy and the dough will become difficult to work with.

Line a large baking sheet with parchment paper. Remove the dough from the refrigerator and cover the countertop with a small amount of caster sugar. Roll the dough out as before. Using a sharp knife, trim the edges of the dough, then cut the pastry into two strips, and divide each strip into five equal squares. Fold the corners of each square into the centre and press gently to secure in place. Put each pastry on the prepared baking sheets, preferably inside lightly buttered tart rings (these help to give the pastries a better shape; if you don’t have them, you can bake the pastries inside buttered muffin tins although I find them to a little on the denser side this way). Leave the pastries to rest for 30 minutes.

Preheat the oven to 190C / 375F.

Bake for 20 to 25 minutes until golden brown and the sugar has caramelised. Remove from the oven and remove the tart rings, if using, then leave the pastries to cool on the baking sheet. I prefer to serve these at room temperature when the sugar on the outside has set, giving you a wonderful texture. They are best served on the day they are made.

From my book Patisserie Made Simple - buy here!

April Pics (8 of 8)-2.jpg
In Pastry
9 Comments
  • Recipes
  • Older
  • Newer

Twitter

  • Was 8 original films, 3 spin off films, a two part play not enough. Can we have something new. https://t.co/cBZdGEGeyv
    Apr 4, 2023, 1:46 PM
  • RT @deliciousmag: Cacio e pepe, but make it buns! These seriously cheesy bread rolls from @TheBoyWhoBakes are inspired by his favouri… https://t.co/oDZlaDgnN2
    Apr 2, 2023, 11:08 AM
  • RT @TheDailyShow: Congrats to Donald Trump on finally winning a majority of votes! https://t.co/ezP55HZgl0
    Mar 31, 2023, 12:43 AM

Instagram

This weeks bonus recipe, for subscribers to my newsletter, is this gorgeous sour cherry and coconut gateau basque. The crust is a buttery cross between pastry and cake, think a cakey cookie. The filling is a layer of sour cherry topped with a rich coconut custard. A real fun one to make too! Link to my newsletter can be found in my bio - #gateaubasque #pastrycream #coconut #sourcherry
In this months @olivemagazine (out today) the team came and photographed my petit kitchen and we talked about how we put our stamp on the place, without spending a fortune. We hated the bland kitchen that we inherited but, as it was relatively new an
In this months @olivemagazine (out today) the team came and photographed my petit kitchen and we talked about how we put our stamp on the place, without spending a fortune. We hated the bland kitchen that we inherited but, as it was relatively new and in good condition, it felt a waste to rip it out and we also didn’t want to spend the money it would take to rip out the whole thing and replace it (it’s a howdens shell so we could have done something cheaper like @plykeakitchens @holte.studio @madebyhusk) so instead I painted all of the cabinets, using @makeitrustoleum kitchen cabinet paint, to give it some personality and lighten the whole thing. Check out the magazine for the full run down. - #kitchendesign #kitchenremodel #rustoleumcabinettransformations #rustoleumkitchencupboardpaint #kitcheninspiration #theboywhobakes #olivemagazine
Are you making scones all wrong? Maybe, maybe not? But I do want to show you how I make them! This recipe is based on the method I learnt at @belmondlemanoir 12 years ago when I did a stage, and it makes the absolute lightest scones. And shock horror, it involves kneading the dough, albeit very lightly. You can get the full recipe in this weeks newsletter (free) linked in my bio. - #scones #bakingday #worldbakingday #afternoontea #hightea #englishscones #clottedcream #creamtea #theboywhobakes
facebook
  • Contact

The Boy Who Bakes

Edd Kimber

facebook