The Boy Who Bakes

Edd Kimber
  • Home
  • Recipes
  • My Books
  • Blog
  • Recipe Index
  • About
  • Home
  • Recipes
  • My Books
  • Blog
  • Recipe Index
  • About

Recipes

  • All
  • baking
  • Biscuits and Cookies
  • Breads and Quickbreads
  • Bundts
  • Cakes
  • Chocolate
  • Dessert
  • drinks
  • Holidays
  • Pastry
  • Scones and Quickbreads

Eggnog Bundt Cake

Edd Kimber December 16, 2022

This post is sponsored by Wilfa

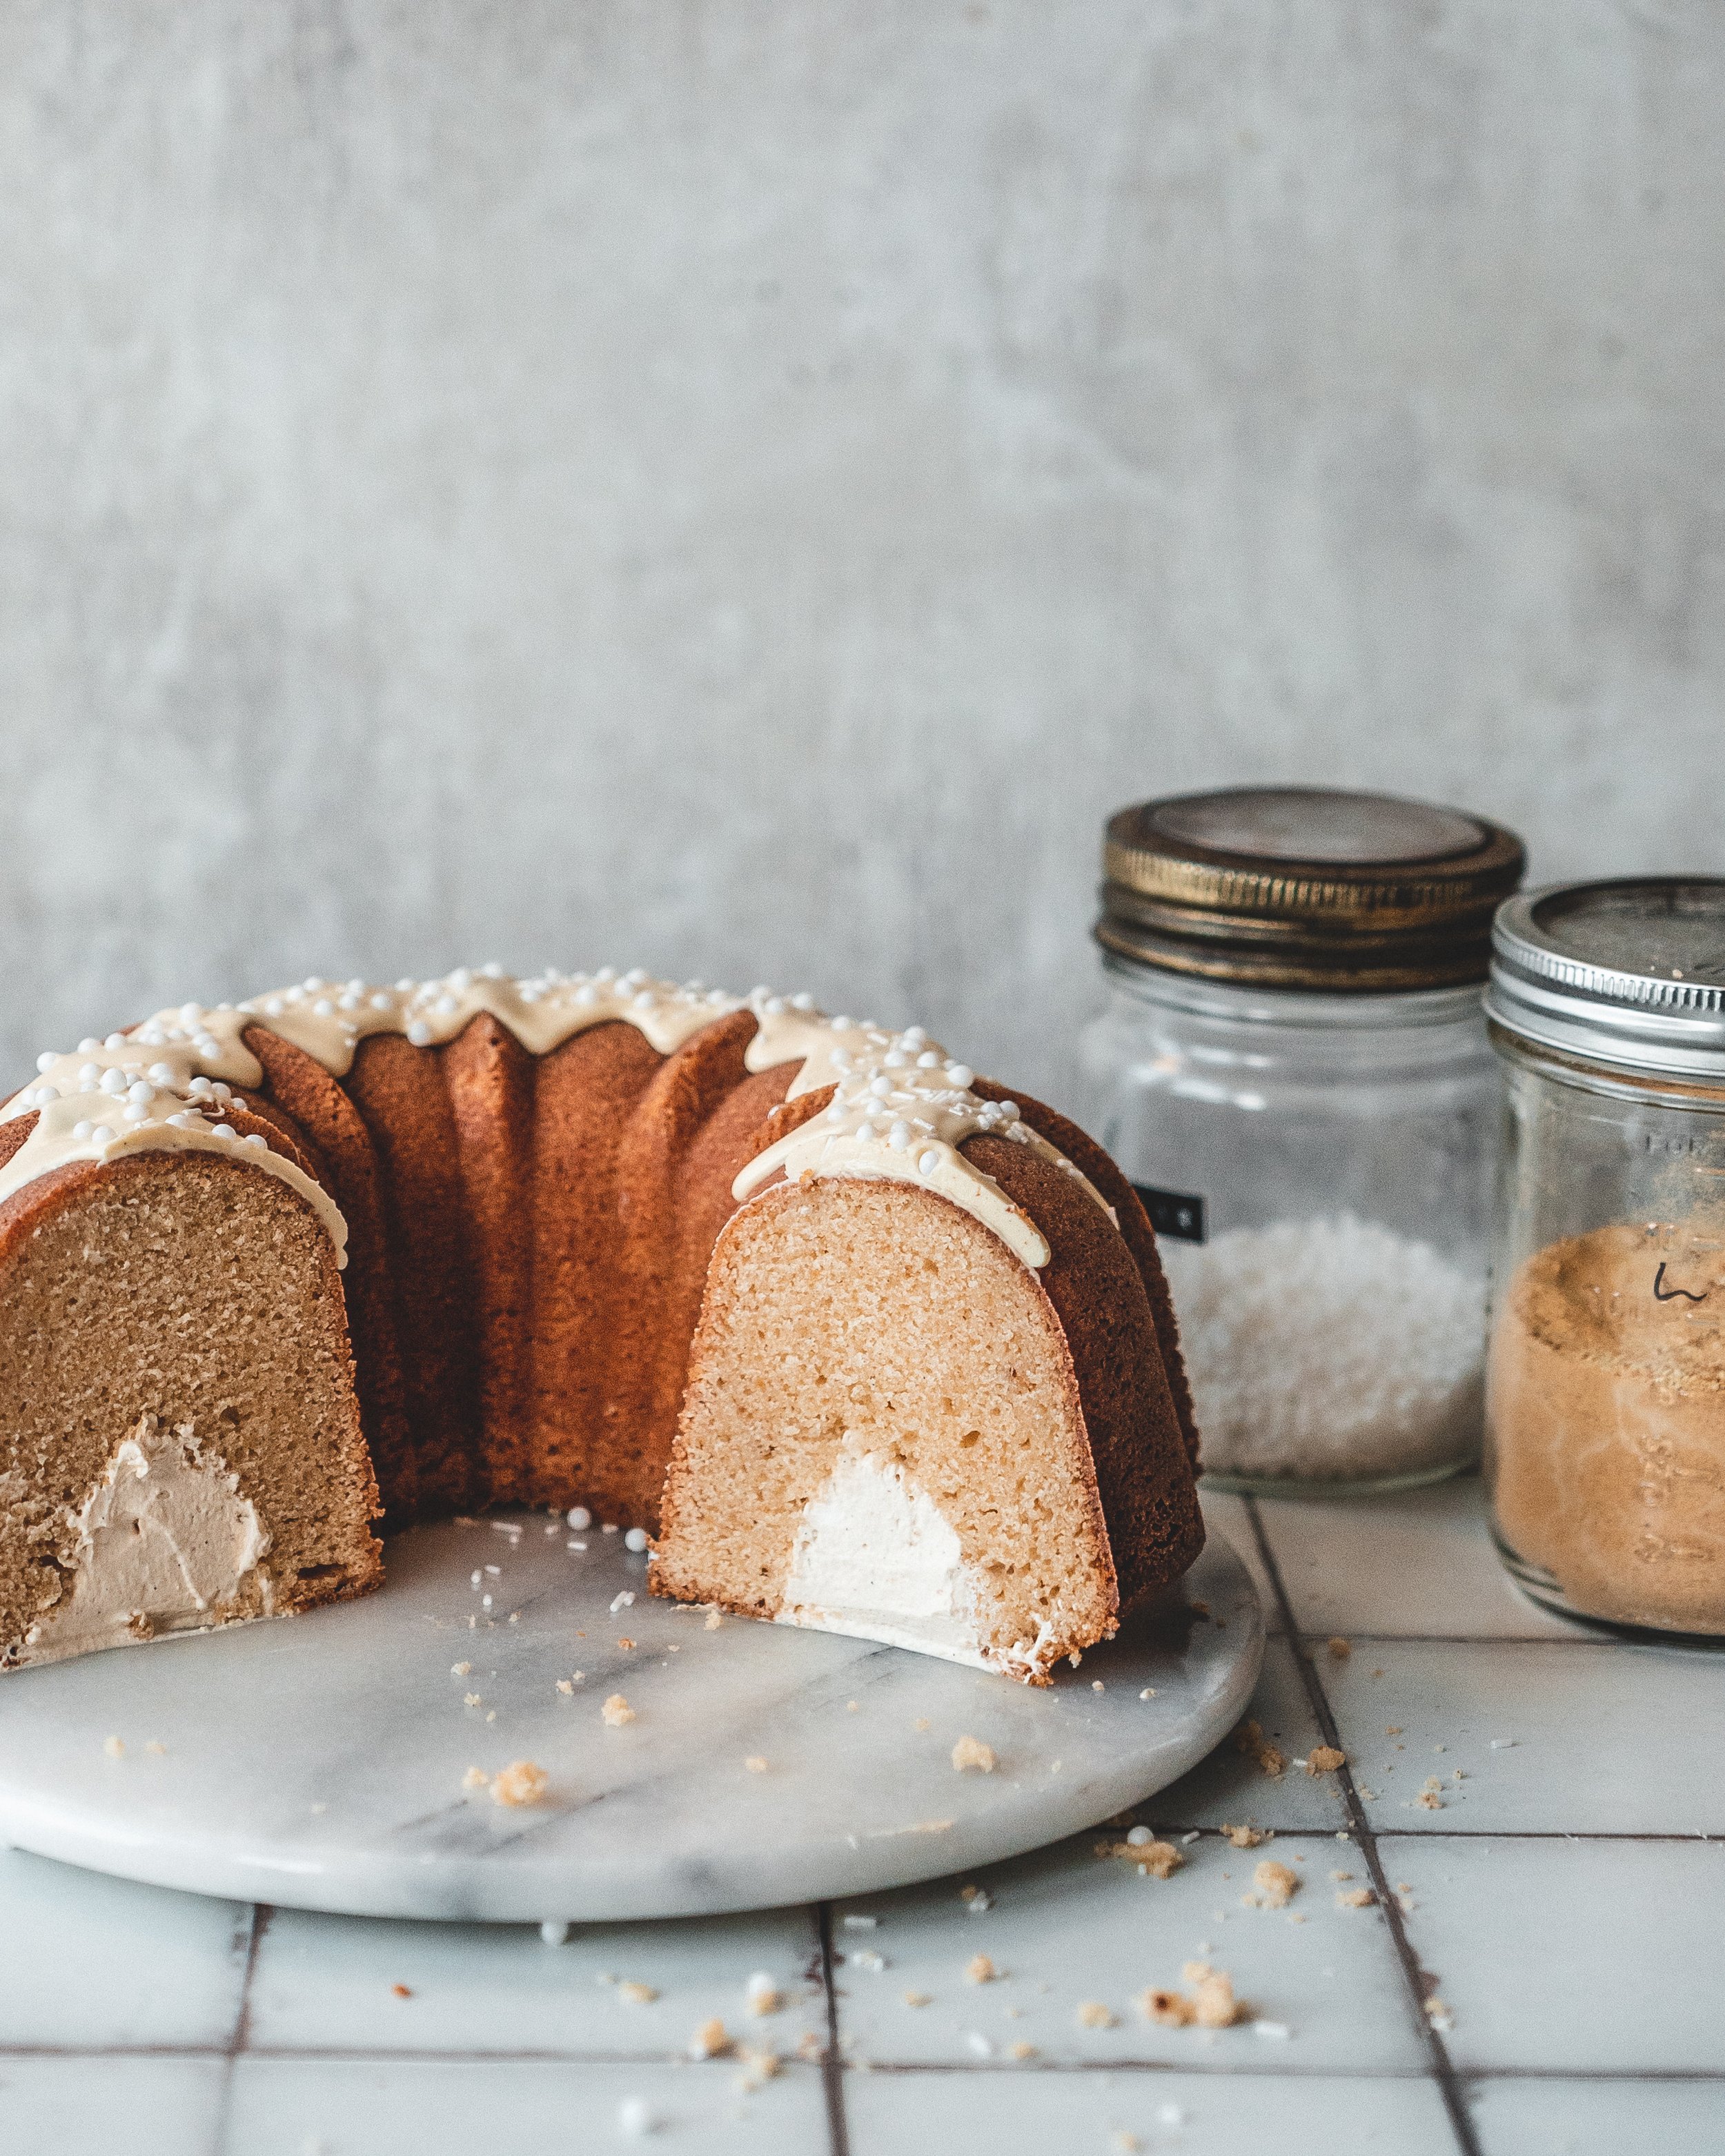
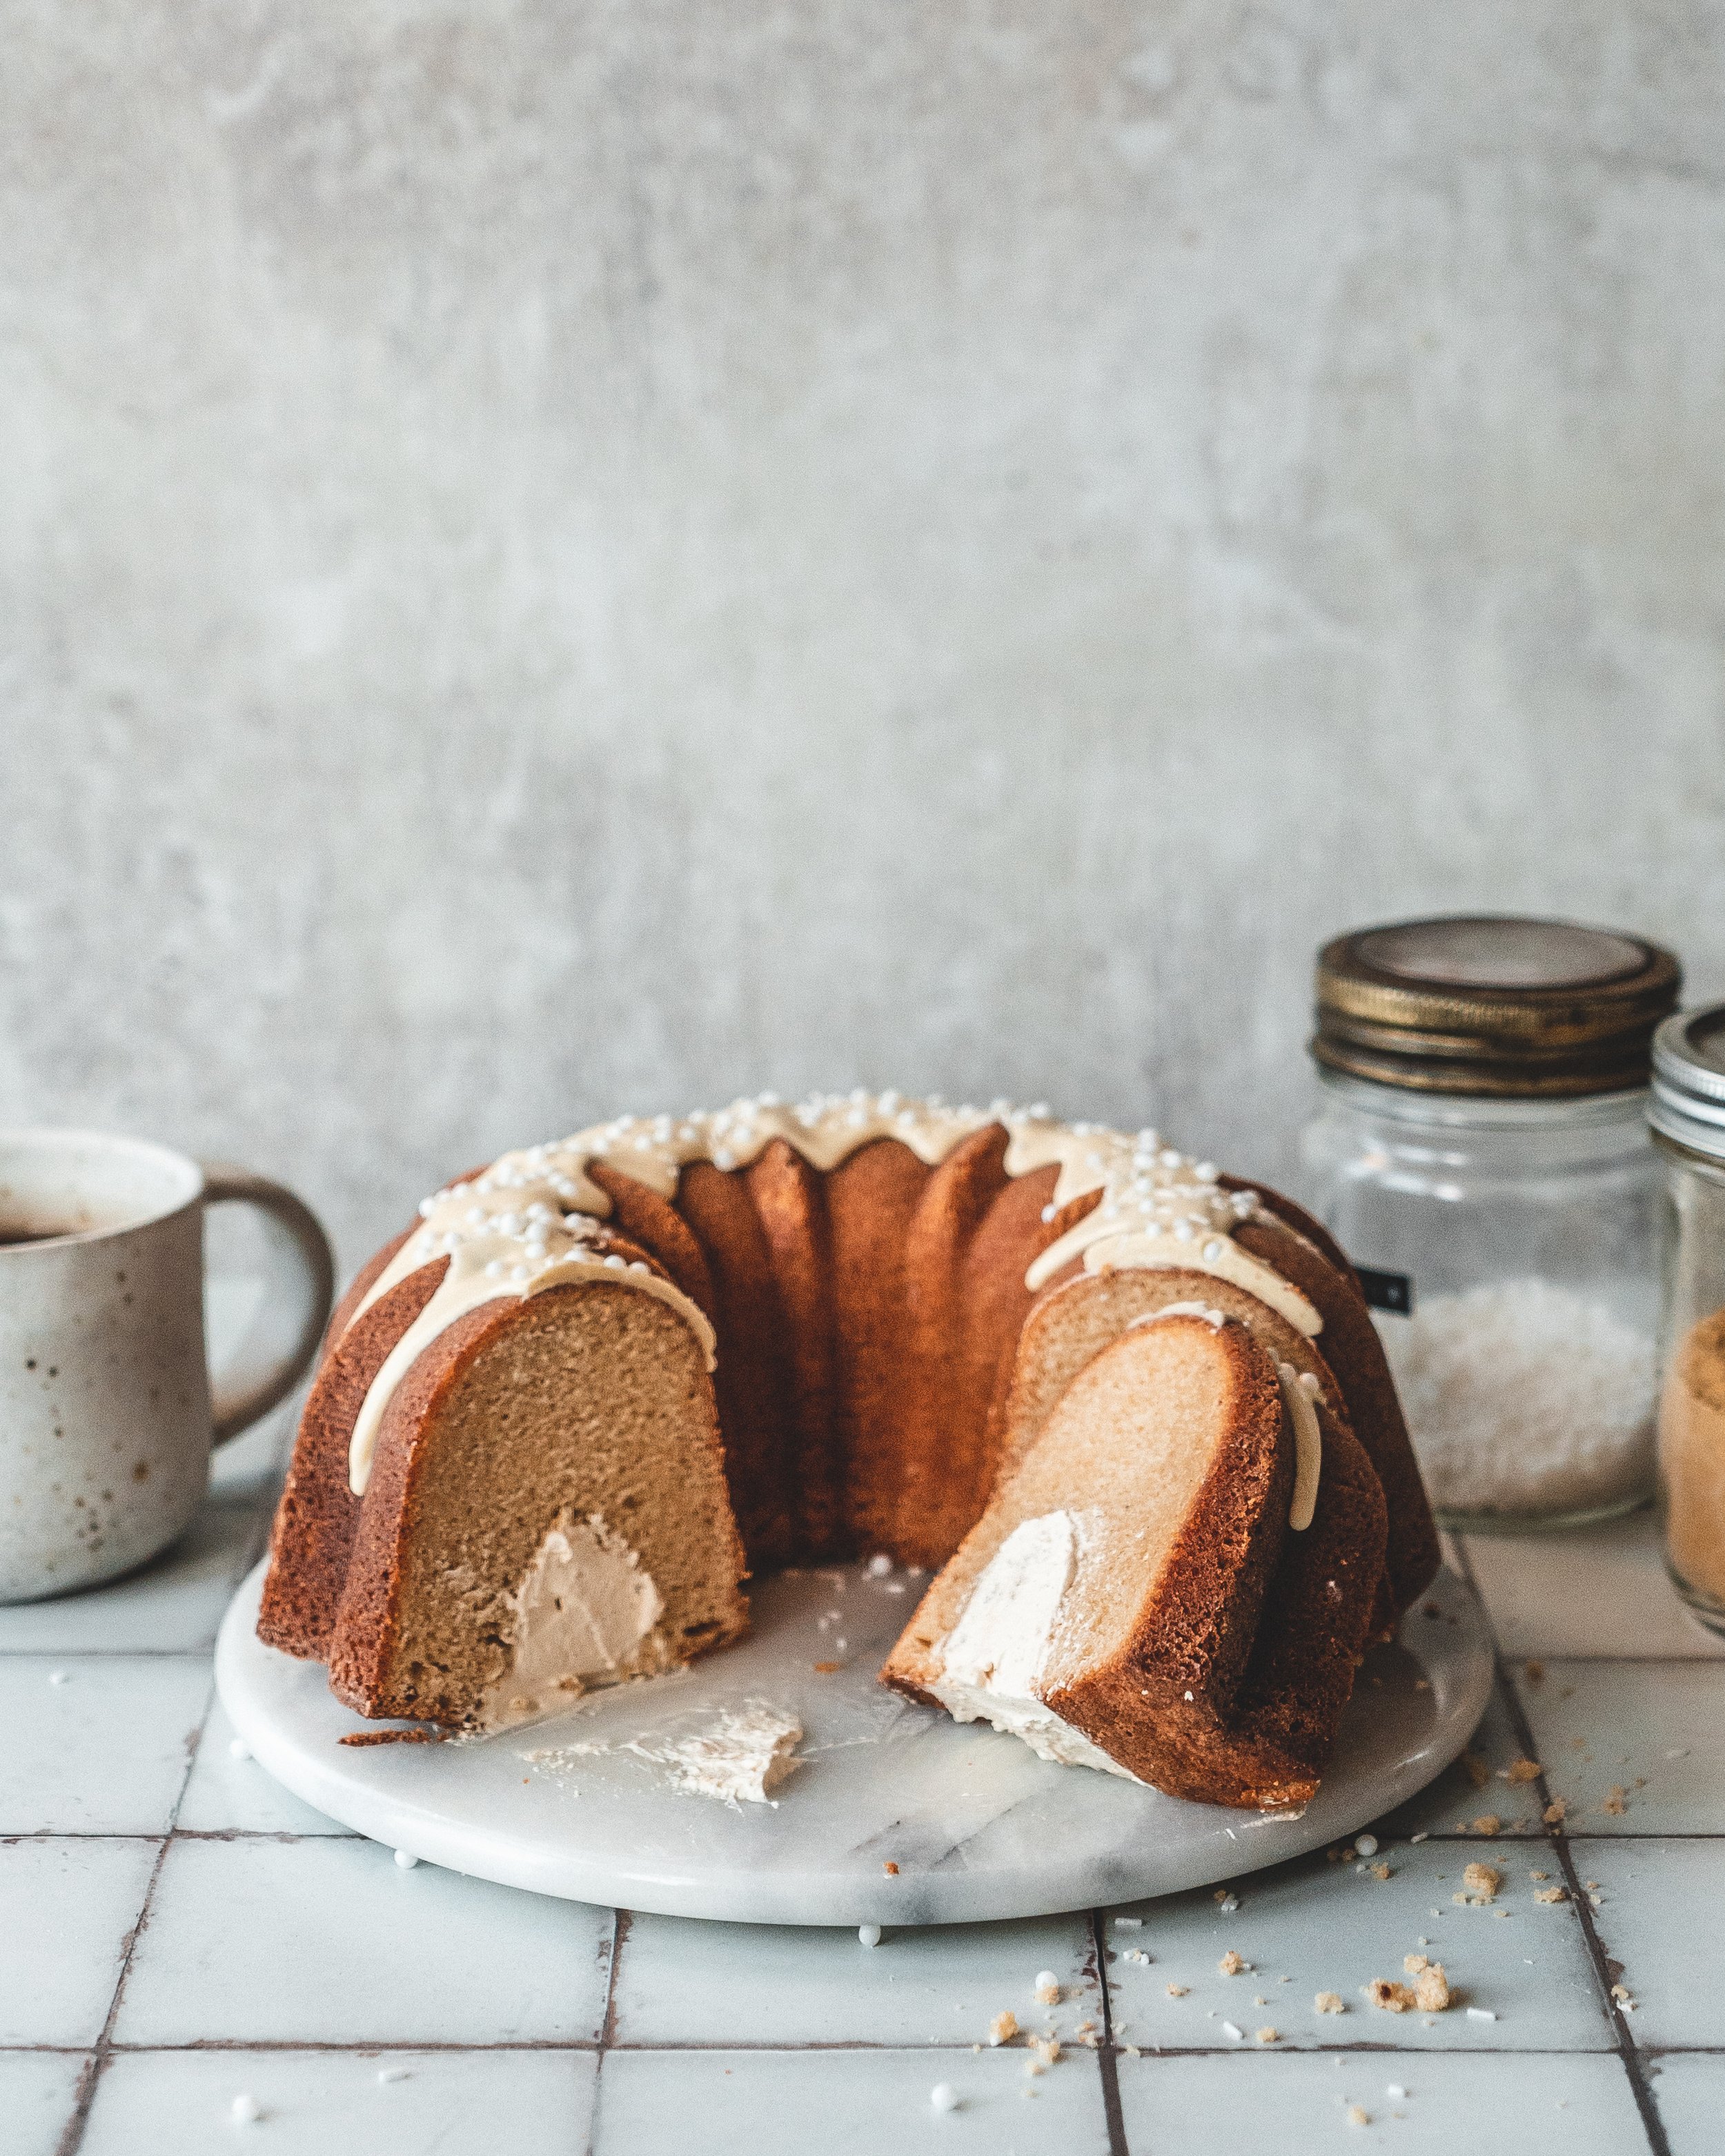
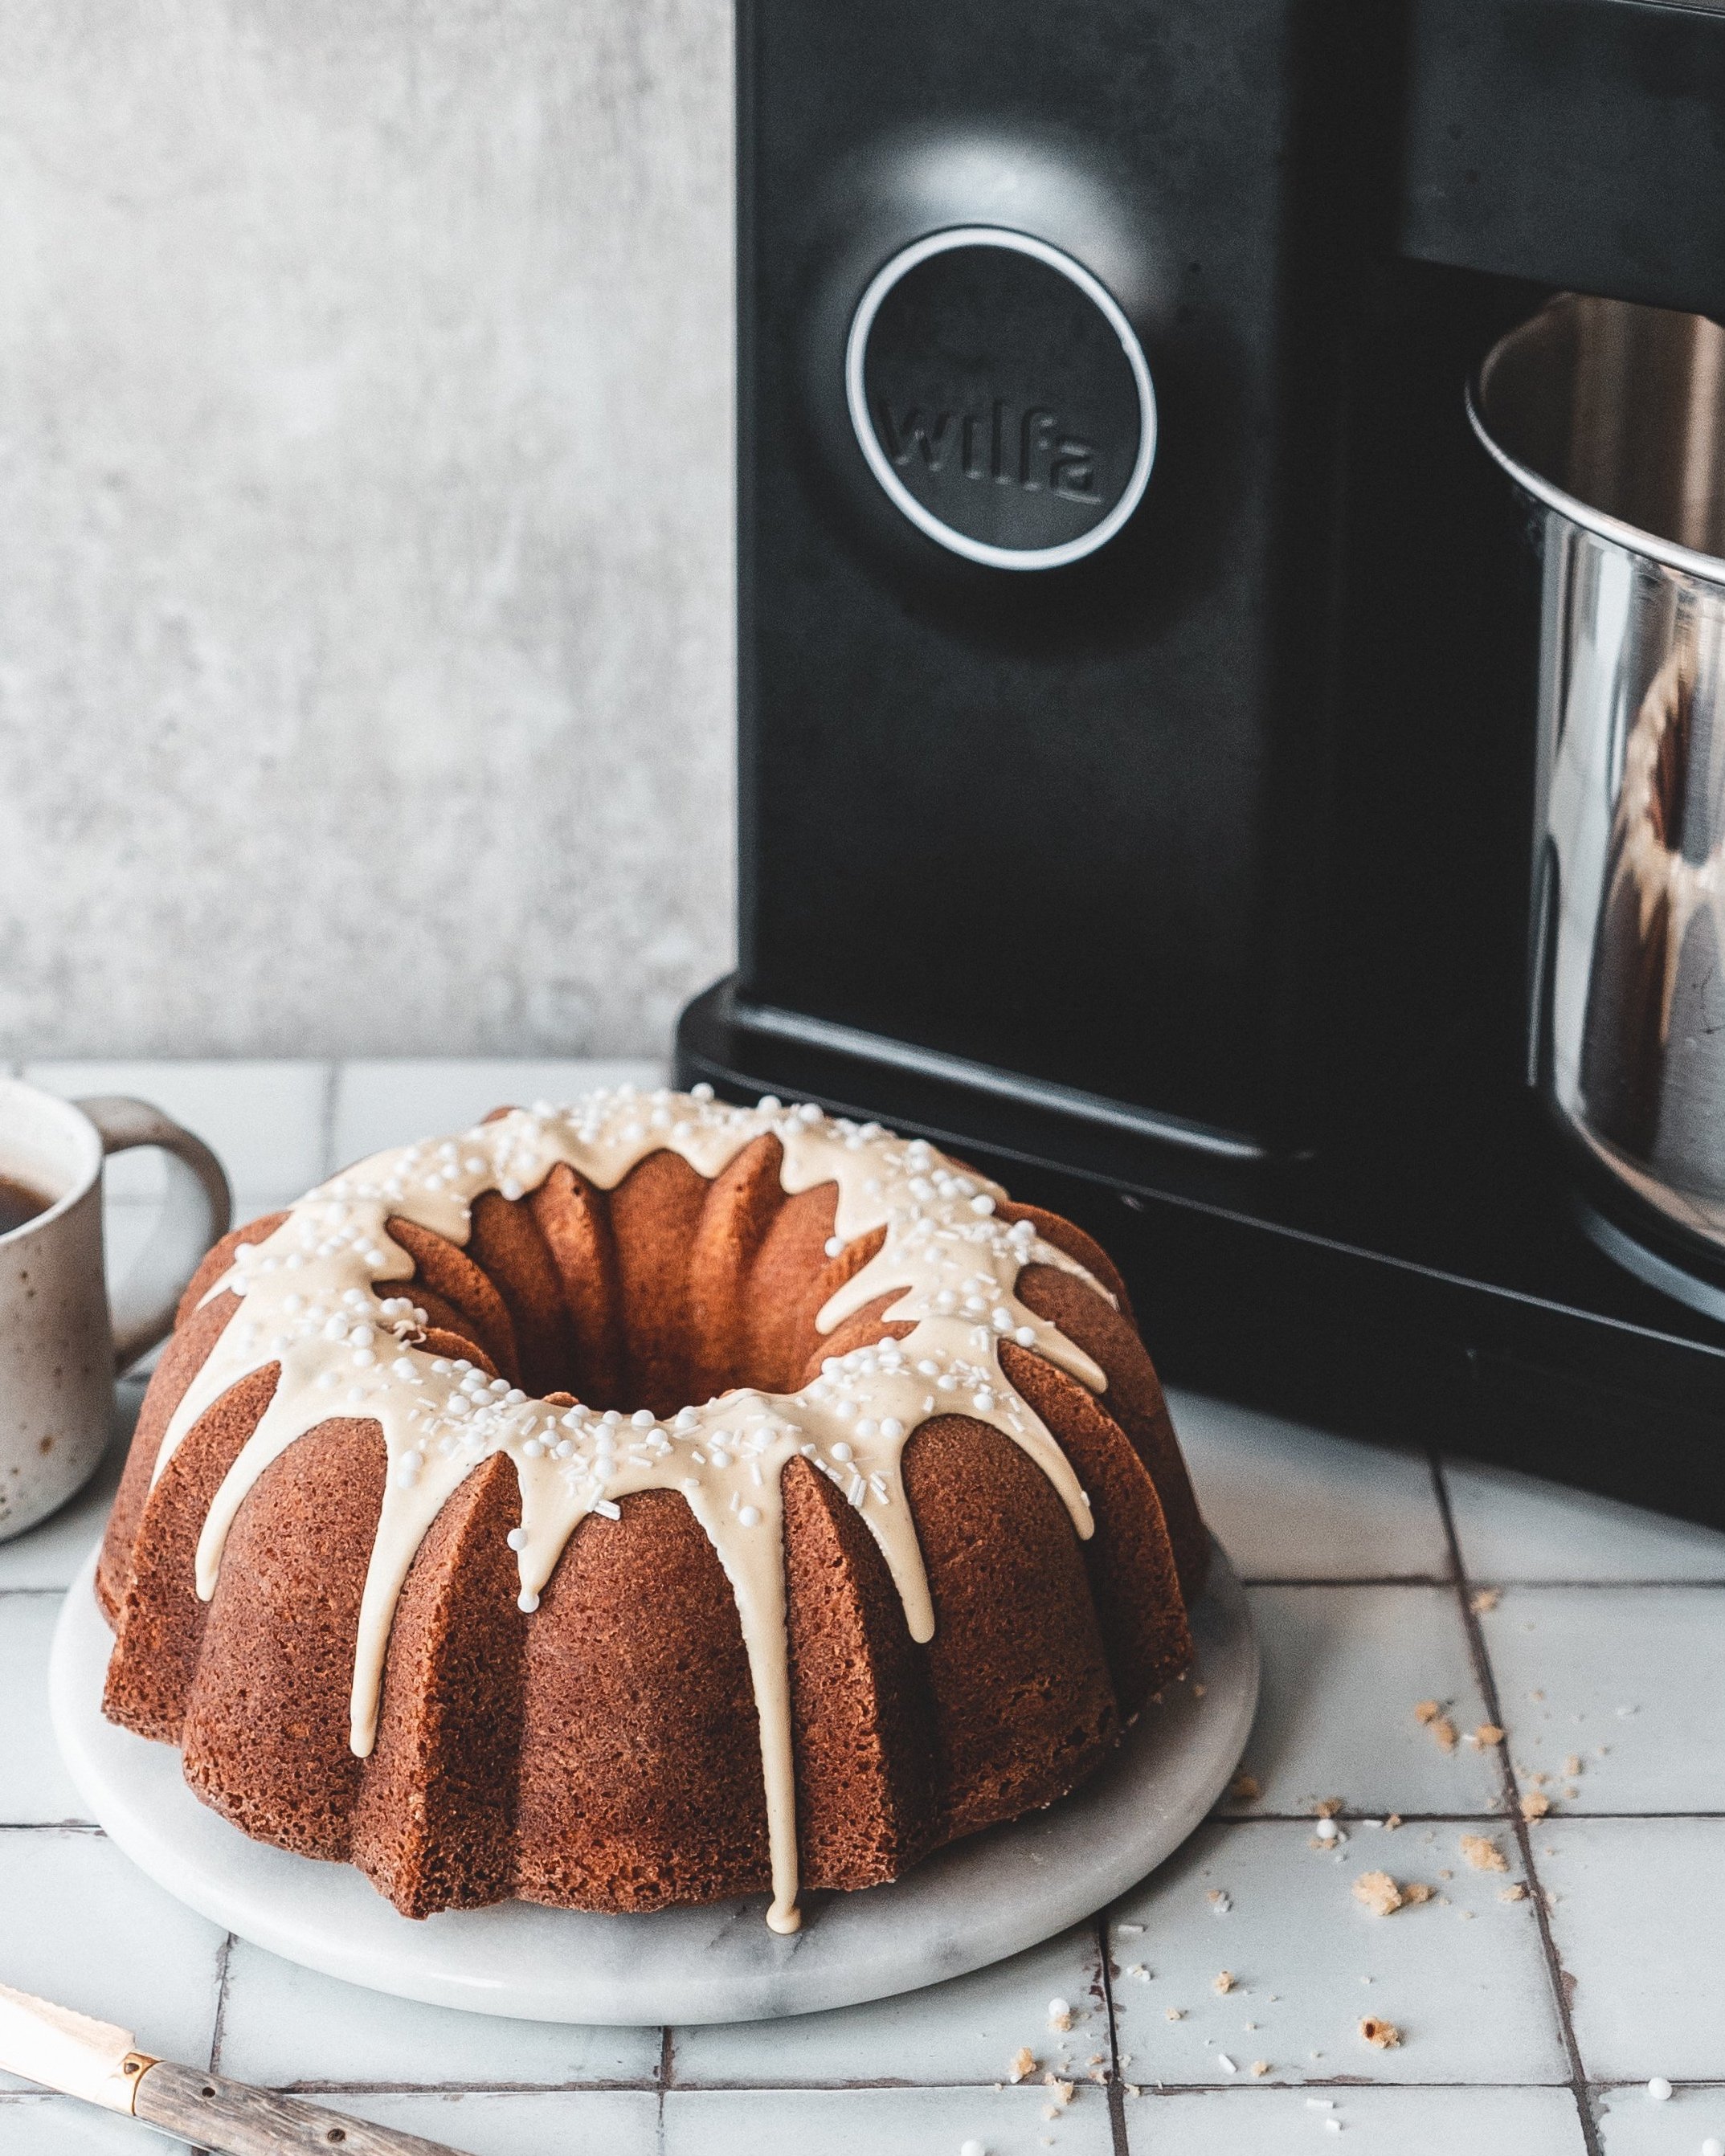
Every year I like to create a special cake for those of you who don’t love the traditional fruit cake, who despise all things dried fruit. This years cake is, I think, something rather extra special and I think you’re going to love it! I happen to love eggnog, be it the traditional version made with eggs, dairy and rum, or an apple cider version I have been making for the past few years, or even the vegan version I came up with this year. What I am saying is that If you’re making eggnog, I’ll happily take a glass or two. This year, I have taken those classic flavours and turned them into a truly fabulous bundt cake. The cake itself is a relatively classic pound cake, rich and buttery and spiked with lots of nutmeg and a good glug of rum. The cake also has a surprise up its sleeve; when whole it will resemble a very simple pound cake with a little white chocolate glaze, but when sliced the secret is revealed. A little bit like the classic ‘tunnel o fudge’ bundt cake, this recipe has a hidden layer of eggnog whipped cream, made with rum, nutmeg and vanilla. The cake has all the warming toasty flavours of eggnog with the same creamy cosiness you’d expect with the drink.

You’ll see in the recipe I suggest using a little toasted milk powder in both the cake itself and in the whipped cream filling. If you saw my video guide on how to make this magical powder you know it has the same flavour profile as browned butter and adding small amounts to these elements really acts as a wonderful flavour enhancer. I jokingly refer to it as the MSG of baking but its probably pretty accurate, it’s like a secret baking seasoning. It adds a gentle toasted, almost caramel like, flavour and whilst you may not be able to detect it as a distinct flavour it really adds depth and character to the recipe.

To make the cake I used my Wilfa Probaker, the amazing stand mixer I introduced to you last month. After that first post one of the main questions I received was, can it make more than bread (something it does better than any other domestic mixer I have ever tried), and the answer is of absolutely, yes! The Probaker is a multifunctional mixer, with attachments for whisking, for kneading and for beating. The other question I received multiple times was, is the mixer only good for big batches and the answer is no, this can be used as a regular domestic mixer, for single batches of cakes and cookies as well as making big batches, it is designed to work just a well making small batches as it is making big batches, its the best of both worlds. This cake was made with the flexible rubber ‘flexiVISP’ beater which scrapes both the sides and base of the mixer as it beats your ingredients together, which means it is more efficient and the bowl needs scraping down much less frequently than with a traditional metal beater. The other thing that I love this mixer for, when making cakes, is that you can have the mixer running and add dry goods into the bowl without them flying out of the bowl in a giant cloud of flour and icing sugar, a feature of the mixer that makes me very happy!

To get 20% off Wilfa products make sure to use the code THEBOYWHOBAKES at checkout.

Eggnog Bundt
Serves 12-15

340g unsalted butter, room temperature
450g caster sugar
3 tbsp toasted milk powder (optional)
2 tsp vanilla bean paste
5 large eggs, room temperature
1/2 a nutmeg, freshly grated
375g plain flour
1/2 tsp salt
3 tsp baking powder
200ml sour cream, room temperature
50ml dark rum

Filling
250ml double cream
1 tbsp light brown sugar
25ml dark rum
1 tsp vanilla bean paste
1 tbsp toasted milk powder (optional)
1/4 tsp freshly grated nutmeg

To Decorate
100g white chocolate, melted and cooled slightly

To make the Bundt preheat the oven to 180C (160C fan). Lightly grease a 12-cup capacity Bundt pan (I used this one) with softened butter and dust with flour, tapping out any excess.

Add the butter and sugar to the bowl of the Wilfa Probaker with the flexivisp (silicon edge beater) attached. On medium/high speed cream together the butter and sugar for 5 minutes or until light and fluffy. Add the milk powder and vanilla and beat briefly to combine. Add the eggs one at a time, with the mixer running on medium speed. Once each egg is fully mixed into the butter mixture, add another. Meanwhile whisk together the flour, baking powder and salt. Grate the nutmeg into the mixer bowl and then add the flour mixture in three additions, alternating with the liquid ingredients (starting and finishing with flour). When you’re adding the flour mixture keep the mixing to a minimum, you want to mix just until evenly mixed but avoiding mixing for too long and making a tough cake.

Scrape the finished batter into the prepared Bundt pan and level out. Bake in the preheated oven for 55 minutes or until a skewer inserted into the cake comes out clean. Place the Bundt pan on a wire rack to cool for 10 minutes before inverting and turning out the cake. Allow to cool fully before adding the filling; when making bundt I often make this in the evening and leave overnight before assembling.

For the filling add all of the ingredients to a large bowl and whisk until medium/stuff peaks form. Place the cake back into the cleaned Bundt pan and use a pairing knife to score a channel in the base of the cake and then use a spoon to scoop out the channel making a tunnel in the base of the cake. Add the filling to this channel and smooth out so the filling sits flush with the base of the cake. Carefully turn the cake out onto a serving plate or cake stand.

To decorate pour over the melted and cooled white chocolate and finish with a few festive sprinkles. The white chocolate needs to have cooled but still be pourable, that way the chocolate doesn't just run immediately off the cake.

Once the filled the cake needs serving on the same day or refrigerating for a day or two. Unfilled the cake would keep for 3-4 days.
In Bundts, Cakes Tags wilfa, probaker, eggnog, bundt, pound cake, white chocolate, rum, nutmeg
Comment

Boston Cream Bundt Cake

Edd Kimber August 25, 2021

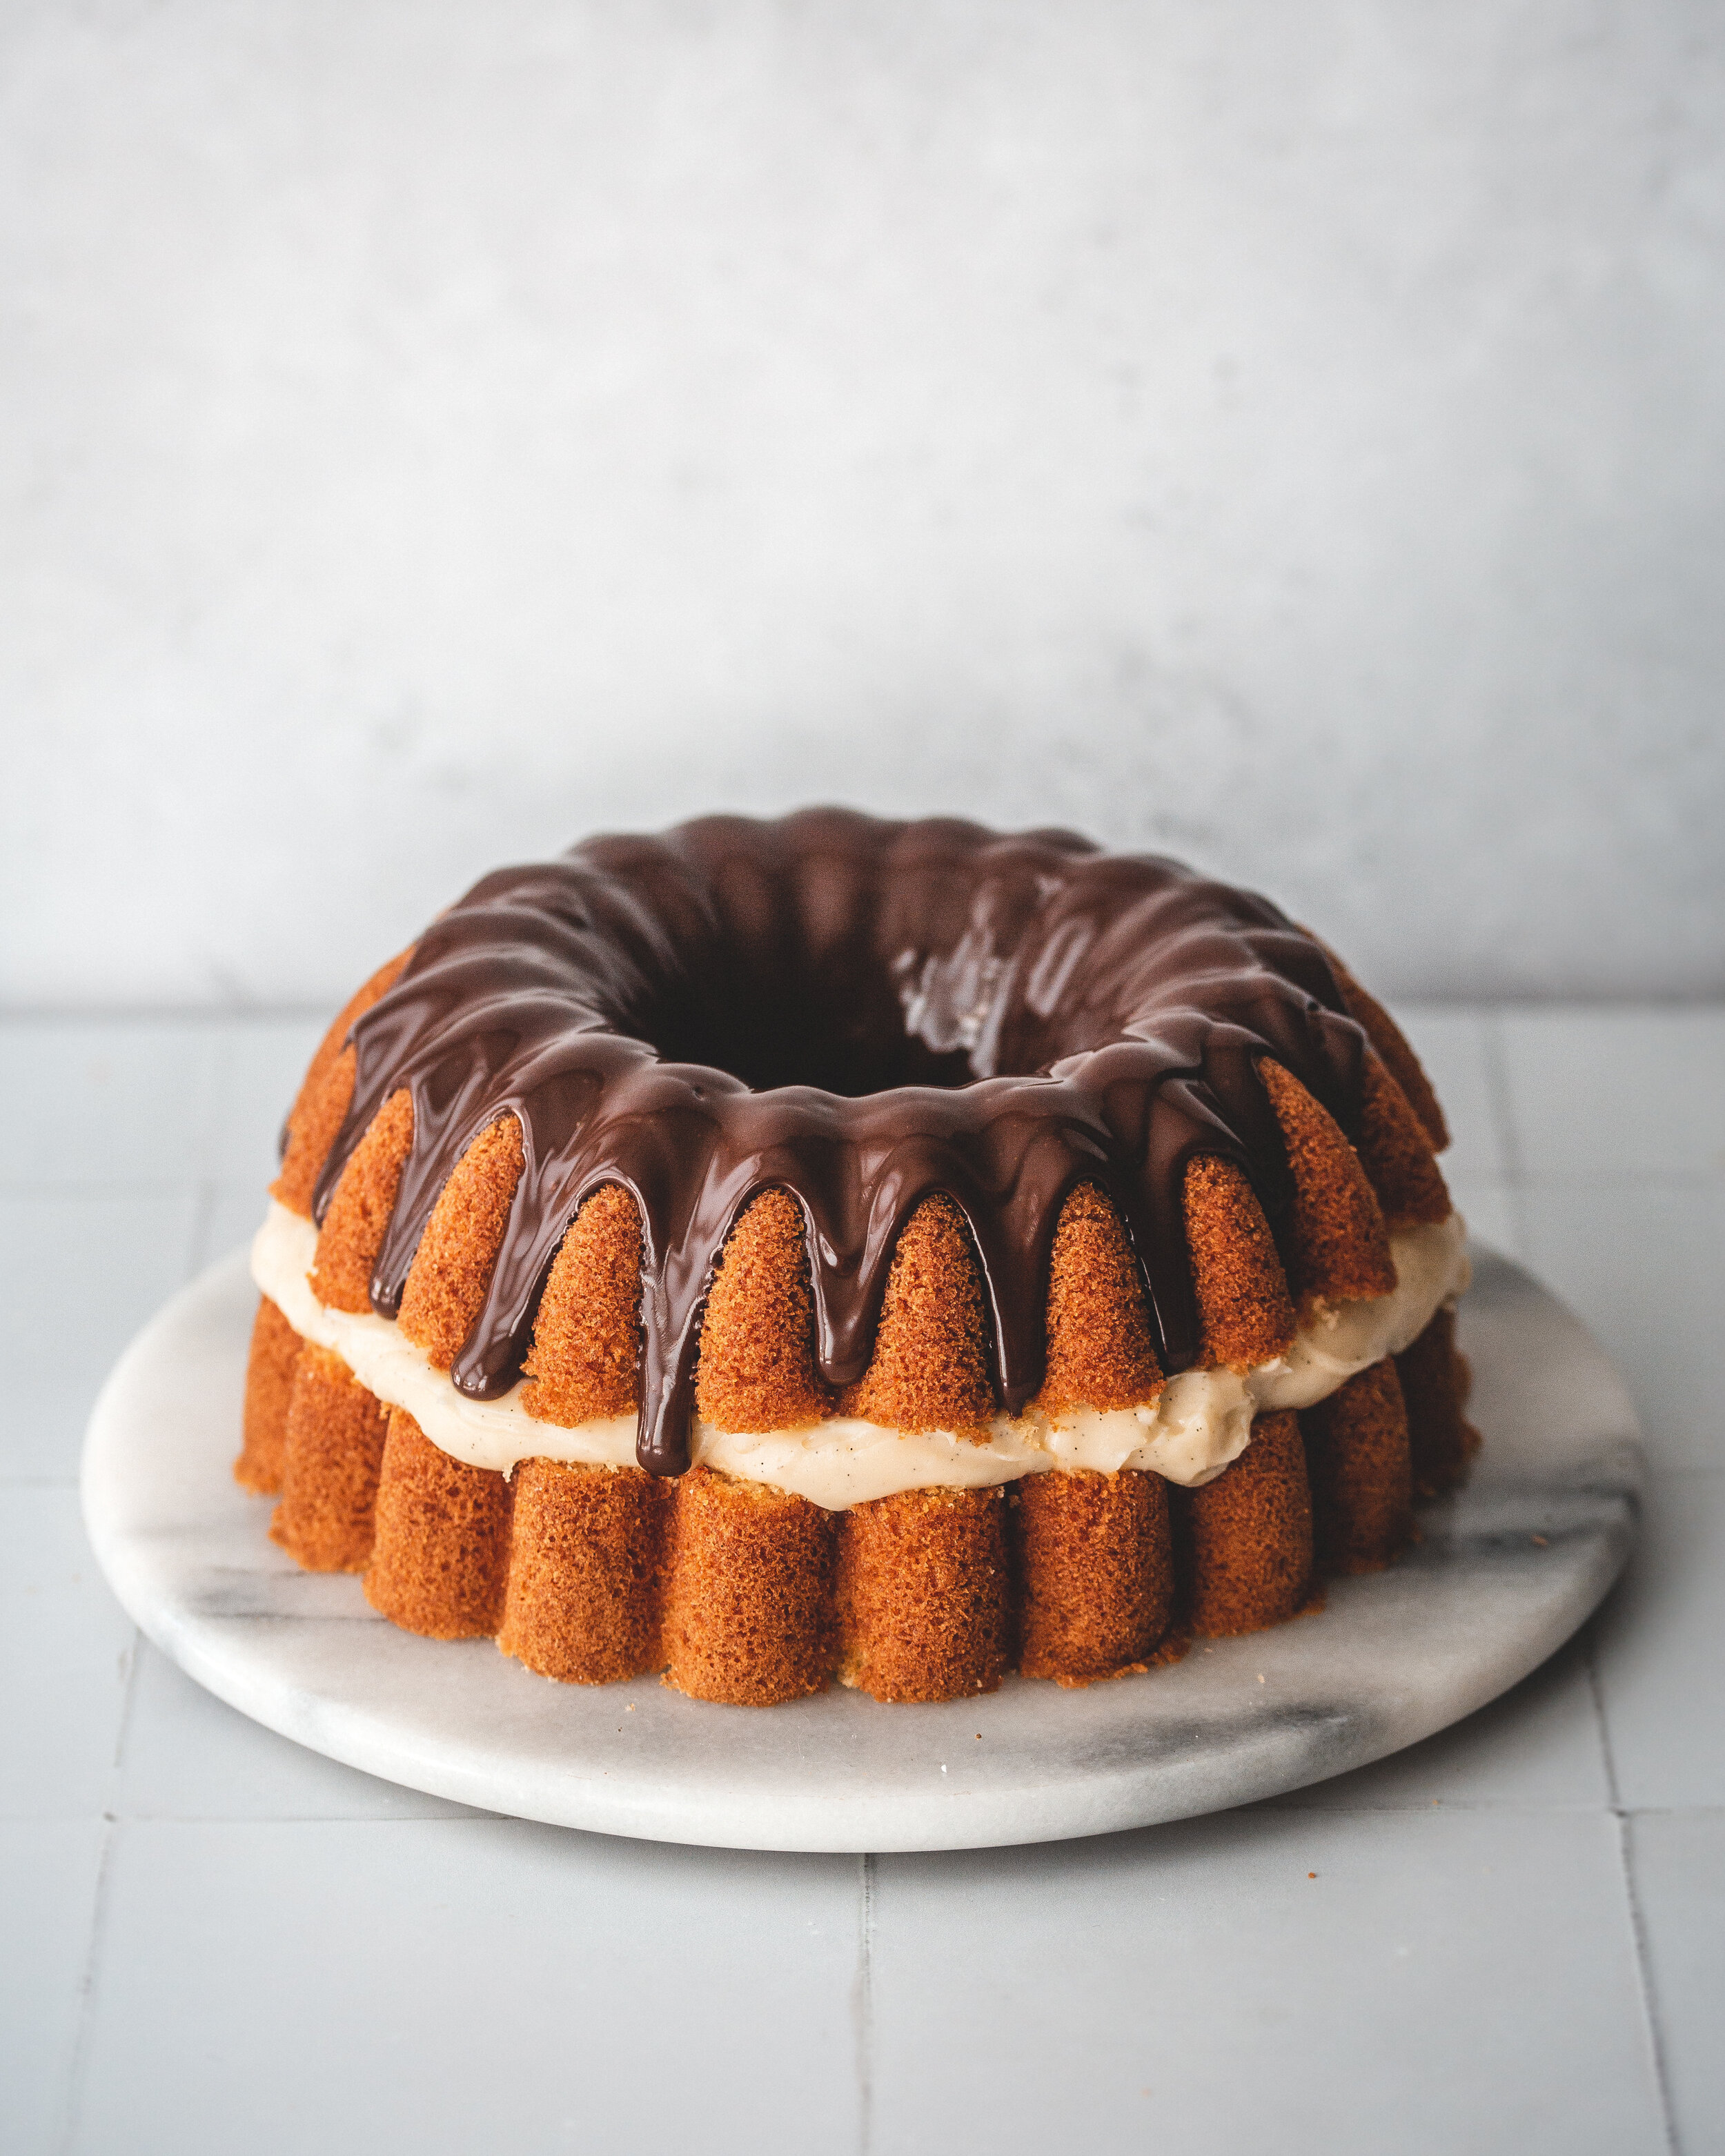
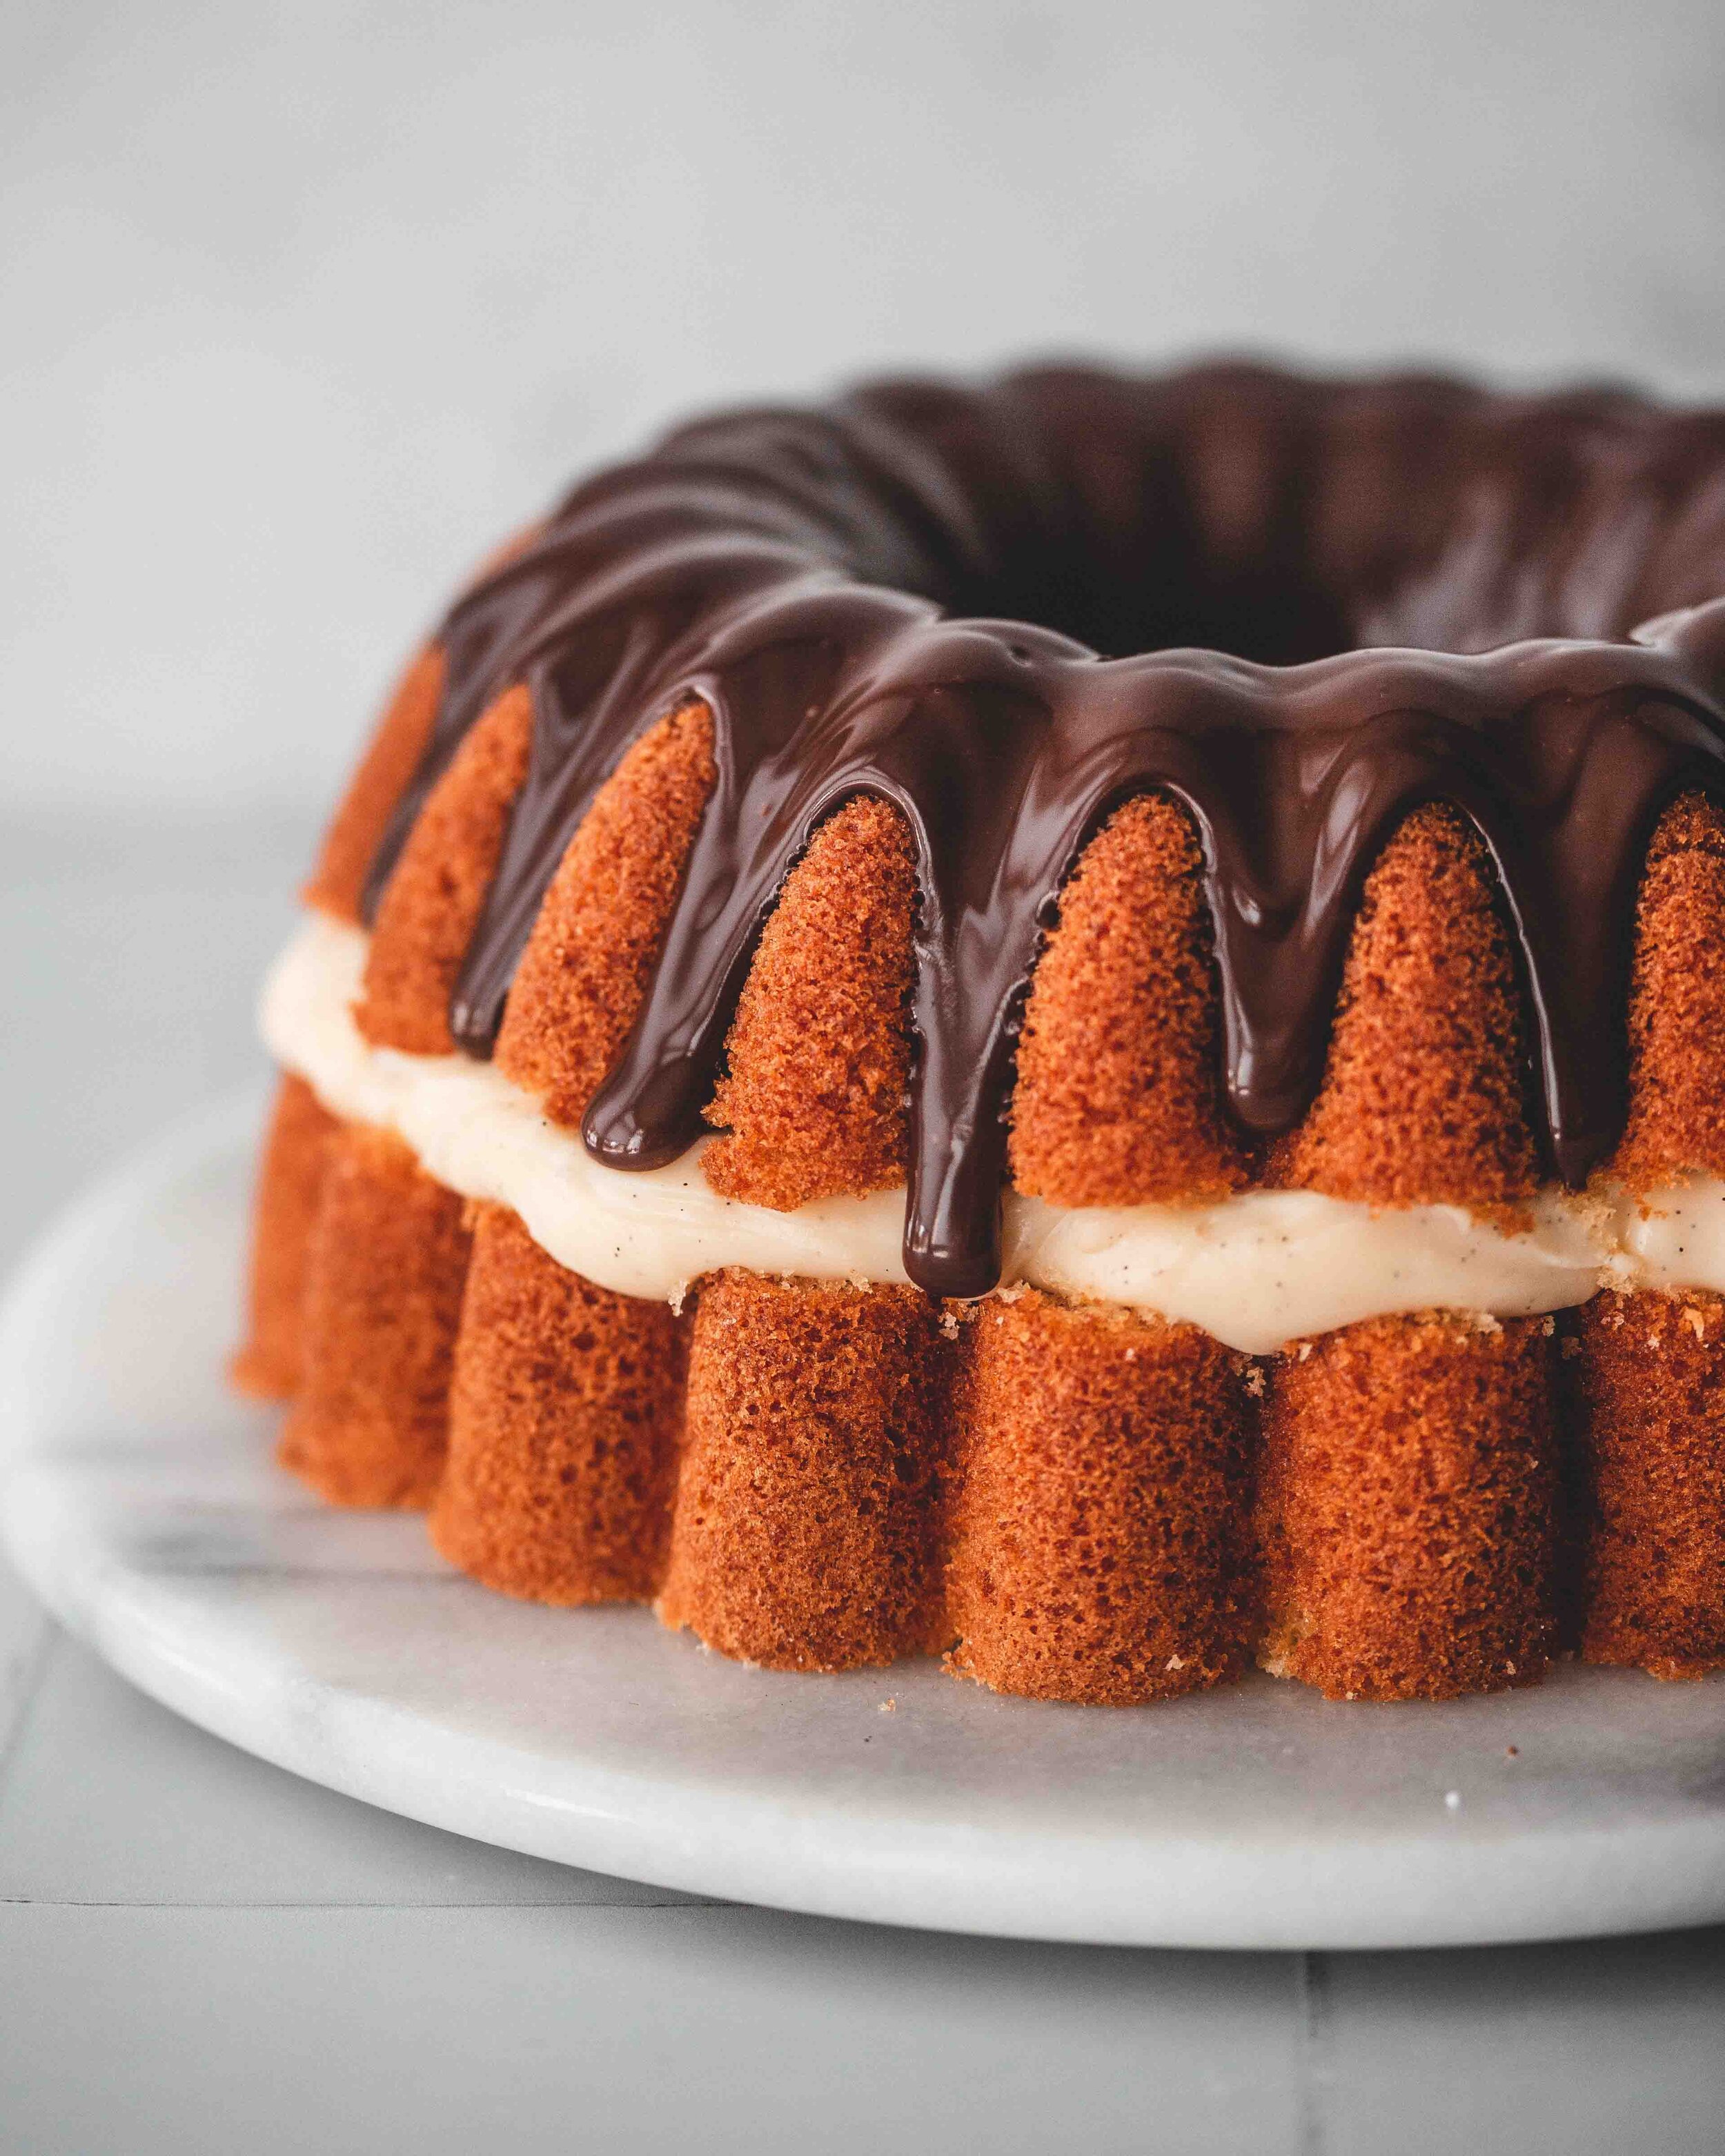
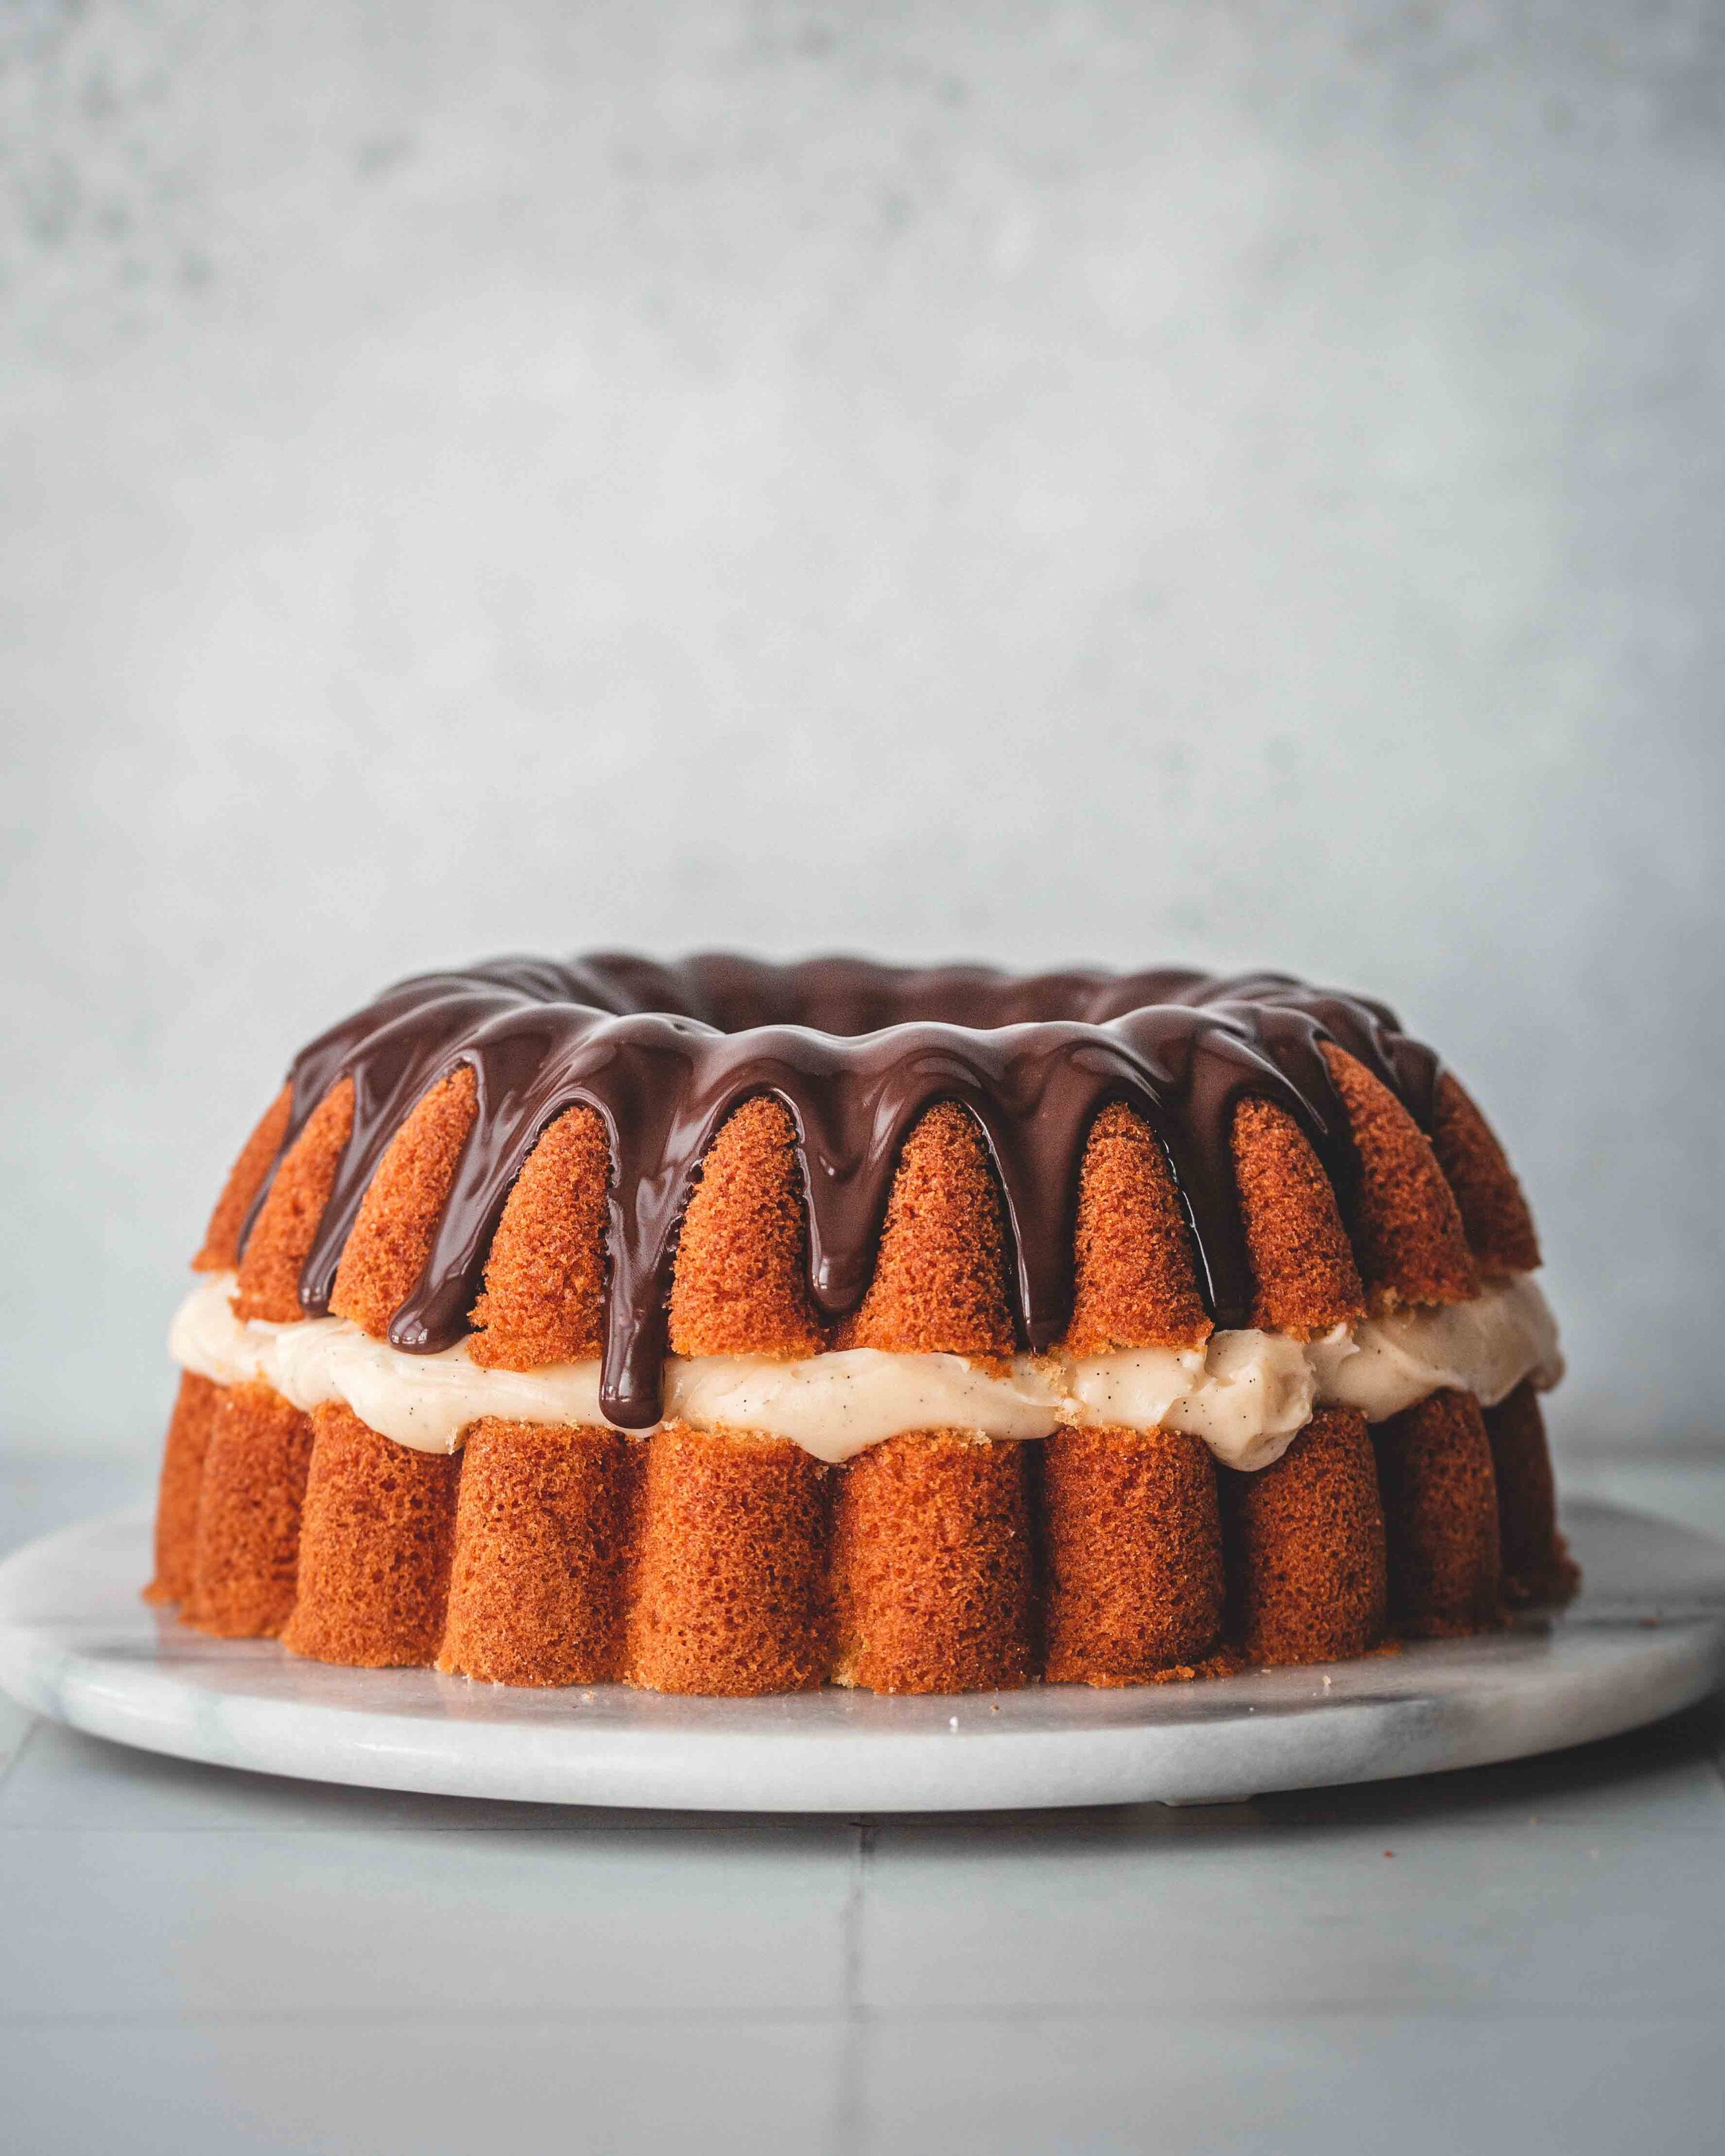
Boston Cream Pie, as it is traditionally called, is a bit of a misnomer in that it is clearly a cake and not a pie. The name, supposedly, harks back to the 1800’s when the line between what was a cake and what was a pie was blurred somewhat, the names being used in more of an interchangeable manner. Either way, what is known about the origins of the cake are murky at best, with the Parker House Hotel claiming they invented the cake but food historians saying its origins are much more likely older than the hotel itself. Traditionally the cake would be made with either a rich butter cake or a lighter whisked sponge, the latter being the version I am more au fait with. The filling was always a rich pastry cream but the topping, which used to be a chocolate fondant, has morphed into a more common chocolate ganache glaze. My version sticks very close to this formula with a whisked sponge in the style of a chiffon cake, filled with a vanilla rich pastry cream and topped with a silky ganache glaze. The only thing I have omitted in this version is the traditional sliced almonds that coat the outside of the cake. Feel free to scatter almonds over the finished cake if you wish.

Boston Cream Bundt Cake
Serves 12-15

Bundt Cake
250g caster sugar
4 large eggs
2 tsp vanilla bean paste
120ml olive oil
80ml whole milk
200g plain flour
1 + 1/2 tsp baking powder
1/2 tsp fine sea salt

Custard Filling
300ml whole milk
1 tsp vanilla bean paste
100g caster sugar
25g cornflour 
2 large egg yolks
1 large egg
30g unsalted butter
Pinch of fine sea salt

Chocolate Glaze
70g dark chocolate, finely chopped
100ml double cream

For the custard filling place the milk, vanilla and roughly half the sugar into a saucepan and place over medium heat and bring to a simmer. Meanwhile, place the remaining sugar and the cornstarch into a mixing bowl and whisk together until combined. Just before the milk is at temperature add the egg yolks and whole egg to the sugar and cornflour mixture and whisk together until smooth. 

When the milk is at temperature remove from the heat and slowly pour over the egg mixture, whisking as you do you. Pour the custard back into the pan and place on the heat and whisk constantly until the custard is very thick and has bubbled. Immediately scrape the custard into a bowl and stir in the butter and a pinch of salt, mixing until smooth. Press a sheet of clingfilm onto the surface of the custard and refrigerate until needed. 

Preheat the oven to 180ºC (160ºC Fan). Grease a 10-cup bundt pan, using either a cake release spray or brushing with softened butter and then dusting with flour. My preference is using a homemade ‘cake goop’ made from an equal volume measure of shortening, neutral oil and all purpose flour, mixed to a paste. 

Place the sugar, eggs and vanilla into the bowl of a stand mixer, fitted with the whisk attachment. On medium/high speed whisk for about 7 minutes or until ribbon stage. Turn the mixer to medium/low and slowly pour in the olive oil and then the milk. Sieve in the flour, baking powder and salt and fold the flour until the batter is smooth and no signs of flour remain. Pour the batter into the prepared pan and then give the pan a couple firm taps on the work surface to pop any large bubbles. 

Bake in the preheated oven for about 35 minutes or until the cake springs back to a light touch. Remove from the oven and set aside for 10 minutes before inverting the cake onto a wire rack to cool completely. 

Once cooled use a serrated knife to cut the cake into two layers. Remove the custard from the fridge and beat to loosen. Place the bottom layer of the cake onto a cake stand or plate and spread the custard over the cut surface. Top with the second cake layer and refrigerate while you make the glaze. 

Place the chocolate into a jug and set aside for the moment. Place the cream into a small milk pan and over medium heat bring to a simmer. Pour into the jug with the chocolate and set aside for a couple minutes before stirring with a small sauce whisk to form a silky ganache. Remove the cake from the fridge and then pour over the glaze, allowing it to drip down the sides of the cake.

The cake is best used within a day or two


In Bundts, Cakes Tags bundt, bundt cake, chocolate, chocolate glaze, pastry cream, creme patissier
9 Comments
Nordicware 75th-14.jpg

How To Prevent A Bundt Cake From Sticking

Edd Kimber May 2, 2021

This post is sponsored by Nordicware UK

Bundt cakes are very special cakes, easy to make and great for any occasion, but whenever I post a recipe for a new Bundt I get the same question. How do I stop my cake from sticking? Thankfully it’s not difficult at all, you just need to follow a couple simple easy guidelines.

Bundt pans are very detailed, and the sometimes intricate designs means there can sometimes be more potential for sticking, especially if the pan is not properly prepared. Obviously you can’t line the base of the pan with parchment paper so what do we do instead. Well you have three options, each with their own pros and cons.

Butter and Flour

Greasing the pan with softened butter and dusting with flour is the most traditional way of preparing this sort of pan. The butter should not be melted as the pans already have a coating to help the cake release and if a liquid fat like melted butter or oil is used it will bead and not actually coat the pan evenly, so use soft butter. Brush the tin with a thin layer of butter, making sure every nook and cranny is coated, especially the central core as this seems to be the most overlooked part of the pan. Once coated, dust the entire tin with a thin layer of flour (or cocoa powder for chocolate cakes). Turn the pan over and tap on the work surface allowing any excess flour to fall out, you want this layer to be as thin as possible. 

Pro: ingredients always on hand and cheap, no special ingredients or equipment needed

Cons: Can leave a floury coating on your cakes and isn’t always a fail safe method of preventing sticking

Spray Oils

For many years using a cake release spray was my go to way of preparing my Bundt pans, an aerosol coats the pan evenly in fat and cakes always released very easily. Nordicware’s own advice is to be careful about the choice of spray oil as some are not designed for cakes and can actually damage the lining of the pans over time. Look for oils that are designed for cakes and not for cooking. General advice with a spray is to hold the pan over the sink, the oils can be hard to direct and can leave a layer of oil on your countertops or floor, and hold the can about 15-20cm away from the tin to ensure an even coating. With these sprays you don’t generally need to add flour as they formulated to work without it, although some brands actually include flour in their formula. 

Pros: quick, easy and reliable

Cons: comparatively expensive and you have to buy an additional product, can also be messy

Cake Goop

This is by far my favourite method, since switching a few years ago I have never had a cake stick, and in fact I now use this for all of my baking, not just bundt cakes. It is basically a homemade version of cake release spray that is much cheaper to make than to buy and it is less fussy to use and wont coat everything in a thin layer of oil. To make you simply beat together an equal amount, by volume, of vegetable oil, shortening (this is Trex in the UK) and plain flour. To do this I use an American cup measure but you can use any container you want to measure out the ingredients, you simply want an equal volume of each. Scrape your cake goop into a sealable container and store in the fridge, it will keep for months and months. To use you simply brush the pan you are using with an even coating of the cake goop.

Pro: easy and cheap to make, plus it is the most failsafe method I have used to date

Con: you have to make it yourself and you may need to buy shortening if you don’t use regularly use it

Nordicware 75th-2.jpg

So now you know how to prepare the tin that is it right? Nope, the second step is the most ignored step but maybe the most important. When you take a cake out of the oven the cake continues to bake for a few minutes and if turned out immediately the cake is likely to break into pieces because it hasn’t fully set and is delicate. This is why I always advise to allow the cake to cool for exactly 10 minutes before turning out onto a wire rack to cool completely. If you leave the cake too much longer you will encounter the sticking issue. As the cake cools the crust will start to become sticking and it will glue itself to the pan, turning out after 10 minutes is the sweet spot where the cake will slide right out of the pan without issue. 

Following these simple steps should ensure you never have another Bundt cake stick

Tags bundt, bundt pan sticking, bundt pan preperation, bundt pan tips
6 Comments
Nordicware 75th-3.jpg

Neapolitan Marble Bundt Cake

Edd Kimber April 30, 2021

This post is sponsored by Nordicware UK

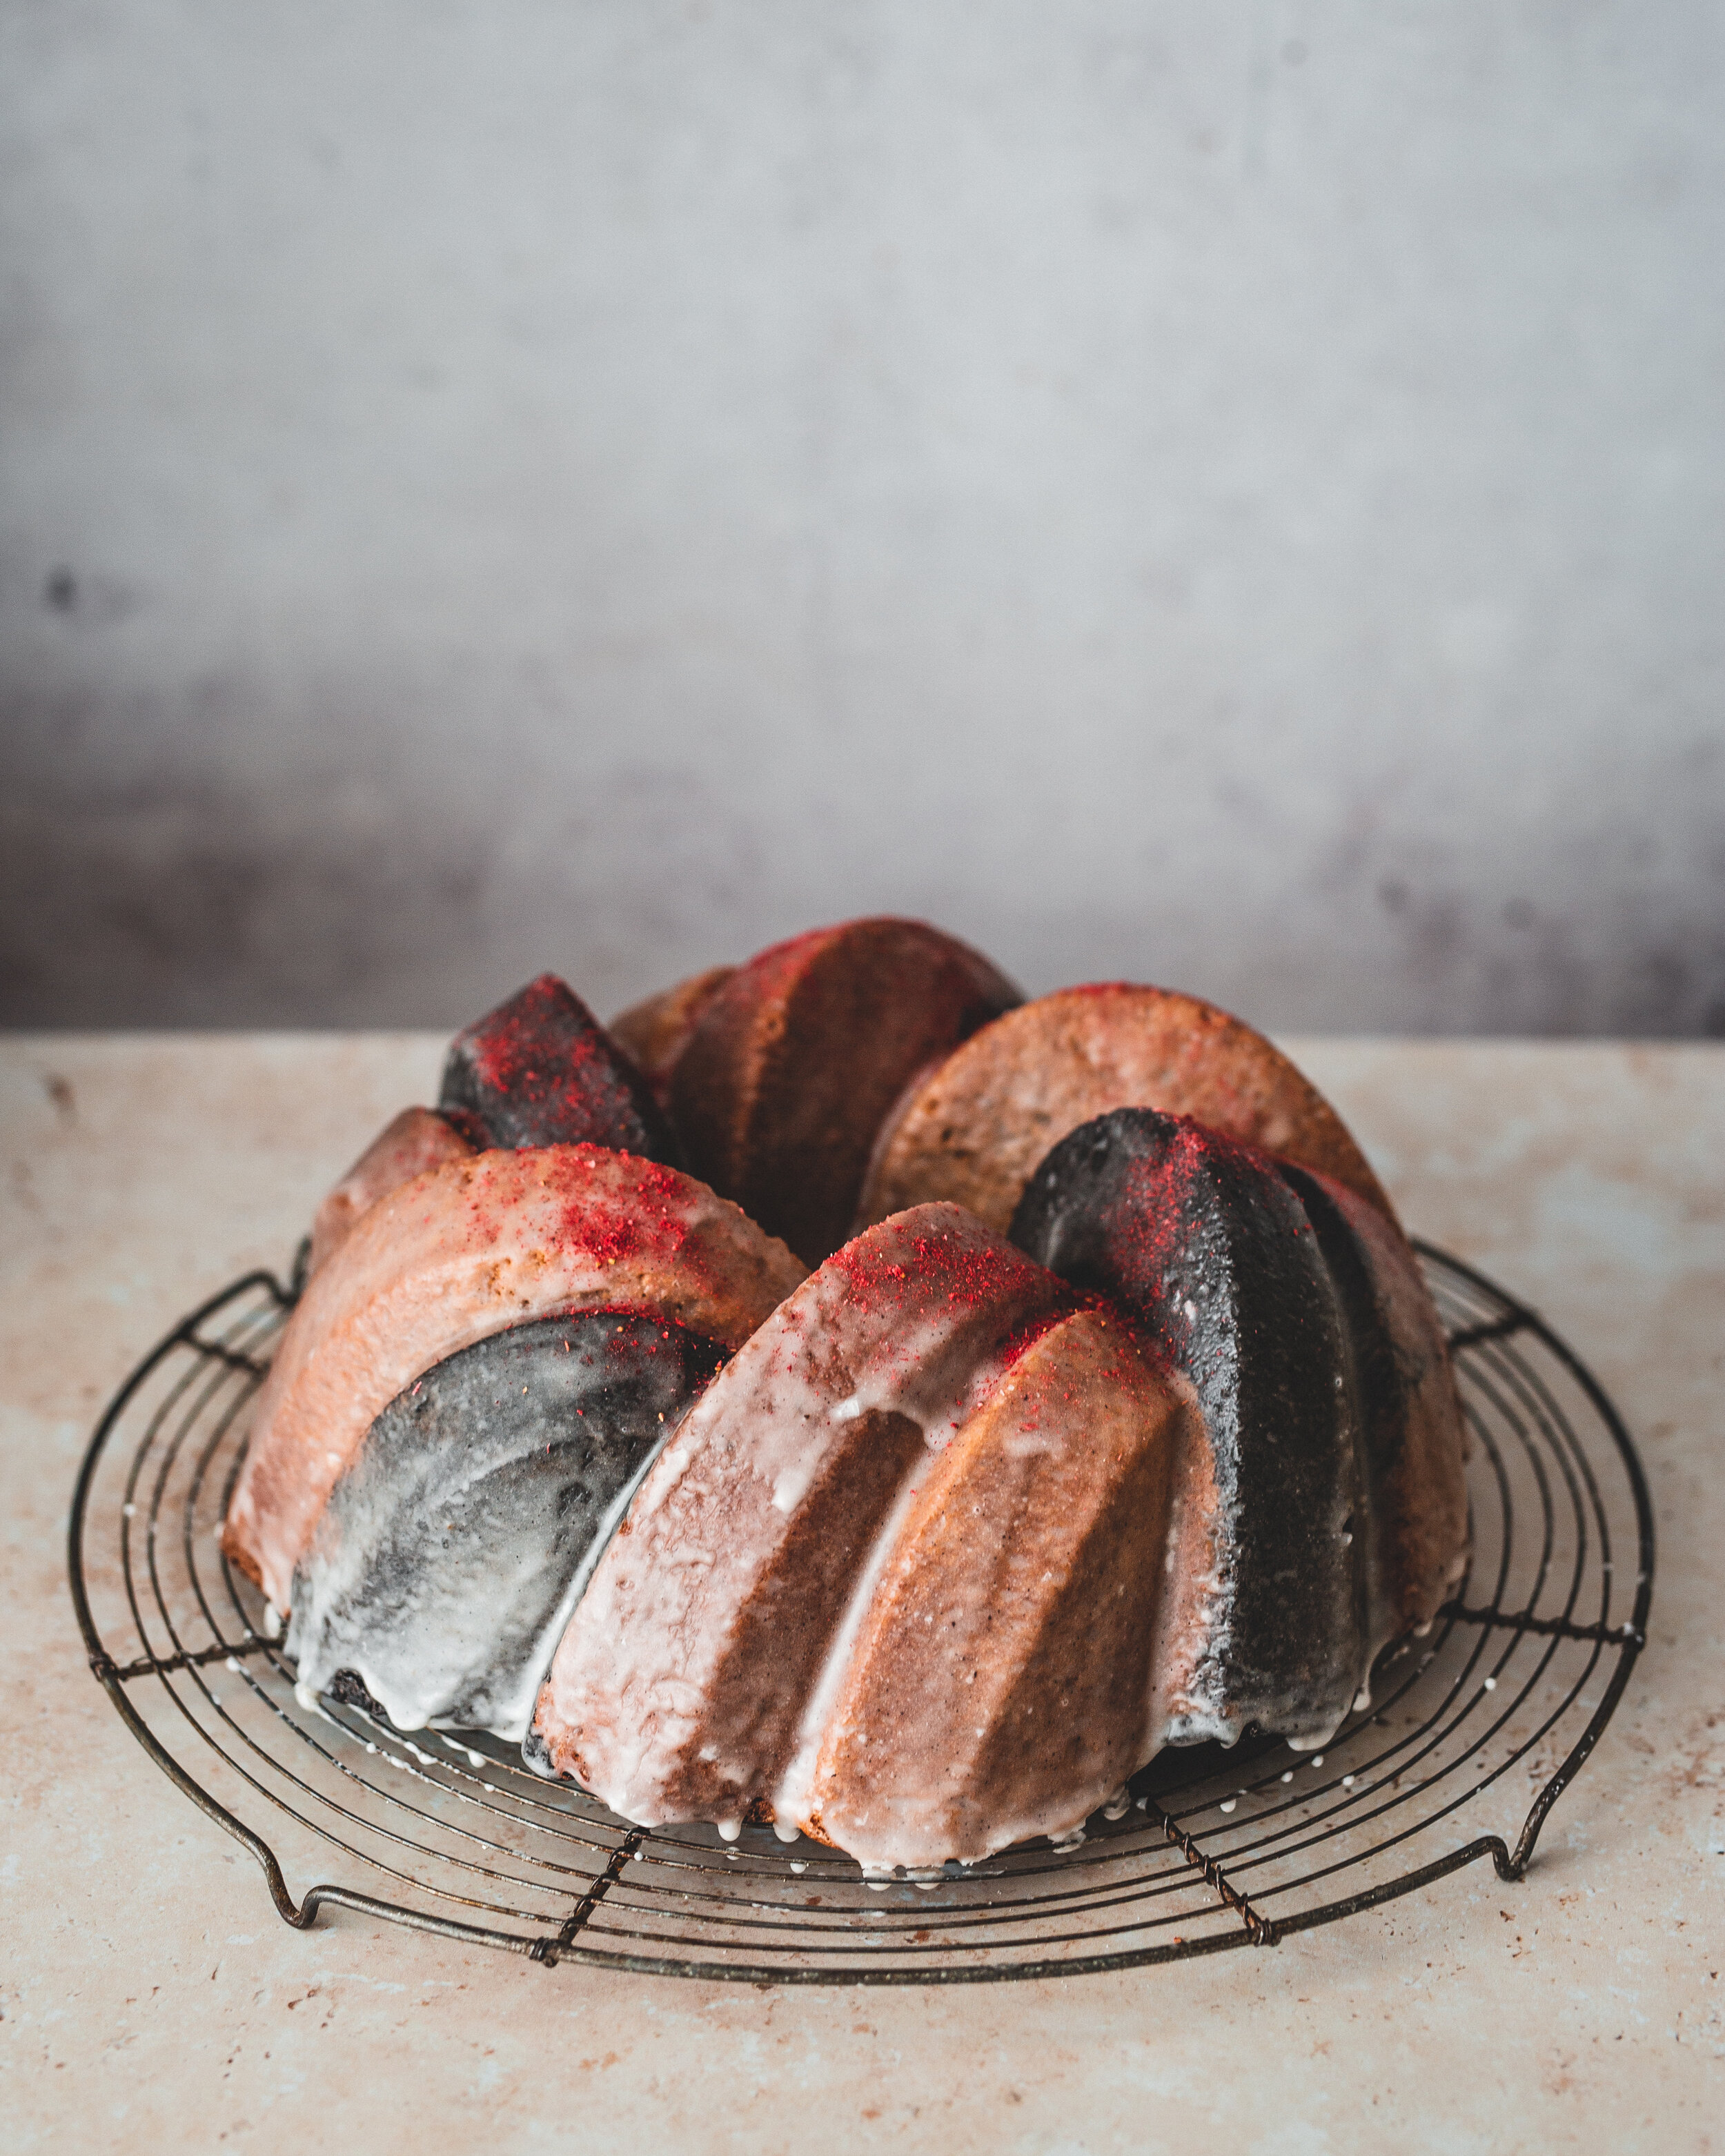
It is no secret that I am a big fan of Bundt® cakes (I’ve written enough recipes for them for that to be pretty obvious) so I’m thrilled to be posting a very special anniversary recipe today in collaboration with Nordicware, the creators of the Bundt® pan. This year, the Minneapolis based bakeware manufacturer turns 75 years old, and to celebrate they have released a new 75th Anniversary Braided Bundt® Pan and they tasked me with coming up with something special to bake in it.

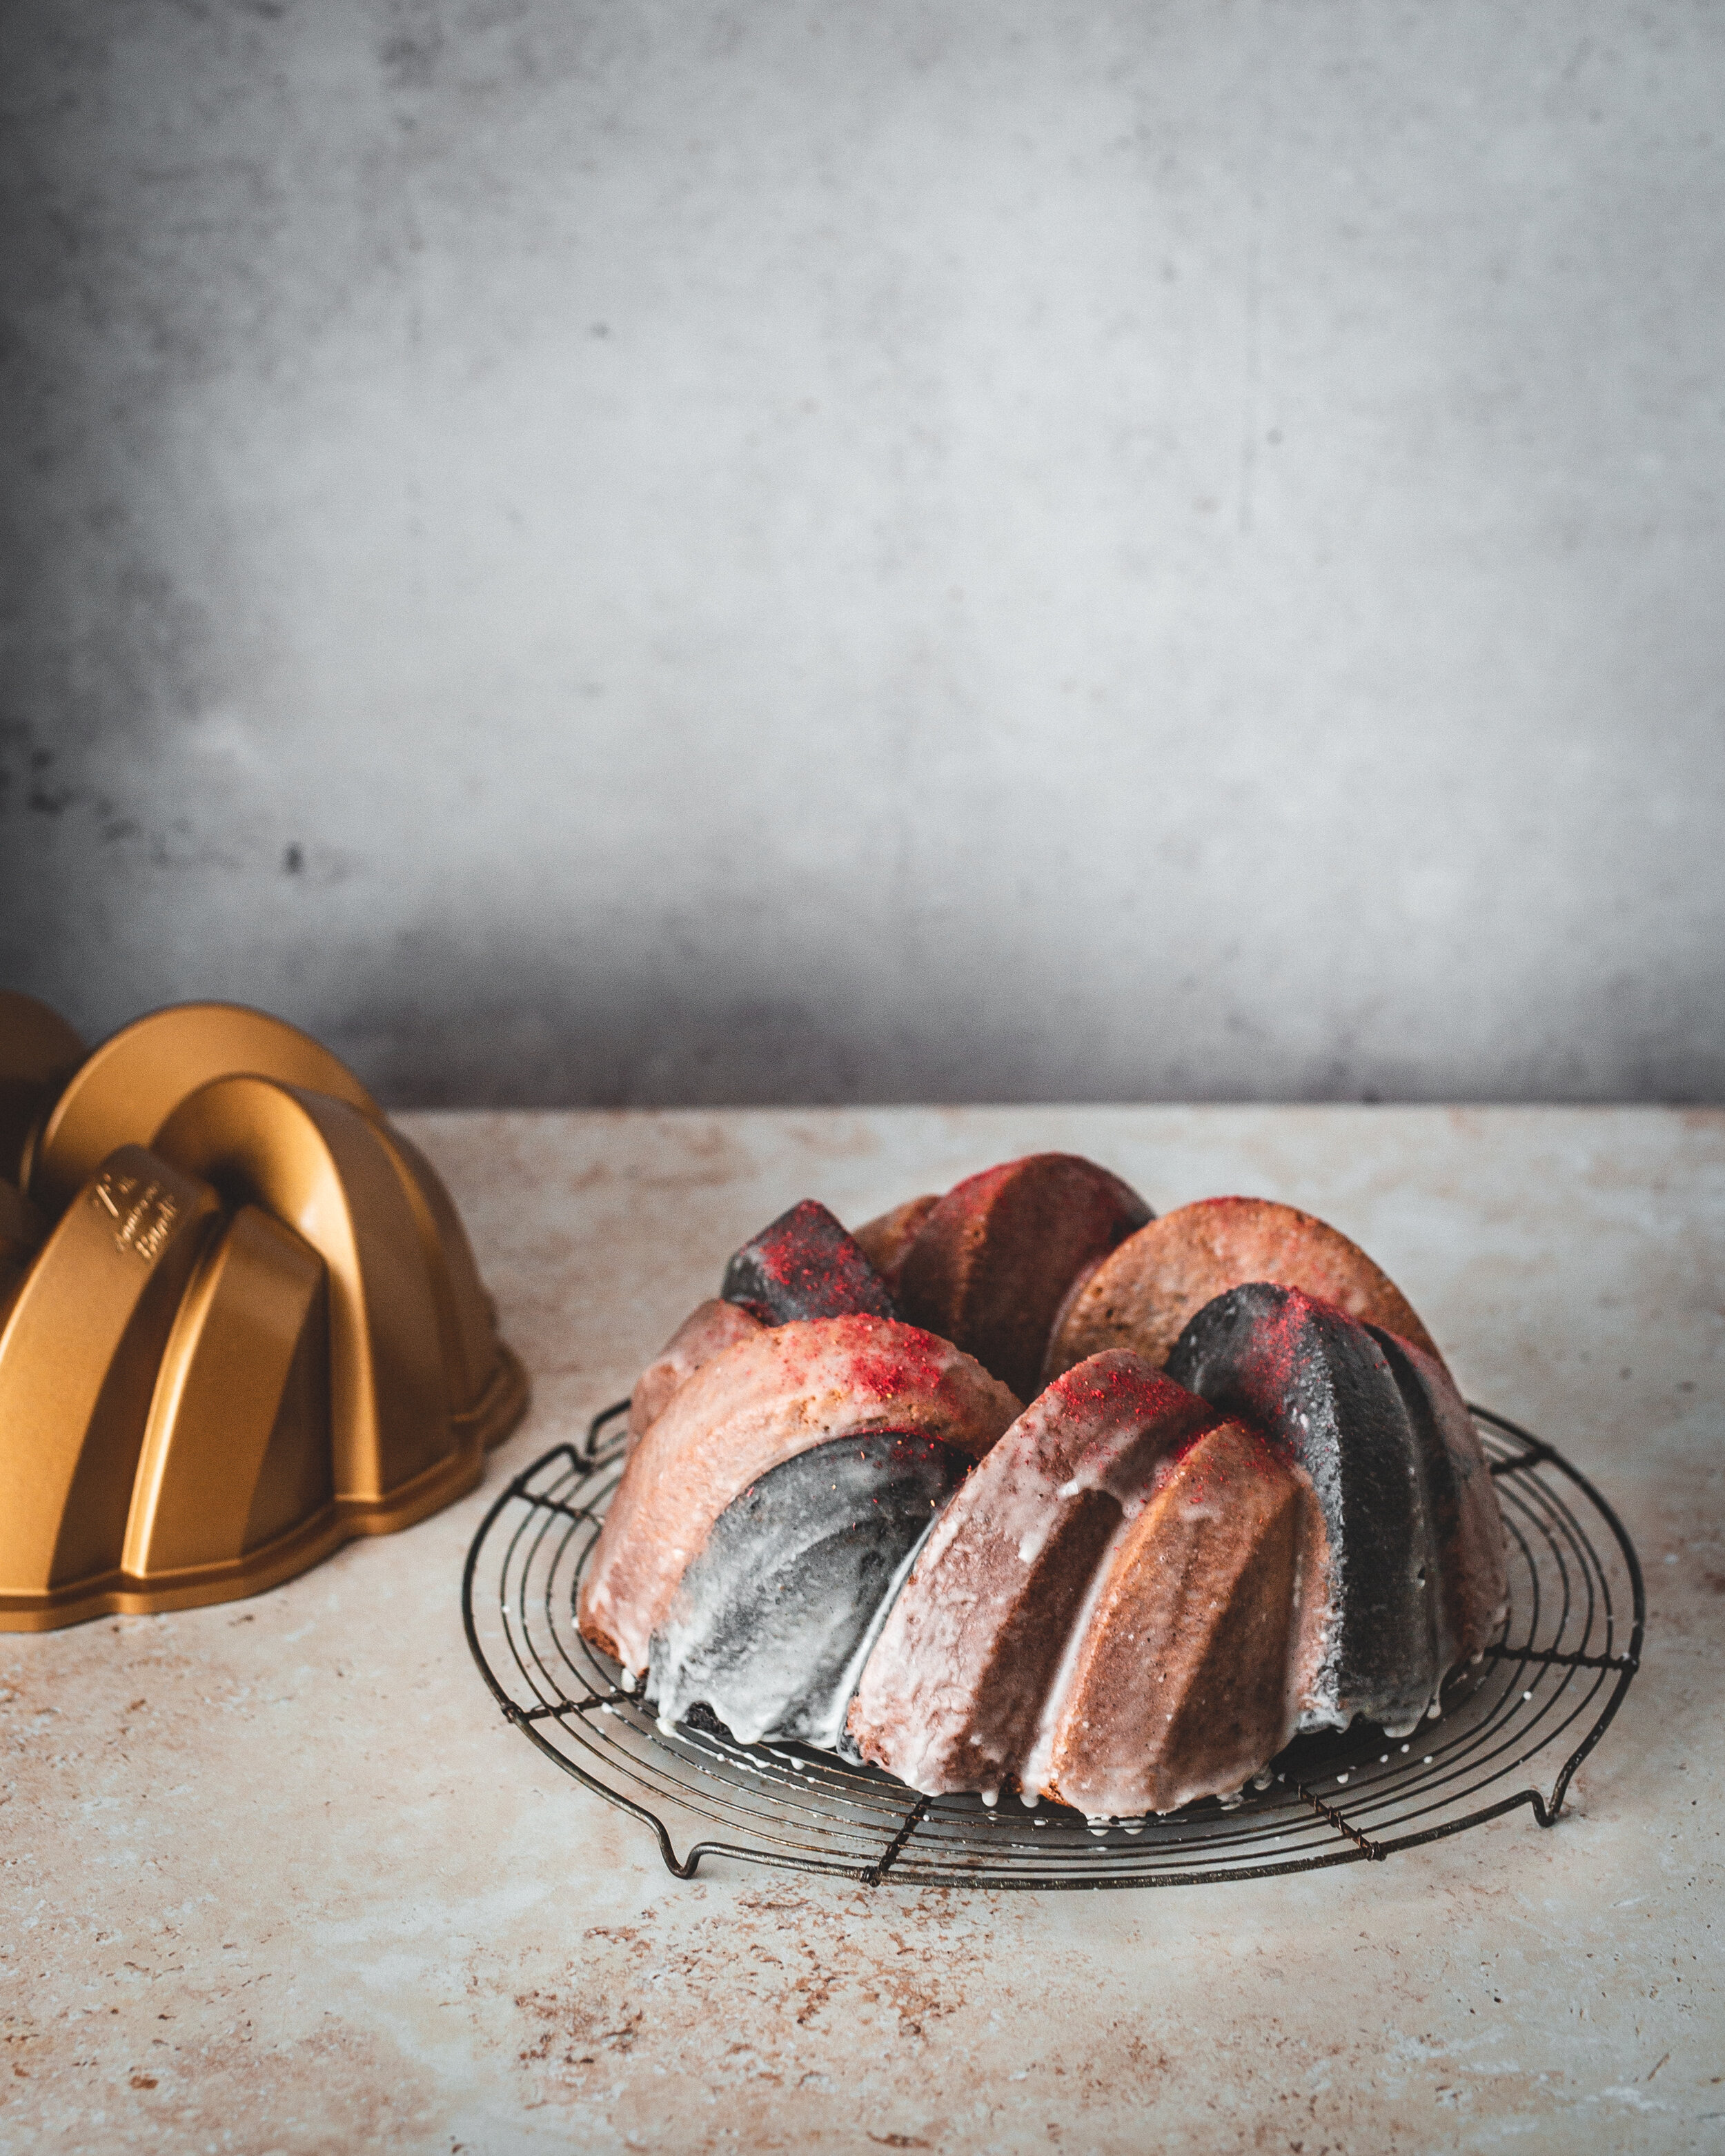
The recipe is inspired by that classic ice cream, the Neapolitan, a mix of chocolate, vanilla and raspberry. The cake is based around the classic pound cake, it’s dense but moist and needs no fancy adornment, although I’ll never object to a ganache or buttercream, the cake itself is good enough on its own. For the chocolate mixture I use a deep dark black cocoa which gives a great colour and flavour. For the vanilla flavour I also add a little white chocolate which makes a wonderful tender cake. The final section is made with freeze dried raspberry powder for a pop of colour and a great raspberry flavour. 

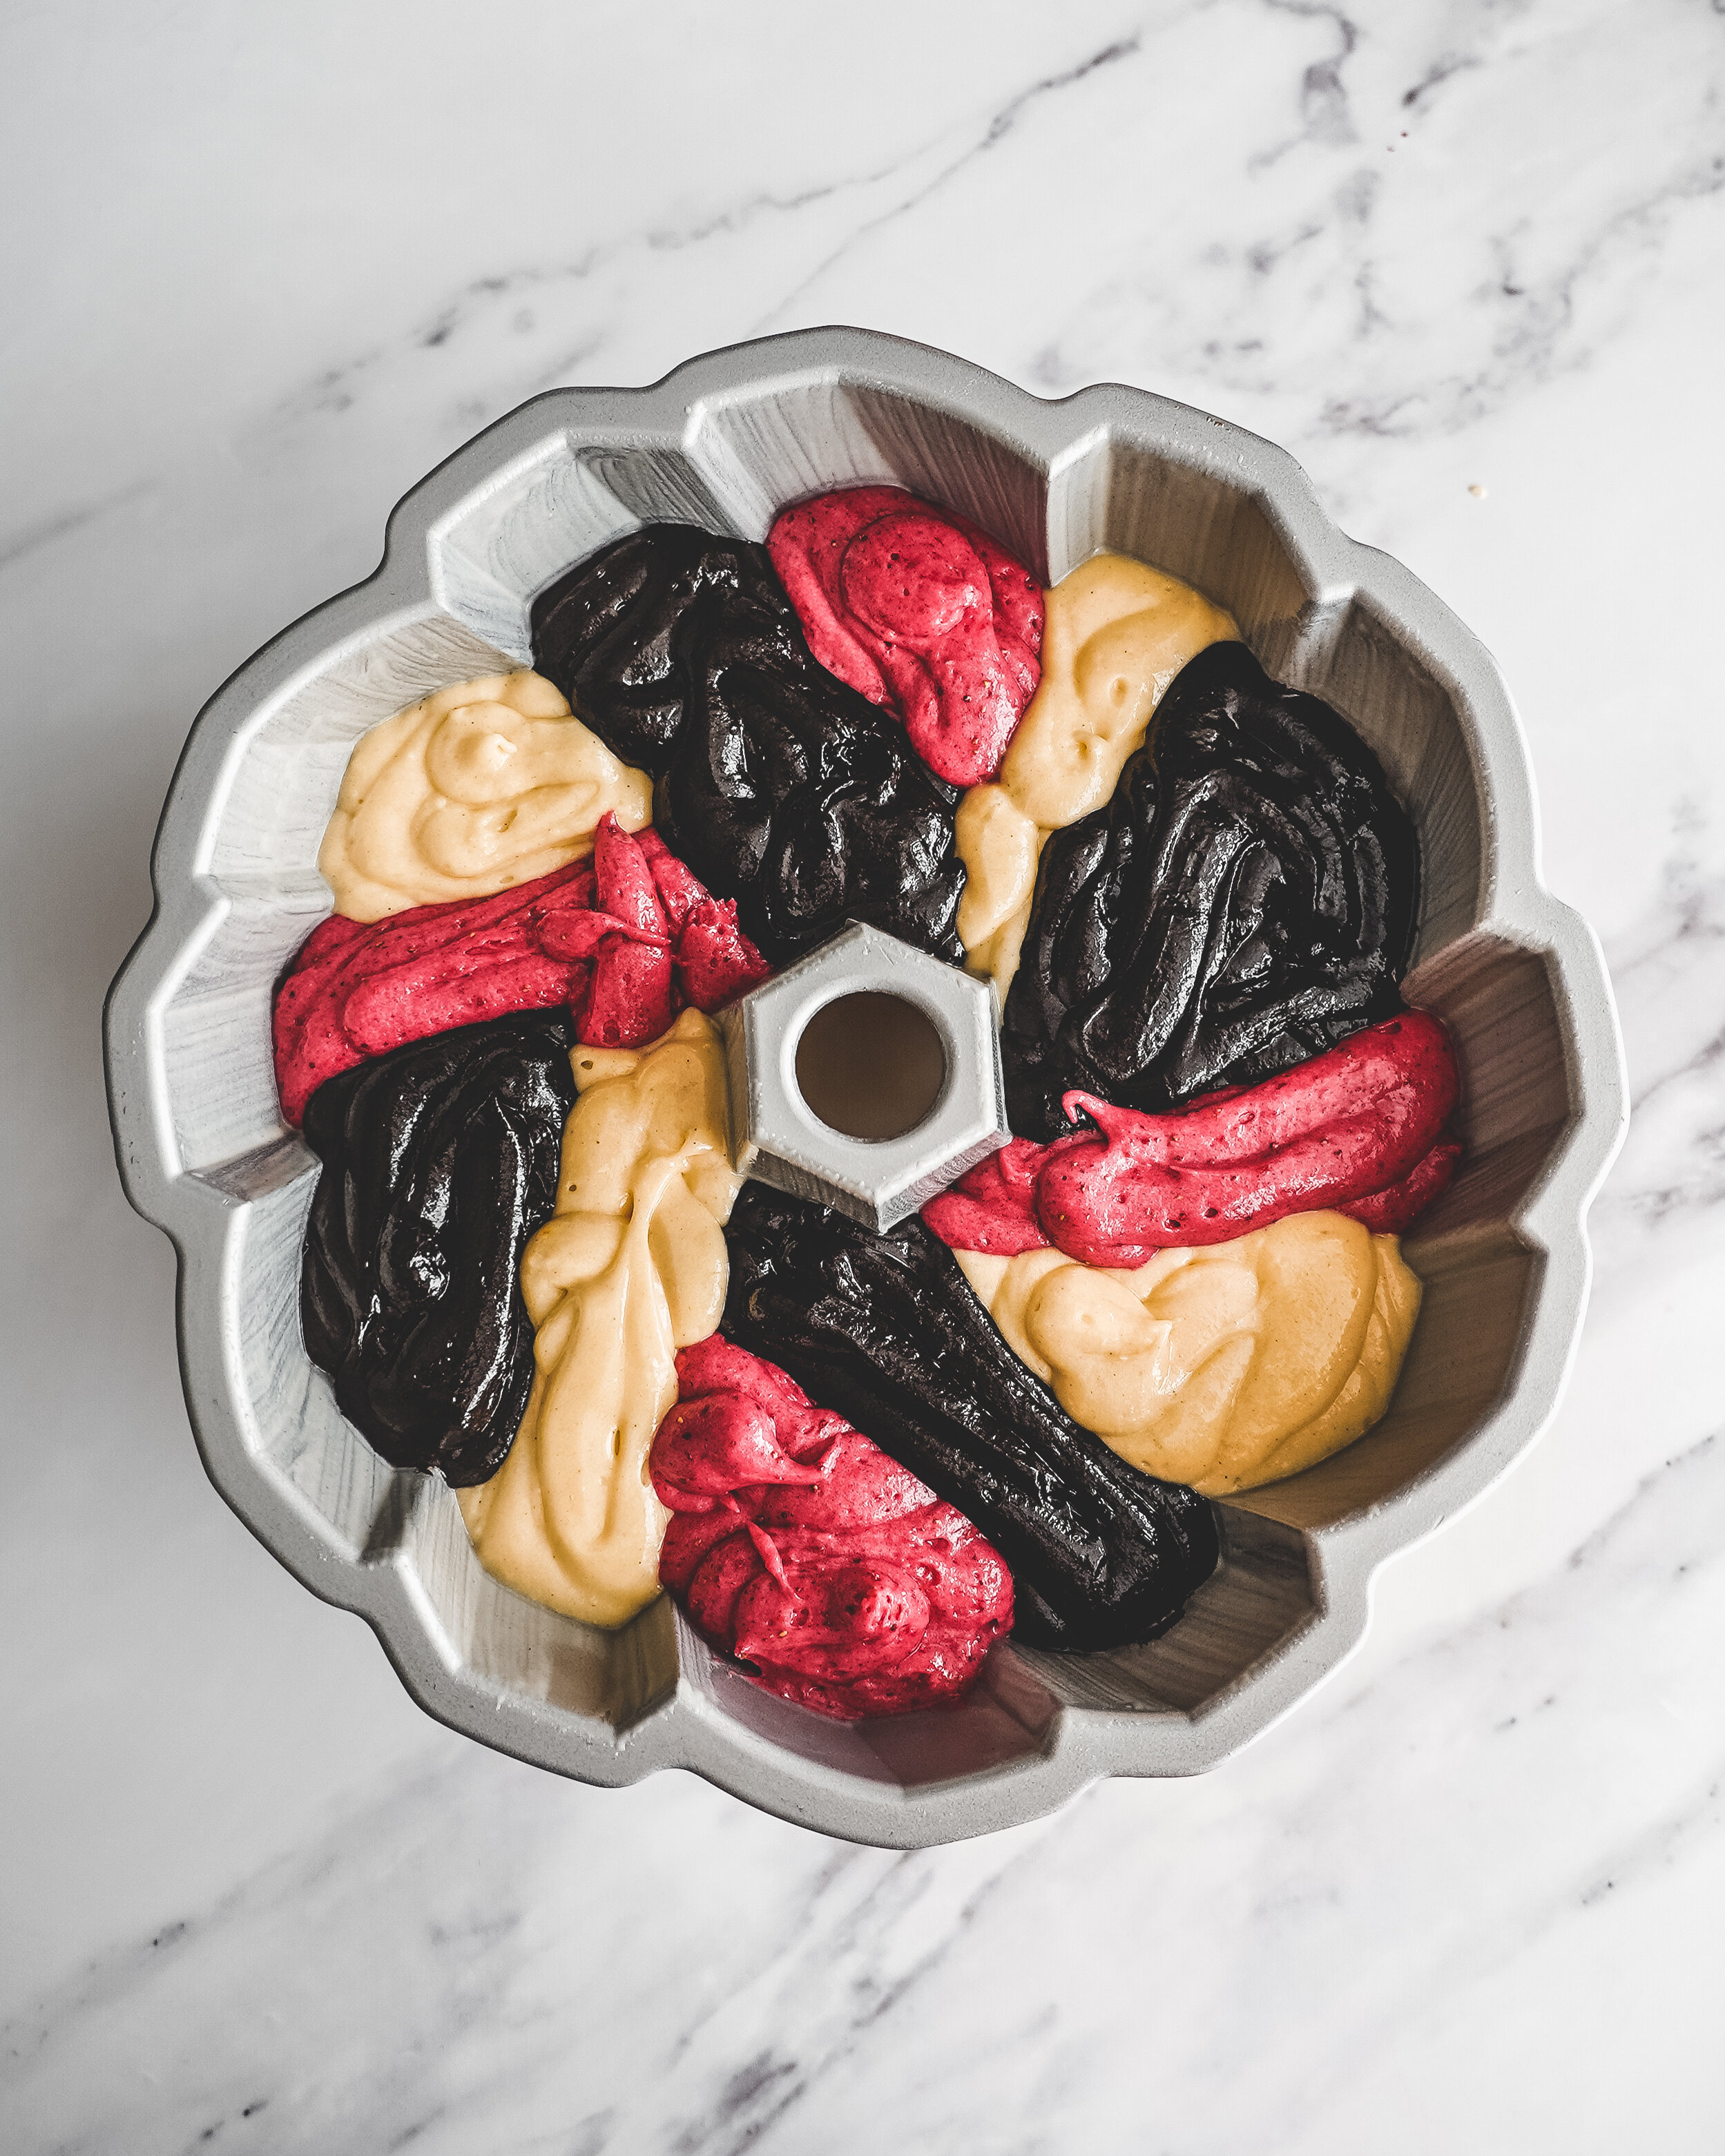
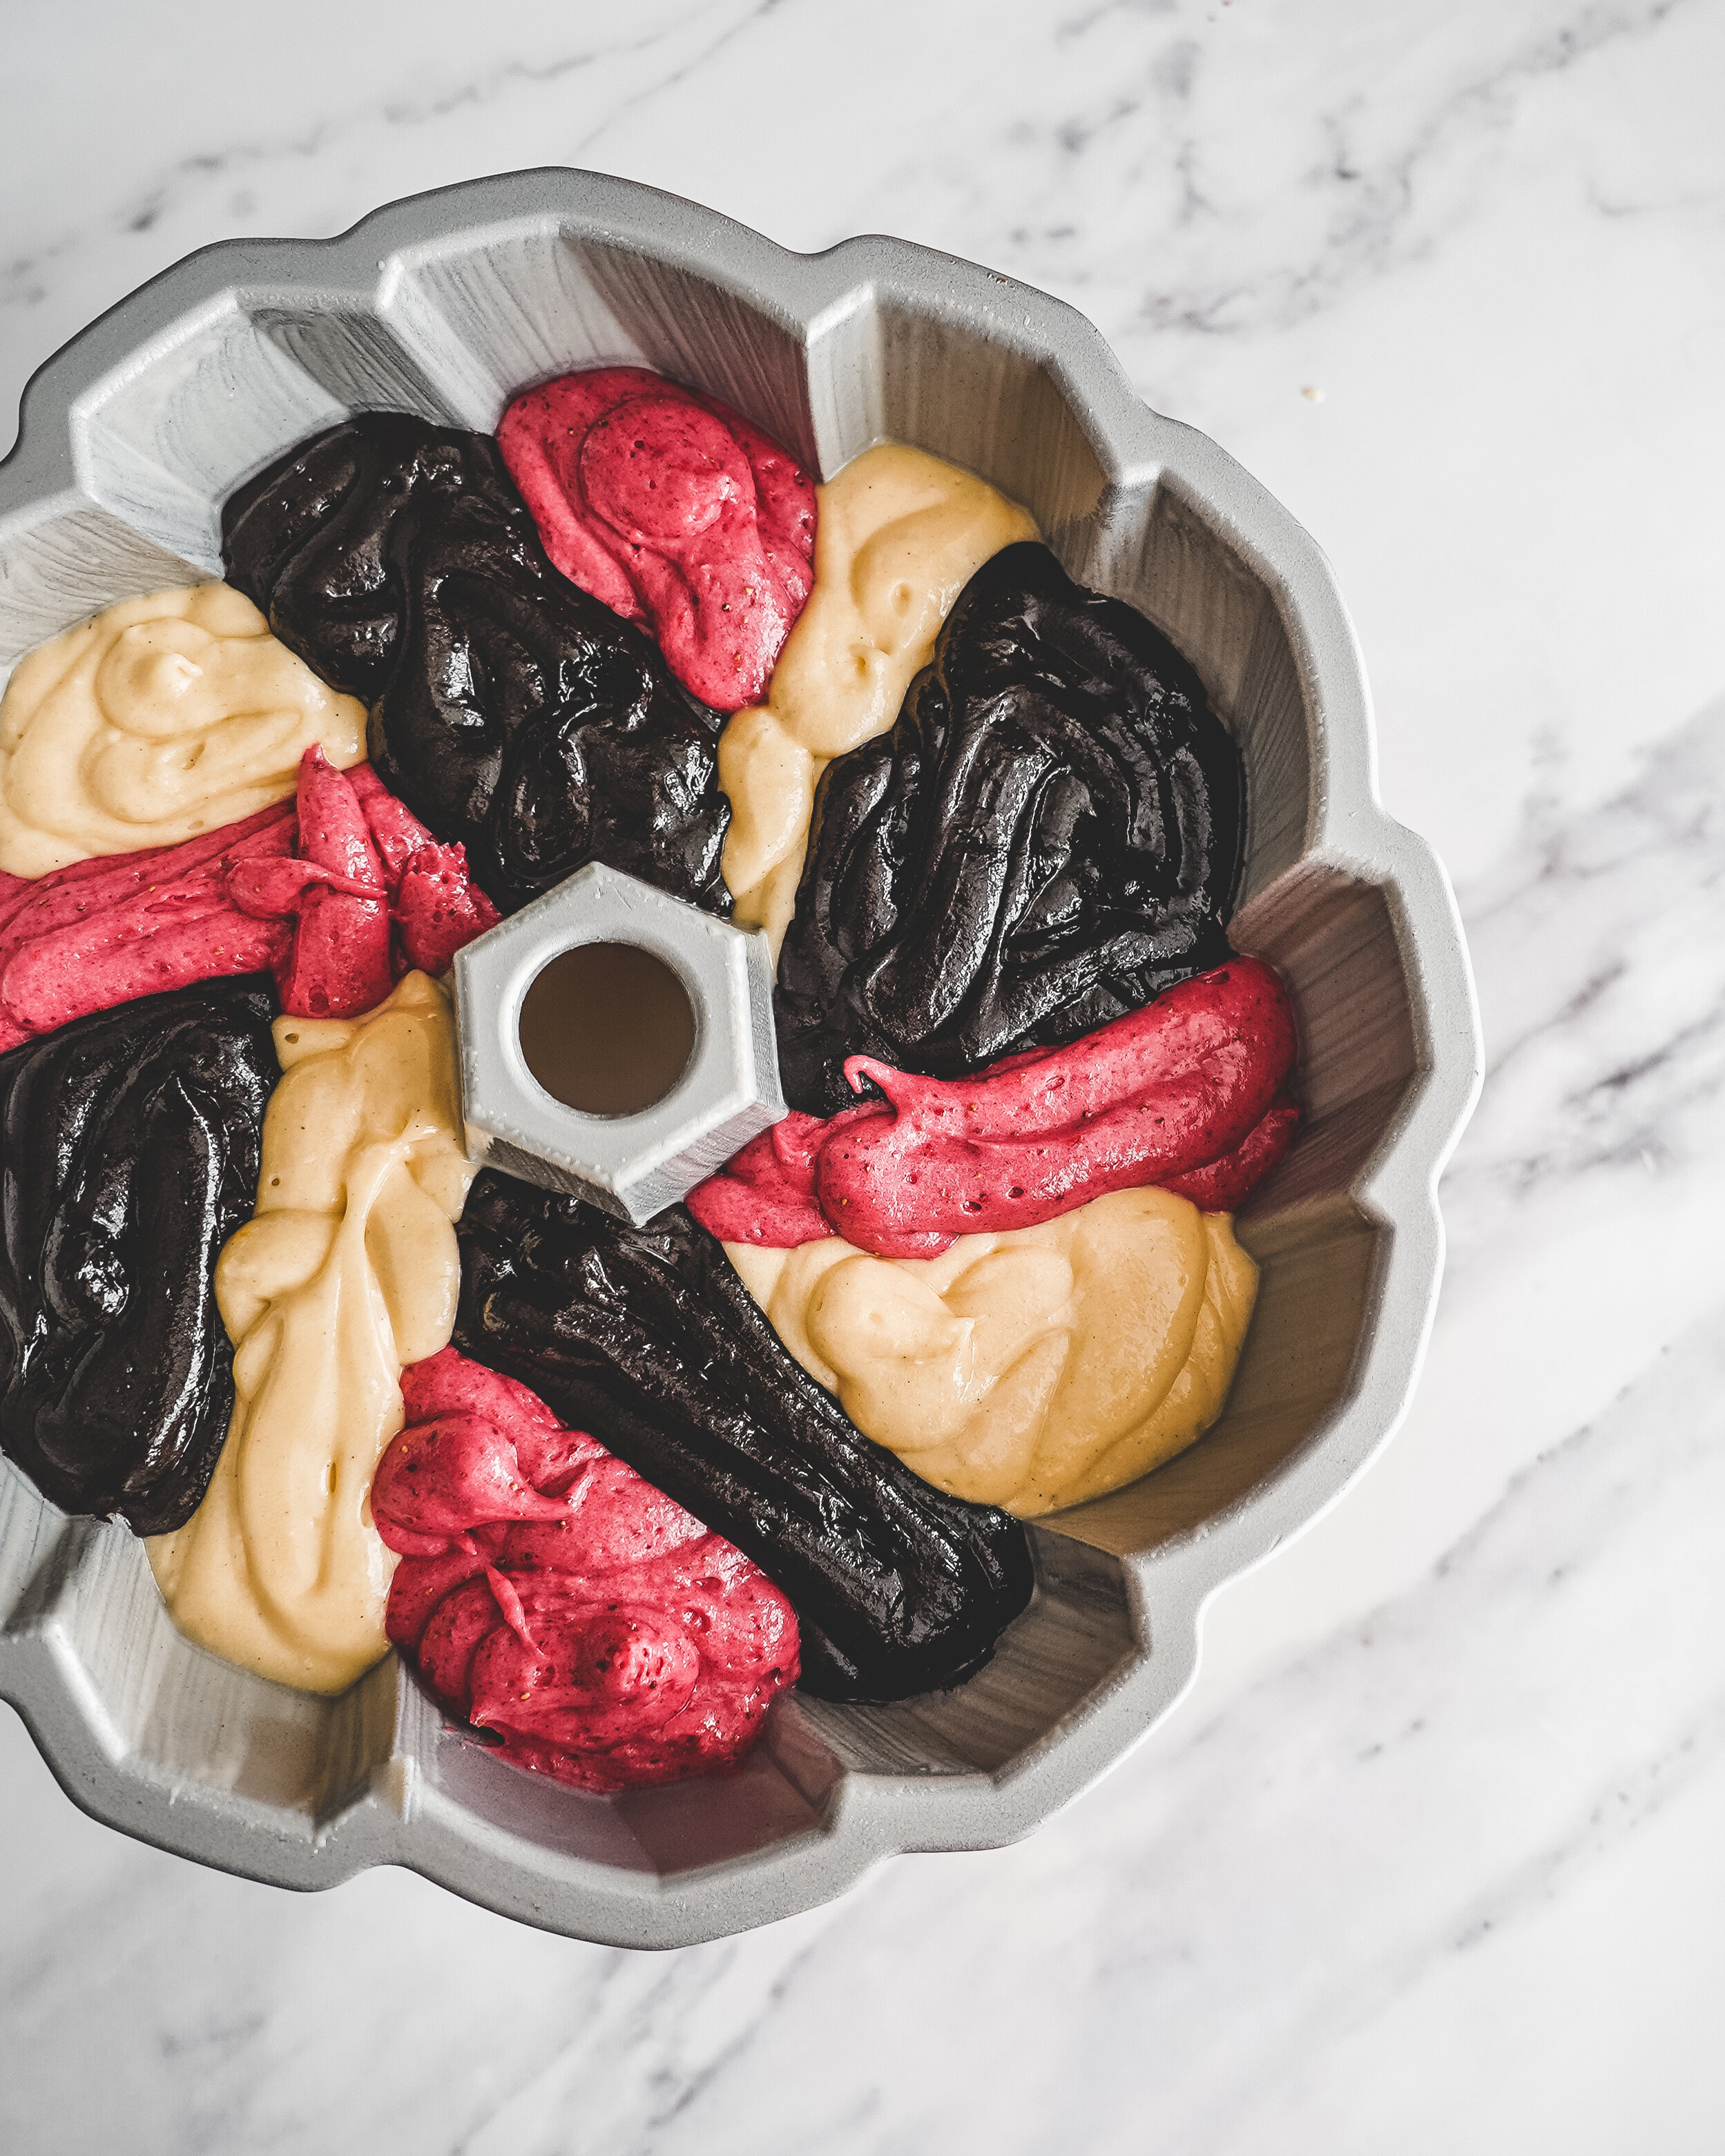
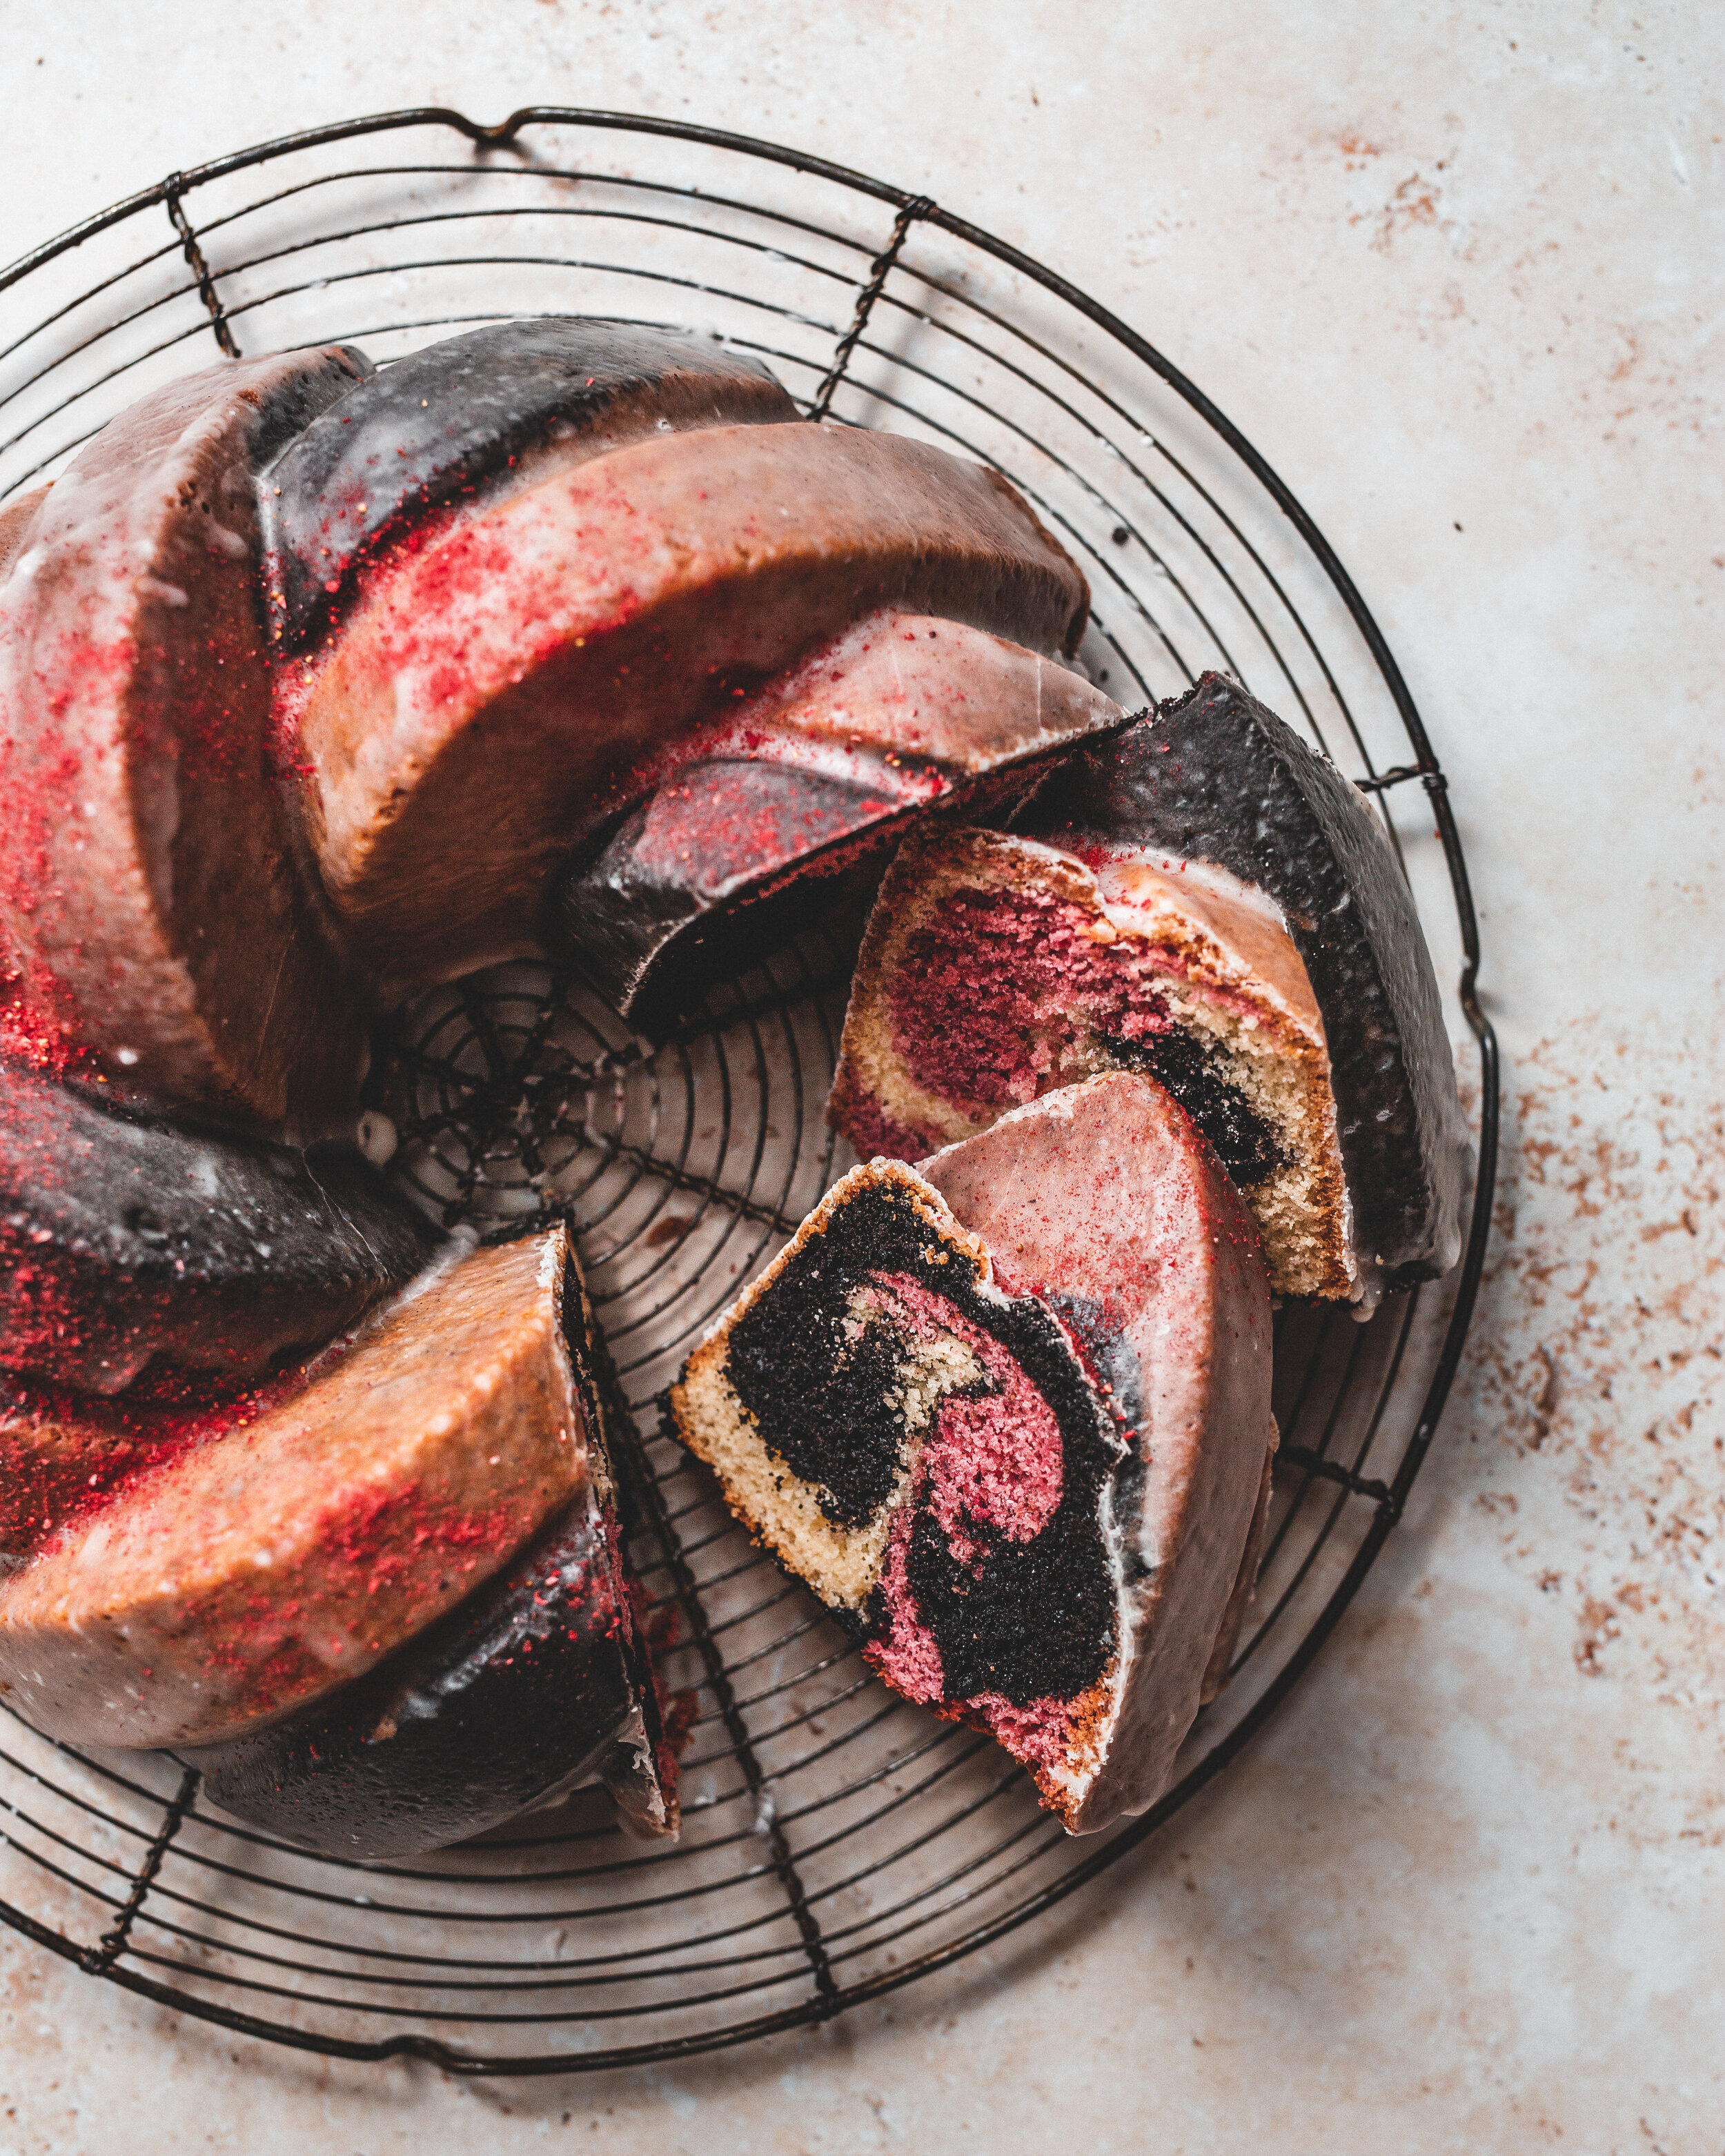
The anniversary Bundt® pan has very distinct sections so I carefully add a different batter to each section so that when the cake is turned out it has a distinctive design. Inside the cake something special happens. Whilst the outside stays distinct in its separation of colours inside the batters naturally swirl together giving a classic marble cake look without any actual swirling. To give the cake a little sparkle, a little finishing touch, the cake is brushed with a thin icing sugar glaze, that gives it an almost doughnut like glaze, thin and translucent and which shatters as it is cut through. 

If you are in the UK the 75th Anniversary Bundt® Pan is available here

Nordicware 75th-16.jpg


Neapolitan Marble Bundt Cake
Serves 15

Base Batter
340g unsalted butter, room temperature
450g caster sugar
6 large eggs
2 tsp vanilla extract

Chocolate Batter
85g plain flour
50g cocoa powder
1 tsp baking powder
1/2 tsp fine sea salt
40ml sour cream

White Chocolate and Raspberry Batter
250g plain flour
2 tsp baking powder
1 tsp fine sea salt
80ml sour cream
75g white chocolate, finely chopped
3 tbsp freeze dried raspberry powder
A little red gel food colouring

Prepare your bundt pan, brushing with a thin layer of cake goop, or brushing with softened butter and dusting with a thin layer of flour (read my guide on ensuring your bundt cake doesn’t stick here)

Place the white chocolate into a heatproof bowl and set over a pan of simmering water and heat, stirring occasionally, until fully melted. Remove from the heat and set aside whilst you prepare the cake. 

Place the butter and sugar into a large bowl and using an electric mixer beat on medium speed for about 5 minutes or until light and fluffy. Add in the eggs one at a time, beating until fully combined before adding another. Finish by briefly mixing in the vanilla. 

Scrape one third of the batter into a separate bowl (top tip: weigh the bowl you want to make the batter in before you start. This way you can simply weigh the bowl with the batter, deduct the bowl weight and then can easily find the weight of the batter). To this third add the ingredients for the chocolate batter, mixing until a smooth cake batter is formed. Into the remaining two thirds add everything for the white chocolate and raspberry batters, except the melted chocolate, raspberry powder and food colouring, mixing to form a smooth cake batter. Take this batter and divide again into two equal portions. To one mix through the melted chocolate and to the other mix in the raspberry powder and a little food colouring to make a vibrant pink. 

To portion the batter into the tin you have two choices, you can spoon the batters into the tin trying to keep each batter neatly inside each section of the tin, alternating the colours as you go, or if you want the neatest possible finish, you can use piping bags. Whichever method you choose add the batter in slowly, little by little, gradually increasing the height, which will help ensure a clean design on the outside of the cake. You can of course simply dollop in the batter in a random fashion if you want to keep things simple.

Nordicware 75th-12.jpg

Before you bake the cake give the pan a couple sharp taps on the worksurface so that the batter fills every nook and cranny of the pan. Pop the cake into the oven for about 55 minutes or until a skewer inserted into the cake comes out clean. Remove the pan from the oven and set onto a wire rack to cool for 10 minutes before inverting the cake and allowing it to cool fully. If you are opting to make the vanilla glaze make this before turning the cake out and use as soon as the cake has been removed from the pan whilst still hot. 

Serve once fully cooled. The finished cake will keep for 2-3 days if kept well covered. 

Nordicware 75th-11.jpg

Vanilla Glaze 
150g icing sugar
2 + 1/2 tbsp milk
1 tsp vanilla bean paste
Small pinch of salt.

Add the icing sugar, 2 tbsp of milk, the vanilla and salt to a small bowl and mix together to make a smooth glaze. The finished texture wants to be on the thin side and fairly runny, you may need to add another 1/2 tbsp of milk to get to this texture. 

Whilst the cake is still hot from the oven use a pastry brush to coat the cake in the glaze. I add the glaze now as the heat from the cake makes the glaze set and turn slightly translucent almost like the glaze on a classic ring doughnut. 

In Bundts, Cakes Tags bundt, neapolitan, marble, pound cake, nordicware
2 Comments
  • Recipes
  • Older
  • Newer

Twitter

  • Was 8 original films, 3 spin off films, a two part play not enough. Can we have something new. https://t.co/cBZdGEGeyv
    Apr 4, 2023, 1:46 PM
  • RT @deliciousmag: Cacio e pepe, but make it buns! These seriously cheesy bread rolls from @TheBoyWhoBakes are inspired by his favouri… https://t.co/oDZlaDgnN2
    Apr 2, 2023, 11:08 AM
  • RT @TheDailyShow: Congrats to Donald Trump on finally winning a majority of votes! https://t.co/ezP55HZgl0
    Mar 31, 2023, 12:43 AM

Instagram

This weeks bonus recipe, for subscribers to my newsletter, is this gorgeous sour cherry and coconut gateau basque. The crust is a buttery cross between pastry and cake, think a cakey cookie. The filling is a layer of sour cherry topped with a rich coconut custard. A real fun one to make too! Link to my newsletter can be found in my bio - #gateaubasque #pastrycream #coconut #sourcherry
In this months @olivemagazine (out today) the team came and photographed my petit kitchen and we talked about how we put our stamp on the place, without spending a fortune. We hated the bland kitchen that we inherited but, as it was relatively new an
In this months @olivemagazine (out today) the team came and photographed my petit kitchen and we talked about how we put our stamp on the place, without spending a fortune. We hated the bland kitchen that we inherited but, as it was relatively new and in good condition, it felt a waste to rip it out and we also didn’t want to spend the money it would take to rip out the whole thing and replace it (it’s a howdens shell so we could have done something cheaper like @plykeakitchens @holte.studio @madebyhusk) so instead I painted all of the cabinets, using @makeitrustoleum kitchen cabinet paint, to give it some personality and lighten the whole thing. Check out the magazine for the full run down. - #kitchendesign #kitchenremodel #rustoleumcabinettransformations #rustoleumkitchencupboardpaint #kitcheninspiration #theboywhobakes #olivemagazine
Are you making scones all wrong? Maybe, maybe not? But I do want to show you how I make them! This recipe is based on the method I learnt at @belmondlemanoir 12 years ago when I did a stage, and it makes the absolute lightest scones. And shock horror, it involves kneading the dough, albeit very lightly. You can get the full recipe in this weeks newsletter (free) linked in my bio. - #scones #bakingday #worldbakingday #afternoontea #hightea #englishscones #clottedcream #creamtea #theboywhobakes
facebook
  • Contact

The Boy Who Bakes

Edd Kimber

facebook