The Boy Who Bakes

Edd Kimber
  • Home
  • Recipes
  • My Books
  • Blog
  • Recipe Index
  • About
  • Home
  • Recipes
  • My Books
  • Blog
  • Recipe Index
  • About

Recipes

  • All
  • baking
  • Biscuits and Cookies
  • Breads and Quickbreads
  • Bundts
  • Cakes
  • Chocolate
  • Dessert
  • drinks
  • Holidays
  • Pastry
  • Scones and Quickbreads

Molasses Spice Sandwich Cookies with Cream Cheese Frosting

Edd Kimber December 3, 2022

The following recipe is sponsored by Wilfa

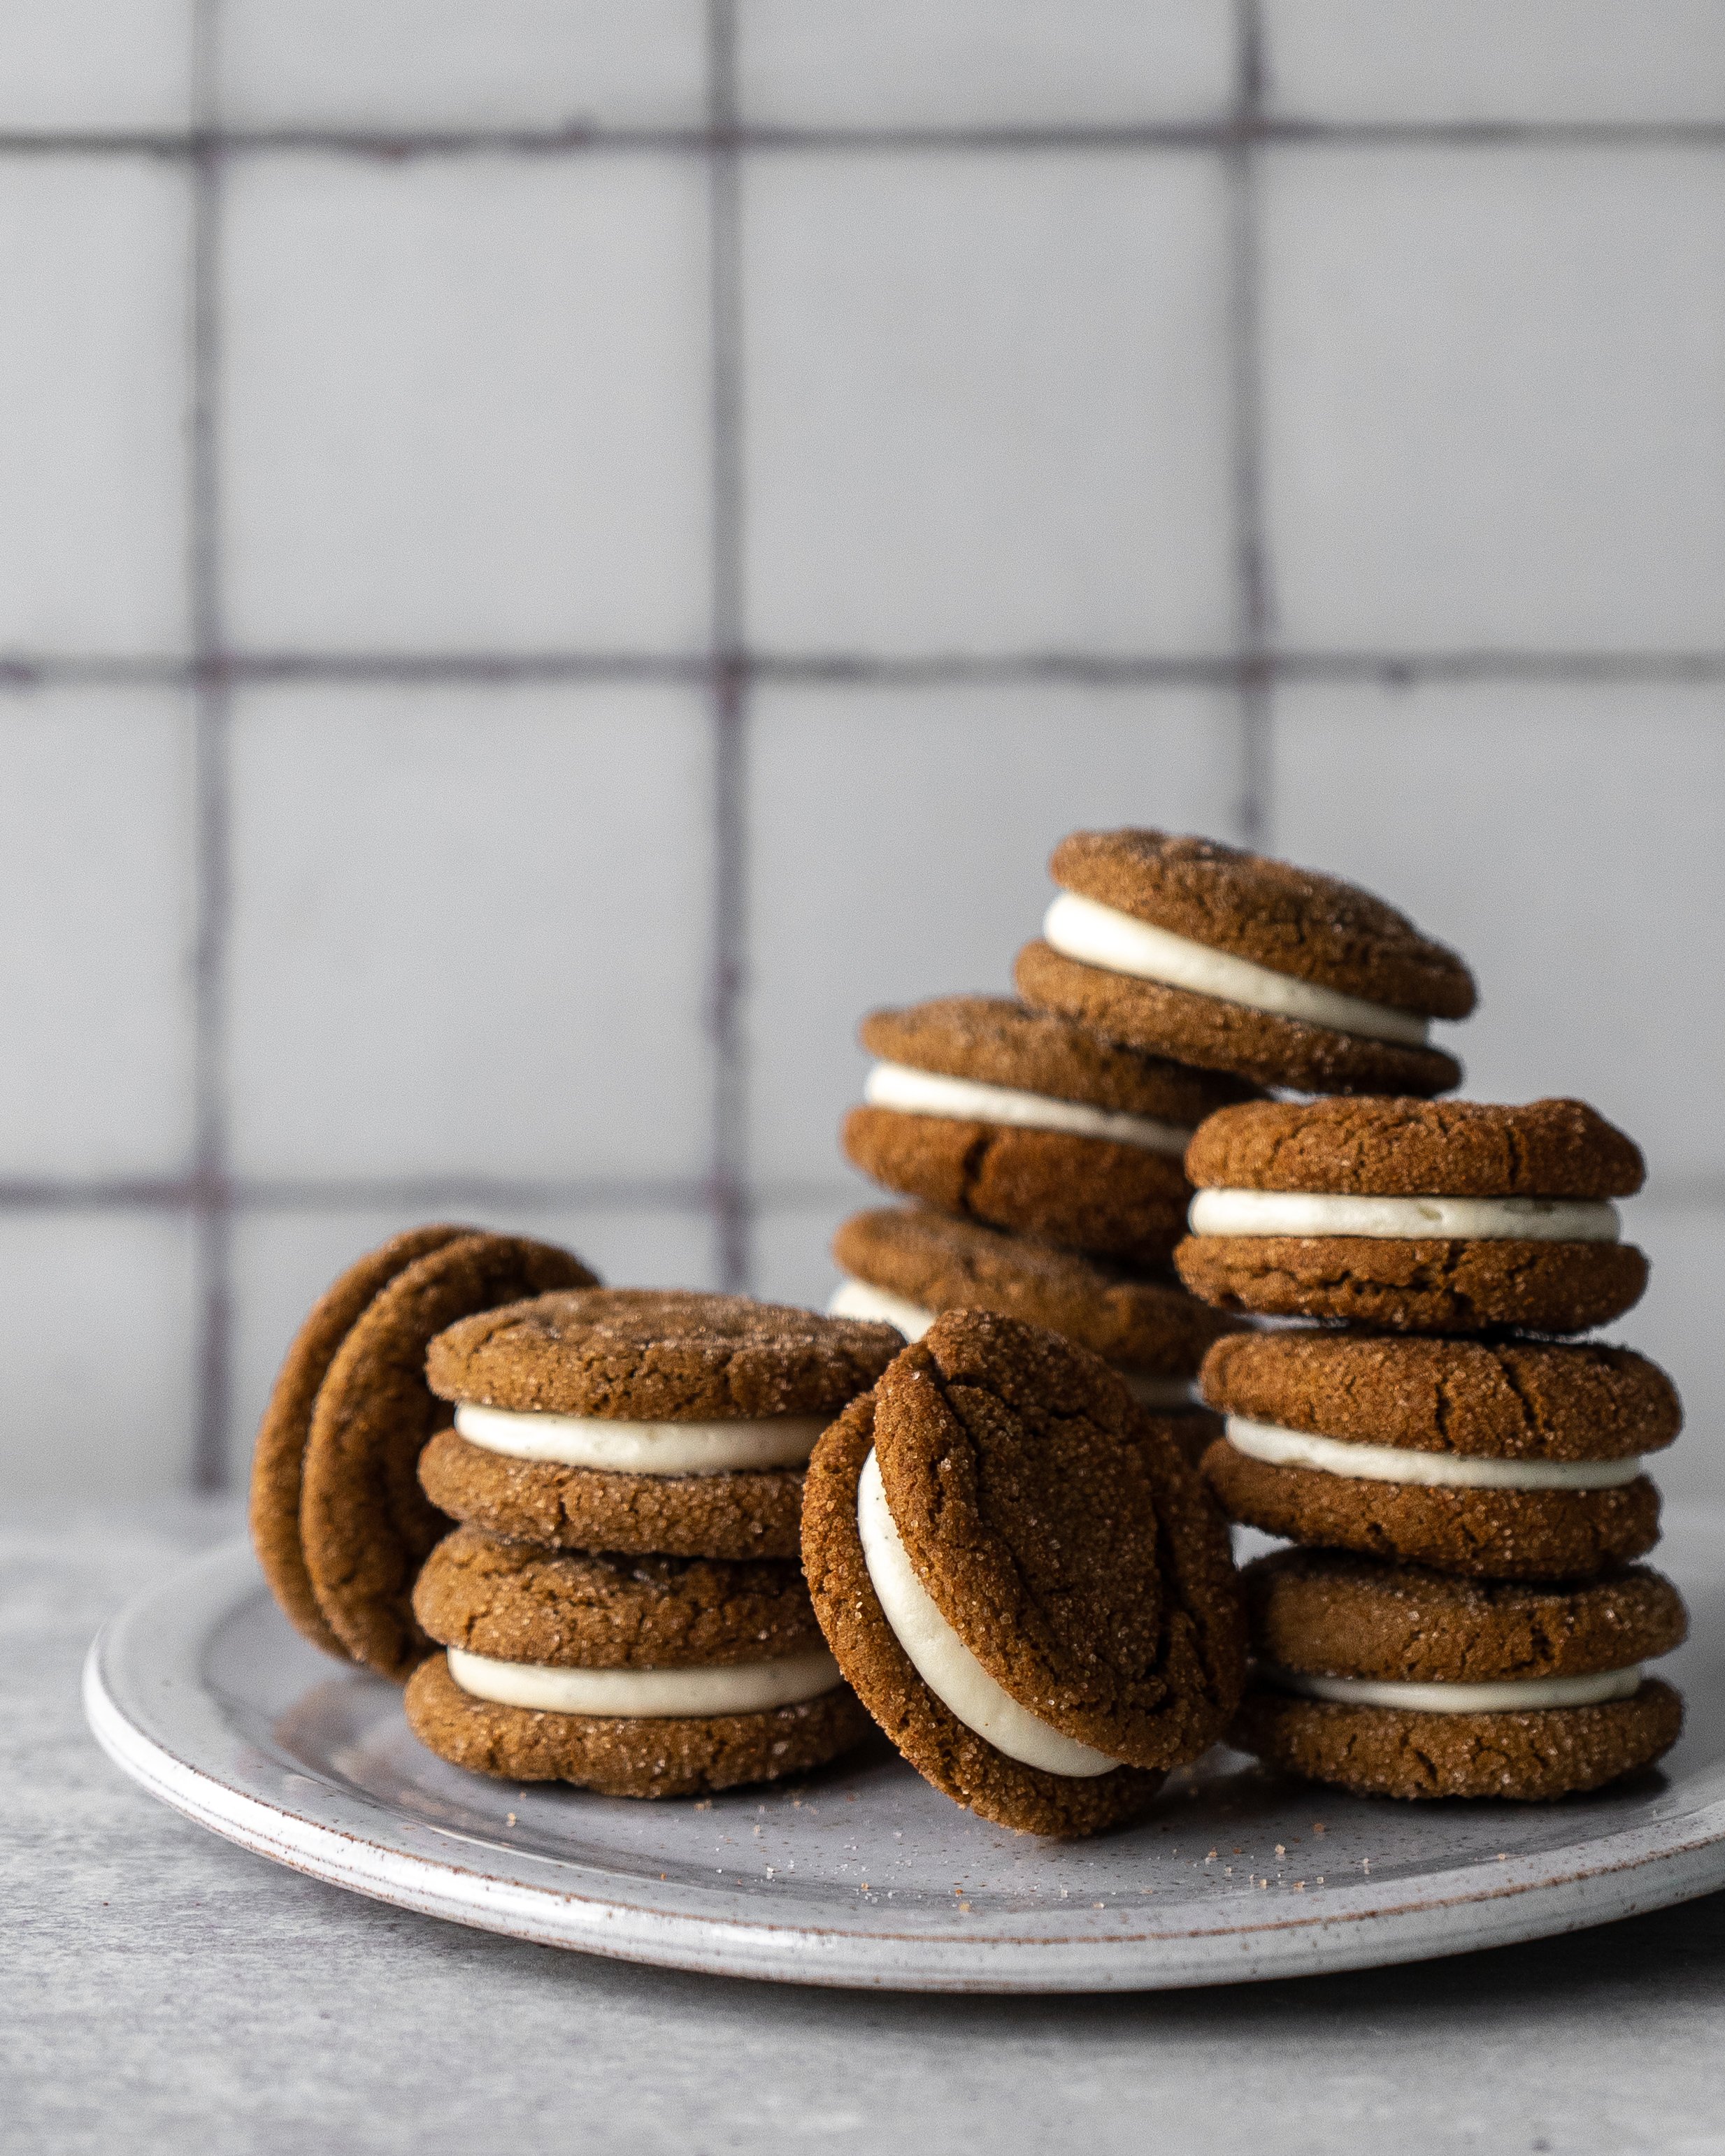
Soft Gingerbread Sandwich Cookies with Cream Cheese Frosting
Makes 15

These incredibly simple sandwich cookies are the epitome of wintery baking, full of warming spices like nutmeg and clove and made more intense with the addition of treacle. The dough is made with melted butter which makes the recipe quicker and easier to make but also means the cookies work wonderfully well with whatever style of mixer you have, an electric hand mixer would be ideal. If you’re in the market for a hand mixer, or maybe looking for a Christmas present idea for the baker in your life, the Wilfa Smooth Mix Hand Mixer is a great option. Firstly its incredibly sleek and stylish but more importantly its also incredibly efficient.

When I used to run macaron classes, I used to use hand mixers for the students, because I couldn’t afford and couldn’t store 10 big stand mixers. The hand mixers I used were about £40-50 each and they only ever seemed to last a few months worth of classes, obviously a total waste of money. The Wilfa hand mixer on the other hand is built to last and is a joy to use. The mixer has five speeds and a great slow start function meaning it doesn’t immediately power up to full speed, which means less flour or icing sugar flying all over your kitchen. This hand mixer has  a retail price of £70 but with my discount code THEBOYWHOBAKES it would only cost £56!

125g unsalted butter, melted
175g light brown sugar
75g black treacle
1 large egg
300g plain flour
1 tbsp ground ginger
1/2 tsp freshly grated nutmeg
1/4 tsp black pepper
1/8 tsp ground clove
1 tsp baking soda
1/2 tsp salt

Cream Cheese Frosting
50g unsalted butter, room temperature
125g icing sugar
1 tsp vanilla bean paste
50g full fat cream cheese, room temperature
Pinch of salt

To make the cookie dough add the butter, sugar and molasses to a large bowl and beat together with a Wilfa Smooth Mix - Hand Mixer, for a couple minutes until pale. Add the egg and beat together for a couple minutes until smooth and combined. Add the flour, spices, baking soda and salt and mix on low speed until a stiff dough is formed. Refrigerate the dough for at least four hours or until firm. At this point the dough can be refrigerated for up to 5 days before baking.

Preheat the oven to 180ºC (160ºC Fan) and line two baking trays with parchment paper.

Roll into tablespoon sized balls, I like to use a small tablespoon sized cookie scoop to portion the dough and then roll by hand to make neat round balls. Roll the balls in granulated sugar and then set onto the prepared baking trays.

Bake for 10 mins until the cookies are crinkly and flattened but still a little domed. Remove from the oven and allow to cool on the sheet tray for 10 minutes before transferring to a wire rack to cool completely. When removed straight from the oven the cookies will be very soft so don’t try and more them until the 10 minutes are up. The cookies will flatten slightly more as they cool leaving you with a chewy edge and a soft centre. Kept in a sealed container they’ll keep for 2-3 days.

To make the cream cheese frosting add the butter to a bowl and using the Wilfa hand mixer beat until soft and creamy. Add in the icing sugar a little at a time and beat on low speed until the frosting is smooth. Once all of the sugar has been mixed in turn up the mixer and beat for about 5 minutes or until light and fluffy. Add in the vanilla, cream cheese and salt and mix briefly just until a smooth mixture has formed.

Spoon or pipe the cream cheese frosting onto the base of half the cookies and sandwich together with a second cookie. Once sandwiched together the cookies will keep for up to 3 days but will slowly soften as they sit.

In Biscuits and Cookies Tags molasses, black treacle, cream cheese frosting, spice cookie, sandwich cookies
1 Comment
black and white cookies made with black cocoa powder and discs of white chocolate, sprinkled with salt

Inside Out Chocolate Chip Cookies

Edd Kimber April 20, 2022

It’s a bit of a rarity these days that I actually get to enjoy making other peoples recipes (something I am trying to do a bit more of at the moment, to bake in a way that is purely about enjoyment, without it becoming work) but for the recent Bake For Ukraine bake sale I wanted to take a new cookie for my menu but I didn’t have the time to really work on anything new so instead turned to my cookbooks to find something I thought might work. The idea I wanted to go for was an inside out chocolate chip cookie, a dark chocolate cookie dough with white chocolate chunks. In the back of my head, I thought the brilliant book Sister Pie had something similar and thankfully I was right.

The cookie from the book is known as a double (okay triple) chocolate chip cookie and I thought it could easily be adapted to fit my idea. In the book the cookie has a pretty quick turnaround, the dough is baked as soon as it is made, no resting, just instant gratification. The recipe looked good to me but I needed something I could prep in advance so I did a quick test. I wanted to be able to make the dough a couple days in advance and then bake it as close to the bake sale as possible. I could either scoop the dough once chilled, as I often do with my cookie recipes, or I could roll it once made and chill it in individual portions. The chilled dough sets very firm so scooping or rolling it wasn’t an option so instead I opted to make it slice and bake style. This is pretty unusual for this type of cookie, normally being a technique you would use with something more akin to a shortbread. This technique also led to an interesting development when it came to flavour. When the cookies were sliced, and because I was using large discs of white chocolate, there was lots more chocolate peeking through the two sides of the cookie than when I made it according to the recipe. This had an unexpected benefit, the chocolate on the base of the cookie caramelised as it baked, meaning the flavour was a little less sweet and with more of a caramelised flavour, a double winner if you ask me.

If you want a cookie that has a sweet and salty contrast with just a hint of an oreo flavour, this recipe is for you. The edges become nice and crisp and the centres become the ideal form of chewy, this is a winner of a recipe and one I will surely make time and time again. 

Inside Out Chocolate Chip Cookies
Adapted from the book Sister Pie by Lisa Ludwinski

225g dark chocolate, roughly chopped
115g white chocolate, roughly chopped
225g plain flour
60g black cocoa powder*
1 1/2 tsp baking powder
1 tsp bicarbonate of soda
1 1/2 tsp fine sea salt
225g unsalted butter, room temperature
150g caster sugar
150g light brown sugar
2 large eggs
250g white chocolate*

*To achieve the intense black and white look the these cookies have you need to use black cocoa powder, a sub category of dutched cocoa powder. This type of cocoa powder is very easy to buy online (I use the brand DeZaan) but if you cant find it you can use traditional dutched cocoa powder, the look just wont quite be the same. The black cocoa is also what contributes to that hint of oreo flavour. For the white chocolate I like to large chocolate discs but if you only have access to bars chop them into irregular sized chunks and avoid using white chocolate chips. 

To make the cookie dough place the two types of chocolate into a bowl set over a pan of simmering water and heat, stirring occasionally, until fully melted. Remove from the heat and set aside for 10 minutes to allow to cool. 

In a large bowl, whisk together the flour, cocoa powder, baking powder, bicarbonate of soda and salt. If using the black cocoa a good whisk should be fine as the black cocoa is lower in fat and doesn’t tend to clump. If using a regular dutch cocoa you may want to sieve this to ensure a lump free mixture. In a large bowl, using an electric mixer, cream together the butter and sugars, beating until light and fluffy, about 5 minutes. Add the eggs one at a time, beating until fully combined before adding the second. Pour in the cooled chocolate mixture and mix until the batter is uniform. Add the flour mixture and on low speed mix together just until a dough is formed. Add the second amount of white chocolate and mix until evenly distributed.

Scrape half the dough onto a large sheet of clingfilm and form into a rough log. Roll the dough in the clingfilm and use your hands to roll into a log that is about 2 inches thick. The dough is soft at this point so the shape wont be perfect. Transfer the log of dough to the fridge and repeat with the second half. Once the dough has had a little time to chill and firm up I like to take it out of the fridge and roll it to refine the shape and make it more evenly round. Chill until firm and ready to use, the dough will keep for about 3-4 days before baking. 

To bake, remove the dough from the fridge and allow to sit at room temperature whilst your oven preheats to to 180ºC (160ºC Fan). Line two large baking trays with parchment paper. 

Using a very sharp knife cut the cookie dough into pucks about 1 inch thick (the cookies should weigh around 60g each, I like to weigh my first cookie puck to ensure I am cutting them the right size). You may find the cookies break into pieces when sliced but don’t worry just press them back together and the’ll be fine. Place 6 cookies onto each of the prepared trays, spacing well apart as they spread. Sprinkle the cookies with a little flaked sea salt and bake in the oven for about 15-16 minutes. They’ll still be soft when they come out of the oven and will set up as they cool. 

After a few minutes transfer the cookies to a wire rack to cool completely. Repeat with the remaining cookie dough. 

Kept in a sealed container these will keep for 2-3 days. The dough can also be frozen for up to two months before baking. 


In Biscuits and Cookies Tags black cocoa, inside out, white chocolate, cookie, cookies, sister pie, double chocolate
2 Comments
PBJ Dodgers-6.jpg

PBJ Jammy Dodgers

Edd Kimber September 28, 2021

PBJ Jammy Dodgers
Sponsored By Lyle’s Golden Syrup

Jammy Dodger, a supermarket classic, a favourite of the biscuit tin. Two crisp biscuits sandwiched together with jam, simple, nostalgic, delicious. I say delicious but a shop bought biscuit like this can almost always be made better at home, using better tasting ingredients and less industrial textures. This recipe is clearly not for a classic dodger but is in the form of and inspired by the classic biscuits. The cookie itself has added flavour and texture in the form of salted peanuts. The dough also uses a little Lyle’s Golden Syrup which adds a warm caramel tone to the biscuit which goes wonderfully with the peanuts.

The filling is a classic jam but with added jazz hands in the form of a peanut butter buttercream. The flavour is balanced nicely again with the addition of the Lyle’s Golden Syrup which also adds a really nice creamy texture to the filling. 

Do These Freeze?

Sandwich cookies like this are not the best candidates for freezing once baked but the dough itself can be frozen for up to a couple months.

Do you have to use peanuts?

I know some people are allergic to peanuts or just don’t like them and the good news is you can happily change the nut to a different flavour in the cookie and for the filling you could either make a traditional buttercream or simply use jam without a secondary filling.

What Type of peanut butter should you use to bake with?

Generally when it comes to baking it is better to use a commercial smooth peanut butter, unless otherwise advised. Natural peanut butter, the type that sometimes separates and has a layer of oil on top, can cause issues with texture and doesn’t always blend with other ingredients very well.

PBJ Dodgers-9.jpg

Tips on Rolling

This a dough with a high percentage of butter which can mean the dough is a little tricky to handle. To get around this make sure the dough has been thoroughly chilled before using. When you take the dough out of the fridge it will be cold and firm and hard to roll. Instead of leaving it for 10 minutes and then rolling (which can lead to a soft and sticky dough) simply bash it a little with a rolling pin. This might seem counter intuitive but this action makes the dough pliable without warming it up too much, making it easier to roll before the butter softens too much. If you are worried about the dough becoming too sticky or warm you can also roll the dough between parchment paper and transfer to the fridge if it becomes too hard to handle

PBJ Dodgers-12.jpg

PBJ Jammy Dodgers
Makes 25-30

Peanut Biscuit
325g plain flour
75g salted peanuts
150g caster sugar
225g unsalted butter, diced and chilled
1 large egg
1 large egg yolk
50g Lyle’s Golden Syrup

Peanut Butter Filling
100g unsalted butter, room temperature
100g smooth peanut butter
150g icing sugar
50g Lyle’s Golden Syrup
150g raspberry jam

To make the biscuit dough add a little of the flour and the peanuts to the bowl of a food processor and pulse until the peanuts are finely ground. Add the remaining flour and salt and process briefly to combine. Add the butter and pulse until the mixture resembles breadcrumbs. In a jug whisk together the egg, yolk and the Lyle’s Golden Syrup, whisking together until the syrup has dissolved into the egg. Pour this into the food processor and pulse just until the dough starts to clump together.

Turn the dough out onto a lightly floured work surface and use your hands to gently form into a uniform dough. Divide into two equal portions and press into discs, wrapping in cling film and then refrigerating until firm.

PBJ Dodgers-10.jpg
PBJ Dodgers-11.jpg

When you’re ready to roll out the cookies preheat the oven to 160C (140C fan) and line a couple baking sheets with parchment paper. On a lightly floured work surface roll out a portion of dough until it is about 3mm thick and then using a 7cm round cookie cutter cut as many cookies as possible, setting the scraps aside. Place the cookies onto the prepared baking trays and refrigerate for 15 minutes. Repeat this process with the second portion of dough. Take the cookies from the fridge and use a 3cm round cookie cutter to remove the middle from half of the cookies. Gently reform the scraps of dough into a ball and then refrigerate as before whilst you bake off the cookies. This dough can be rolled out again for more cookies.

Bake in the preheated oven for about 15-18 minutes or until just starting to turn golden on the edges. I bake the cookies lower than usual as it crisps the cookies evenly throughout without over browning them. Allow to cool on the baking tray for a couple minutes before transferring to a wire rack to cool completely.

To make the peanut butter filling place the butter and peanut butter into a large bowl and using an electric mixer beat together until smooth and creamy. Add the icing sugar and Lyle’s Golden Syrup along with a small pinch of salt and beat together until light and fluffy. If the mixture feels a little stiff add a tablespoon or so of double cream.

PBJ Dodgers-7.jpg

To assemble the cookies pipe a ring of the peanut butter filling around the edge of each base cookie and spoon a little jam into the centre. If you like a little added texture you can also sprinkle with a little extra chopped peanuts. Dust all the ring cookies with icing sugar then place one on top of each bottom cookie, sandwiching together. Once assembled the cookies are best within a day or two.

In Biscuits and Cookies Tags sandwich cookie, jammy dodger, linzer cookie, pbj, peanut butter, sable, golden syrup
Comment
black cocoa pb cookies-1.jpg

Black Cocoa Peanut Sandwich Cookies

Edd Kimber May 24, 2021

These cookies are so ridiculously simple and so delicious. The cookie element is based around my melting moment recipe, a melt in the mouth, incredibly tender cookie. I use black cocoa but you can also use a regular dutched cocoa powder if thats what you have on hand. The balls of cookie dough are rolled in salted peanuts and pressed into flat discs and then baked. The filling is a simple white chocolate ganache mixed with peanut butter. Its the sort of cookie you want mid morning with a strong cup of coffee. 

Before we get to the recipe lets talk about cocoa powder for a second. Cocoa powder comes from the cocoa pods and specifically the beans inside those pods, so far so obvious. The beans are fermented and then dried. Generally they are then roasted (unless the product is destined to be used for ‘raw’ chocolate or cocoa powder but I wont be talking about that process here). The beans are then cracked open and the nibs are ground into what is called cocoa liquor and then, using a hydraulic press, the liquor is pressed under great pressure to extract most of the cocoa butter leaving behind a product known as a cocoa cake. This cake is dried once again and then ground into cocoa powder. 

Why then is there such a variety in cocoa powders, what is the difference between natural, dutched and black? Natural is the cocoa powder made as above with no additional processing, it is a light almost dusty brown colour and is bright and acidic in flavour. Dutched cocoa goes through an alkalisation process which lessens the acidity and makes a deeper richer tasting cocoa powder with a darker colour. In the UK and Europe this is traditionally the main type of cocoa powder available although natural and raw cocoa have become more popular over the last few years. Black cocoa, with its characteristic charcoal black colour, is a variation of dutched cocoa powder, the process of alkalisation taken to its limit to make an intensely dark and slightly bitter cocoa powder, if you’ve ever eaten an oreo you’ve had black cocoa. I like black cocoa for its colour and its flavour but its not suitable for everything, the flavour isn’t a pronounced chocolate flavour its much more roasted than that so if you want classic chocolate flavours I would a traditional dutched powder.

Whenever I use black cocoa I am always asked where to buy it as in the UK it is a relatively unknown product, at least until recently. I would always bring some home from the US when there on holiday or for work, King Arthur Baking sell my go-to version. Someone imports that brand into the UK but it is criminally expensive so I am thankful that a few new brands have sprung up to make it easier, and cheaper, to buy. Van Houten was the first brand more widely available, selling on Amazon, but I am yet to test this brand out. When I buy the cocoa myself I get it from De Zaan, a commercial cocoa powder producer that have recently started selling in a more direct to customer facing way. You can find there cocoa powder on Amazon and on from HB ingredients. 

Before we get to the recipe a brief note on peanut butter. When baking with peanut butter you need to be careful about what style you use. Generally you want to be using a commercial peanut butter and this is for the simple reason that it is less likely to split creating odd textures in the finished recipes. By all means you can use a natural peanut butter but be aware the result might not look like you envisioned or like the images of the recipe. 

Black Cocoa Peanut Melting Moments with Peanut Butter Ganache
Makes 15 Sandwich Cookies

Cocoa Melting Moments
250g unsalted butter, room temperature
1/2 tsp vanilla extract
200g plain flour
60g black cocoa powder
85g icing sugar
30g cornflour
175g salted peanuts, roughly chopped

Peanut Butter Ganache
100ml double cream
125g white chocolate
75g smooth peanut butter 

Preheat the oven to 160ºC (140ºC Fan) and line a couple baking sheets with parchment paper.

For the cookies place the butter into a large bowl and use an electric mixer to beat until soft and creamy. Add the vanilla and beat briefly to combine. In a separate bowl whisk together the flour, cocoa, icing sugar and cornflour. Add the flour mixture to thee butter mixture and mix on slow speed just until a dough is formed. 

Divide the dough into 20g portions and roll them into balls. Roll the balls in the chopped peanuts, your not looking to fully coat the balls just get a decent amount of peanuts on each cookie. Place the balls onto parchment lined baking trays leaving a little space between each cookie. Using a glass or measuring cup press each ball into a flat disc. Spraying the glass with a little oil can help prevent them sticking. 

black cocoa pb cookies-1-2.jpg

Bake the cookies in the preheated oven for about 20-25 minutes or until the edges are set and dry.

Remove the trays from the oven and allow the cookies to cool fully. 

To make the ganache place the chocolate and cream into a small saucepan and place over low heat. Stir constantly, making sure to scrape the bottom of the pan to prevent anything from scorching, until the chocolate has melted. Pour the ganache into a small bowl and stir to make sure everything is combined. Set aside for 10 minutes before adding the peanut butter and using a small whisk to combine into the ganache. The ganache needs to be a little cool before adding the peanut butter as the heat can make the mixture split. Refrigerate the ganache until thickened enough to hold its shape but still spreadable, 60-90 minutes. Pipe or spread a small amount of ganache onto half of the cookies and sandwich together with a second cookie. Refrigerate for 30 minutes or until the ganache has fully set. 

Kept in a sealed container these will keep for 3-4 days.

In Biscuits and Cookies, Chocolate Tags black cocoa, melting moments, sandwich cookies, ganache, white chocolate, peanut butter, peanuts, easy, easy baking
4 Comments
  • Recipes
  • Older
  • Newer

Twitter

  • Was 8 original films, 3 spin off films, a two part play not enough. Can we have something new. https://t.co/cBZdGEGeyv
    Apr 4, 2023, 1:46 PM
  • RT @deliciousmag: Cacio e pepe, but make it buns! These seriously cheesy bread rolls from @TheBoyWhoBakes are inspired by his favouri… https://t.co/oDZlaDgnN2
    Apr 2, 2023, 11:08 AM
  • RT @TheDailyShow: Congrats to Donald Trump on finally winning a majority of votes! https://t.co/ezP55HZgl0
    Mar 31, 2023, 12:43 AM

Instagram

This weeks bonus recipe, for subscribers to my newsletter, is this gorgeous sour cherry and coconut gateau basque. The crust is a buttery cross between pastry and cake, think a cakey cookie. The filling is a layer of sour cherry topped with a rich coconut custard. A real fun one to make too! Link to my newsletter can be found in my bio - #gateaubasque #pastrycream #coconut #sourcherry
In this months @olivemagazine (out today) the team came and photographed my petit kitchen and we talked about how we put our stamp on the place, without spending a fortune. We hated the bland kitchen that we inherited but, as it was relatively new an
In this months @olivemagazine (out today) the team came and photographed my petit kitchen and we talked about how we put our stamp on the place, without spending a fortune. We hated the bland kitchen that we inherited but, as it was relatively new and in good condition, it felt a waste to rip it out and we also didn’t want to spend the money it would take to rip out the whole thing and replace it (it’s a howdens shell so we could have done something cheaper like @plykeakitchens @holte.studio @madebyhusk) so instead I painted all of the cabinets, using @makeitrustoleum kitchen cabinet paint, to give it some personality and lighten the whole thing. Check out the magazine for the full run down. - #kitchendesign #kitchenremodel #rustoleumcabinettransformations #rustoleumkitchencupboardpaint #kitcheninspiration #theboywhobakes #olivemagazine
Are you making scones all wrong? Maybe, maybe not? But I do want to show you how I make them! This recipe is based on the method I learnt at @belmondlemanoir 12 years ago when I did a stage, and it makes the absolute lightest scones. And shock horror, it involves kneading the dough, albeit very lightly. You can get the full recipe in this weeks newsletter (free) linked in my bio. - #scones #bakingday #worldbakingday #afternoontea #hightea #englishscones #clottedcream #creamtea #theboywhobakes
facebook
  • Contact

The Boy Who Bakes

Edd Kimber

facebook