The Boy Who Bakes

Edd Kimber
  • Home
  • Recipes
  • My Books
  • Blog
  • Recipe Index
  • About
  • Home
  • Recipes
  • My Books
  • Blog
  • Recipe Index
  • About

Recipes

  • All
  • baking
  • Biscuits and Cookies
  • Breads and Quickbreads
  • Bundts
  • Cakes
  • Chocolate
  • Dessert
  • drinks
  • Holidays
  • Pastry
  • Scones and Quickbreads

Winter Coffee Brioche Buns

Edd Kimber November 17, 2023

This post is sponsored by Ozone Coffee UK

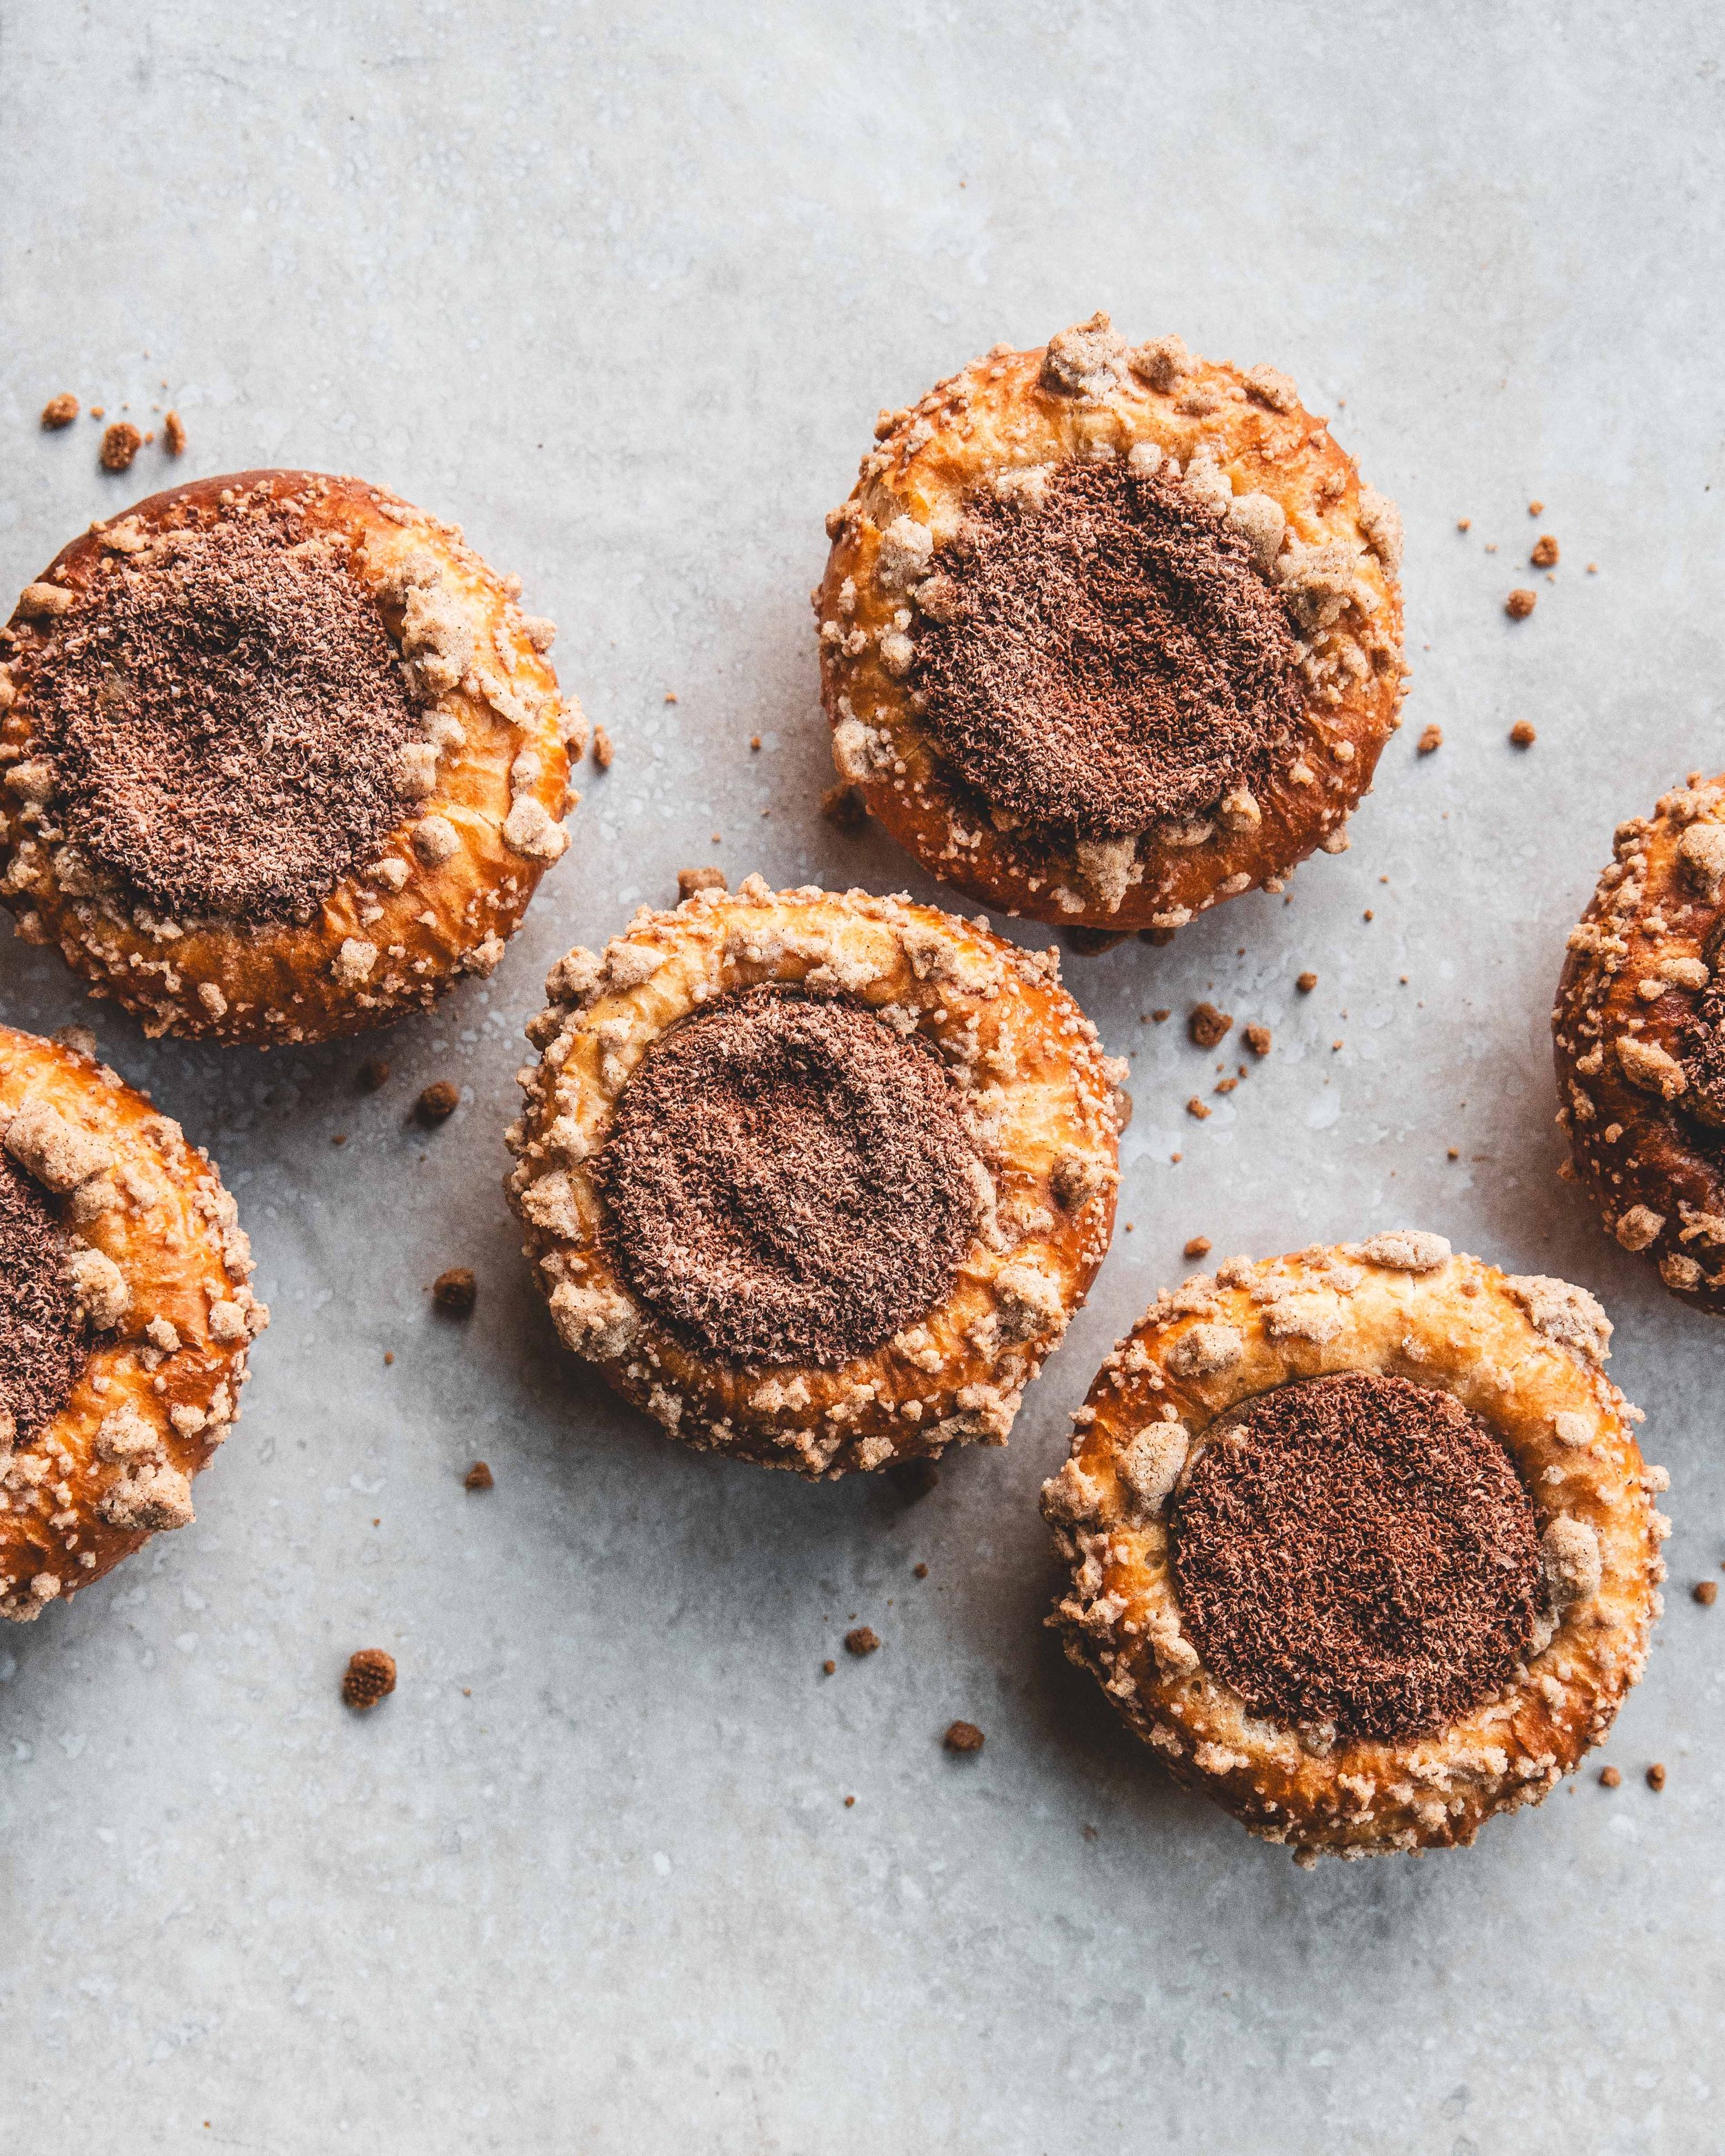
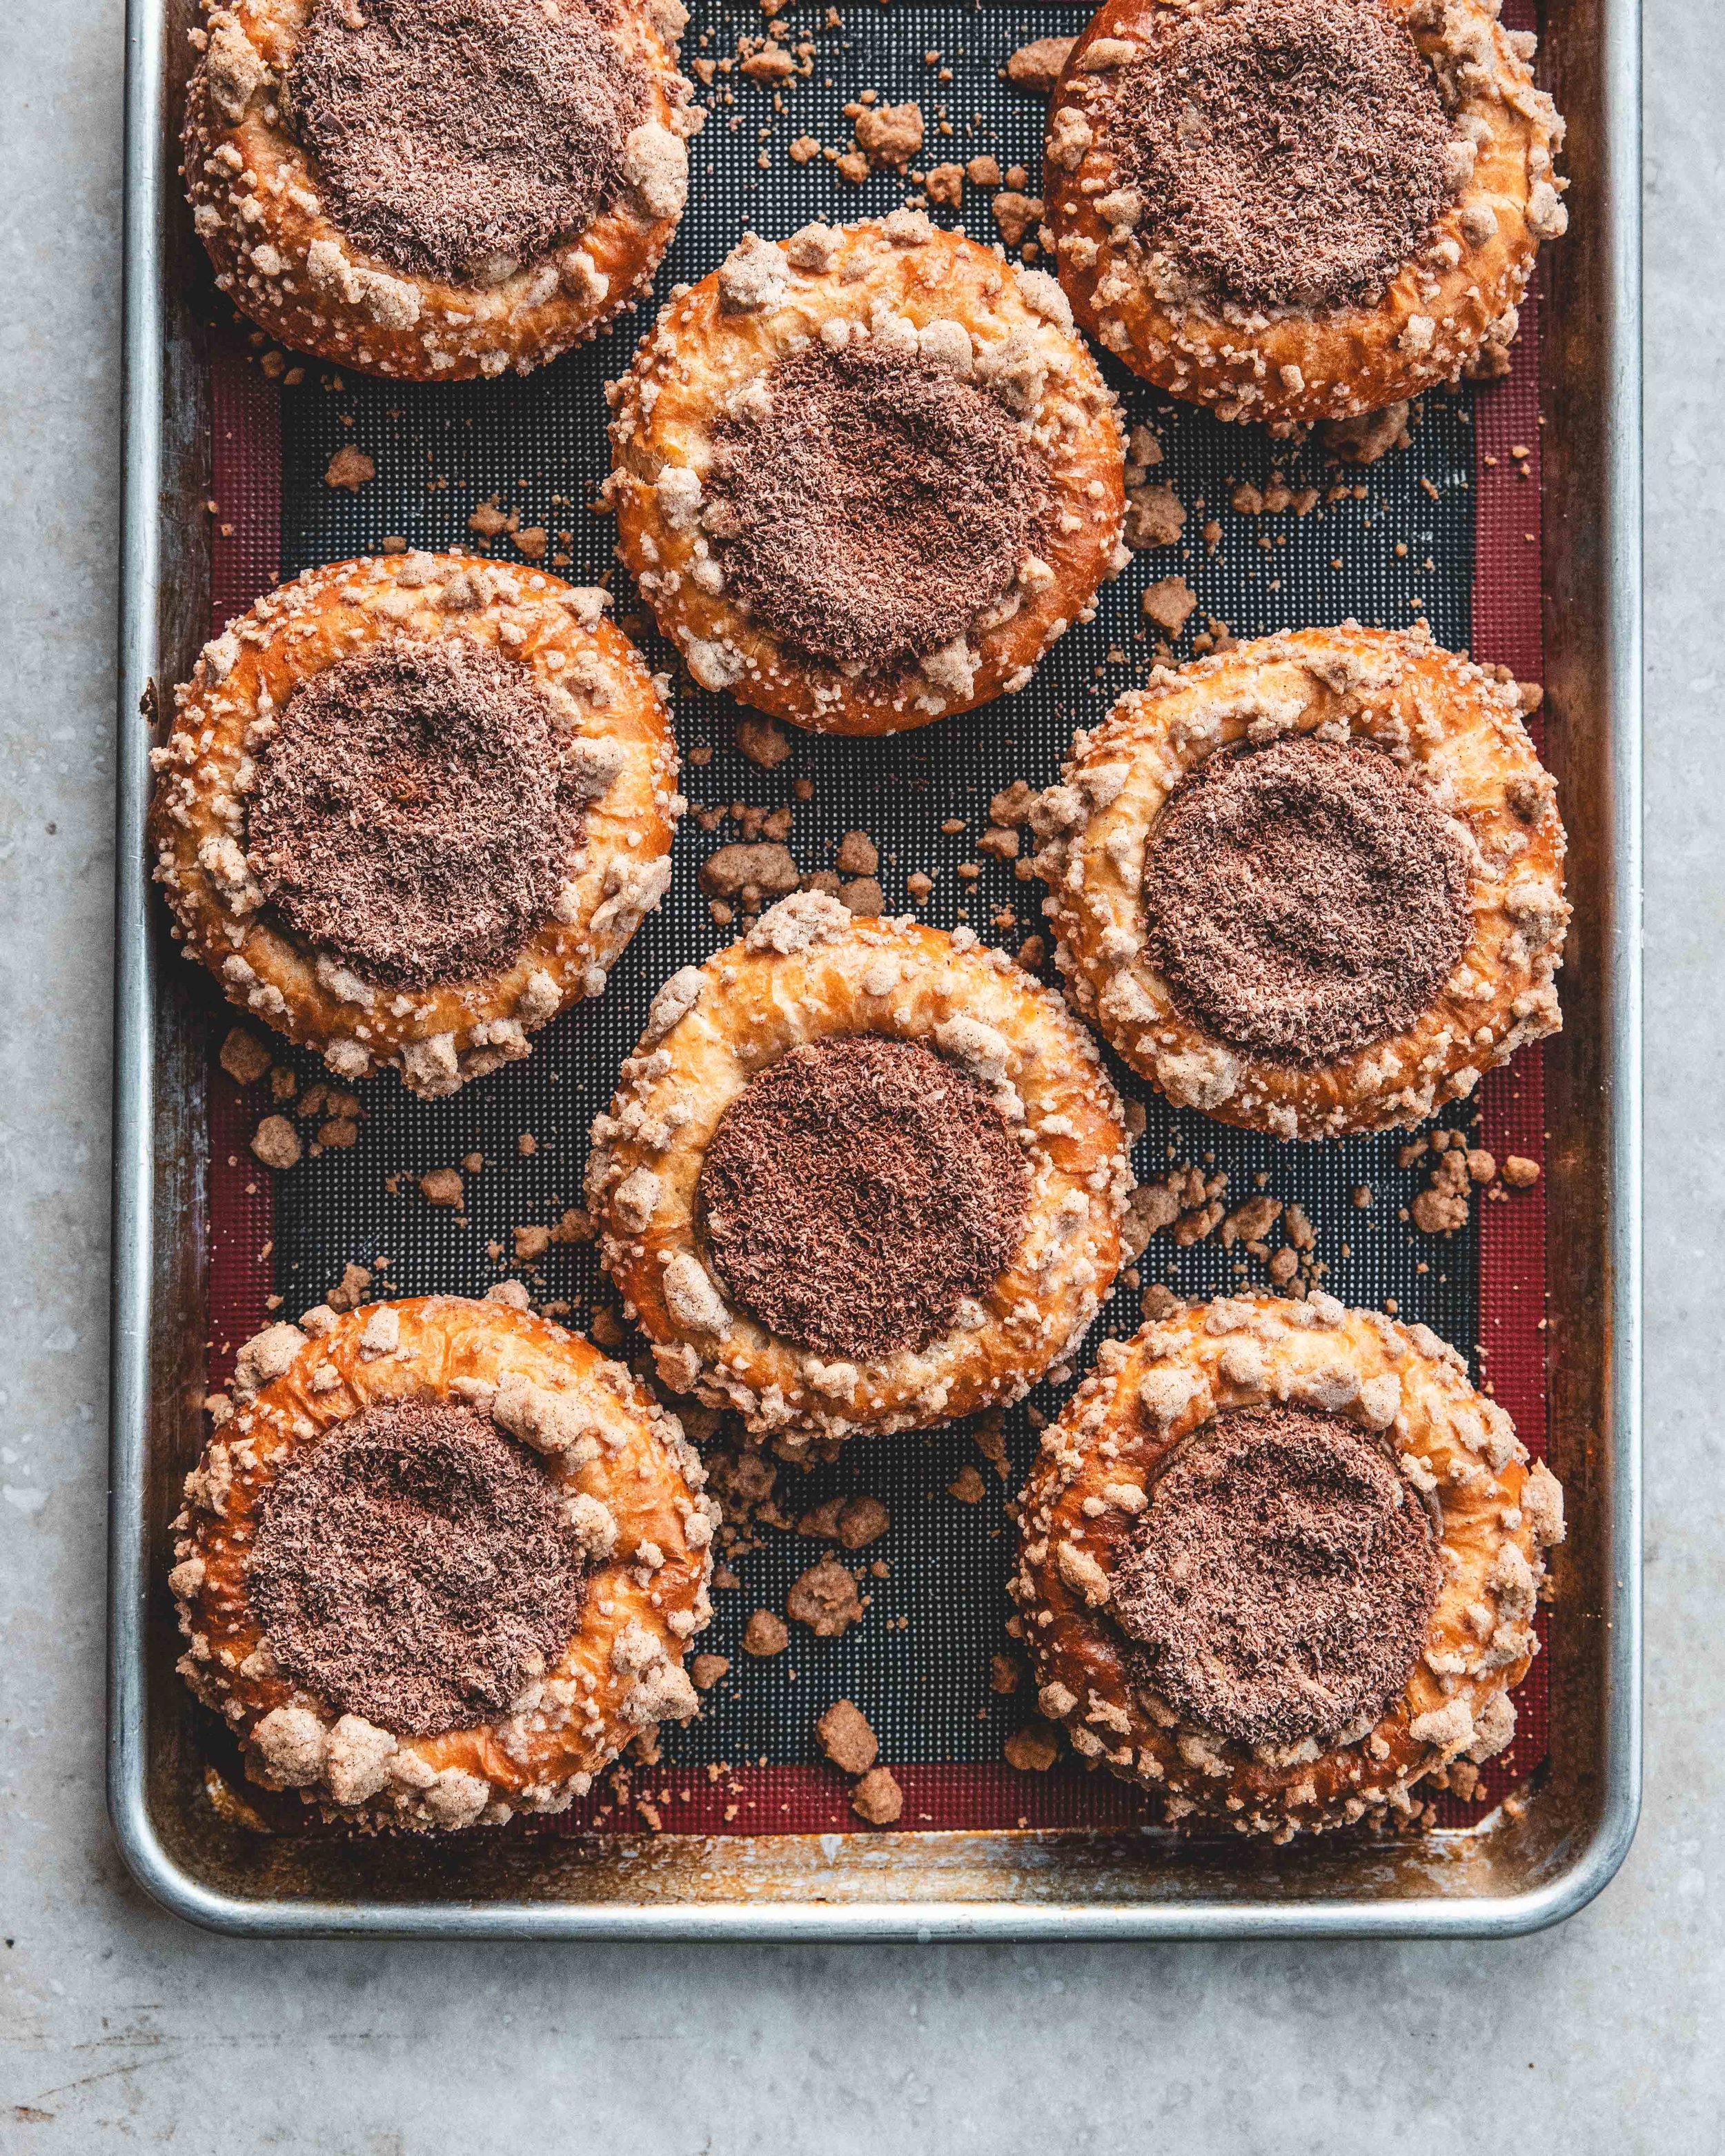
It’s time for Brunch. I’m not talking eggs Benedict, or avocado on toast, but coffee absolutely does make an appearance. This weeks recipe is a fabulous layering of flavours and textures and a coffee lovers dream. It starts with a classic brioche, which is treated almost like pastry, to make a tart base which is filled with a coffee custard and surrounded by a lightly spiced crumb. To finish, the custard is covered with a thin layer of grated chocolate. Brioche, coffee custard, spiced crumb and chocolate, sounds like a brilliant brunch dish if you ask me.

The centrepiece of this dish is a rich coffee custard and to get the perfect flavour I have partnered with Ozone Coffee and am using their brilliant Festive Blend. Ozone, one of my favourite London coffee roasters, have been releasing an annual festive blend for a couple years now and not only is it a brilliant coffee it also makes a great stocking stuffer; the beautiful packaging is even designed to be gifted. If you don’t know Ozone they are originally from New Zealand but have also been in London for over 10 years now. They have 4 locations across the city and at their two East London locations, Shoreditch and, my personal favourite, London Fields they also serve a mean brunch. If you’re in the area you should absolutely go and check out their new winter menu which launched this week.

Flavour-wise the coffee blend is inspired by mince pies and has tasting notes of sweet pastry, dried fruits and brown sugar. The flavours in the dish were designed to pair beautifully with the coffee; the spicing in the crumb is wintery and festive and the crunch reminds you of pastry. If you want to push the mince pie comparison even more you could even add a little alcohol to the custard, some rum or brandy would be perfect.

You can buy the Ozone Festive Blend in all of their locations and online on their website here.

Brioche Tips

Making brioche is not difficult but there are some things to bear in mind. When trying to develop gluten, fat can prevent that. This is why the butter isn’t added straight away. If the butter is added at the start of mixing, the flour becomes coated in fat, and the liquid in the bread cant team up with the flour as easily to develop gluten. Building up the gluten, before adding the butter is added, helps create a properly kneaded dough but adding the butter almost pulls this back a little and more kneading is required to ensure a properly elastic dough. You might think the kneading times are a little overblown but this is what you need to properly develop the dough. The reason for all of this kneading is a finished brioche with the proper texture, an under-kneaded dough will end up as dense brioche, too bready in texture. Well developed brioche, that is also properly proofed, will be incredibly light and fluffy, and will almost melt in the mouth.

Winter Coffee Brioche Tarts
Makes 8

Brioche

180g plain flour
180g strong white bread flour
20g caster sugar
1 tsp fine sea salt
7g fast action dried yeast
85ml whole milk
3 large eggs, plus one for egg wash
150g unsalted butter, room temperature

Coffee Custard

200ml whole milk
50ml double cream
2 tbsp coffee beans, roughly ground.
1 large egg
2 large egg yolks
100g caster sugar
25g cornflour
25g butter, diced
50g milk chocolate, grated, for garnish

Spiced Crumb

50g plain flour
50g caster sugar
1/4 tsp ground cardamom
1/4 tsp ground cinnamon
1/8 tsp freshly ground nutmeg
Pinch of fine sea salt
40g unsalted butter

To make the brioche add the two flours, the sugar, salt and yeast to a large bowl and whisk to combine. Add the milk and eggs and using an electric stand mixer knead for about 10-15 minutes or until the dough is smooth, elastic and no longer sticking to the sides of the bowl. Add the diced butter and continue mixing until fully combined. Once the butter has been incorporated into the dough continue kneading until, once again, the dough is smooth and silky and no longer sticking to the sides of the bowl, this should take another 10-15 minutes. Tip the dough out onto your work surface and form into a ball. Place the dough into a lightly greased bowl and cover with clingfilm. Allow the dough to rest at room temperature for 30 minutes before moving to the fridge and chilling overnight.

For the coffee custard place the milk and cream into a large saucepan along with the ground coffee and bring to a simmer. Once at temperature turn off the heat, cover and set aside for about an hour to infuse the flavour of the coffee. Once the hour is up, bring the milk mixture back to a simmer then pour through a fine mesh sieve, into a measuring jug, to strain out the ground coffee. The coffee can absorb a little of the liquid so top up with extra milk if needed. Whilst the milk is coming to a simmer add the egg, yolks, sugar and cornflour to a large bowl and whisk together. Pour the strained milk mixture onto the egg mixture, whisking as you pour to prevent the eggs from scrambling. Pour the custard mixture back into the saucepan and place over medium heat and cook, whisking constantly, until the mixture bubbles and thickens. Cook for another minute before scraping into a bowl. Add the butter and mix until combined. Cover with clingfilm and refrigerate until needed.

To assemble the brioche remove the dough from the fridge and tip out onto a lightly floured worksurface. Press flat and then divide into 8 equally sized pieces. Form each piece of dough into a neat round and then roll out into an 11cm circle. Lightly grease eight 10cm loose bottomed tart tins and use the discs of brioche to line the tart tin as if using pastry. Place the brioche tarts onto a large baking tray and cover lightly with clingfilm and set aside until the brioche has doubled in size, this should take about 2 hours.

Whilst the brioche is rising make the crumb topping. Add the flour, sugar, spices and salt to a mixing bowl and whisk to combine. Add the butter to a small pan and melt. Pour the melted butter into the flour mixture and use a fork to stir to combine, making a crumble like topping. Refrigerate until the brioche has finished proofing.

When almost ready to bake preheat the oven to 190ºC (170ºC Fan).

To assemble the tarts remove the custard from the fridge and beat until smooth and silky. Using your lightly floured fingers, gently reinforce the depression in the middle of the brioche tarts (as the brioche proofs the depression starts to fill in). Brush the outside of the brioche with egg wash and spoon, or pipe the custard into the middle of the brioche buns. Sprinkle the crumb around the outside of the brioche.

Bake in the preheated oven for about 20-25 minutes or until the brioche is golden brown. When removed from the oven the custard will have puffed up but as it cools will sink lightly. Set aside until the brioche is cooled.

To finish the brioche scatter the grated chocolate over the custard. To make this neat I place a small cookie cutter on the top of brioche, so that the entire custard is covered, and spoon in the chocolate so it forms a neat circle.

The brioche is best served on the day it is made but can be covered and stored for a further day.
In Breads and Quickbreads Tags brioche, coffee, crumb, streusel, ozone coffee, bread, buns, winter
5 Comments

Chocolate Passion Fruit Brioche Buns

Edd Kimber March 22, 2022

Is there a flavour pairing you go back to time and time again, something you just cant get enough of? Chocolate and mint, matcha and white chocolate or maybe pear and ginger? For me the pairing is the joyous matching of chocolate and passion fruit (works brilliantly with both milk and dark chocolate but milk is what I normally go for). I first tried this pairing in a macaron at famed pastry chef, Pierre Herme’s, Parisian boutique. It just works, the brightness of the passion fruit and the rich creaminess of the milk chocolate, I will never bore of it. 

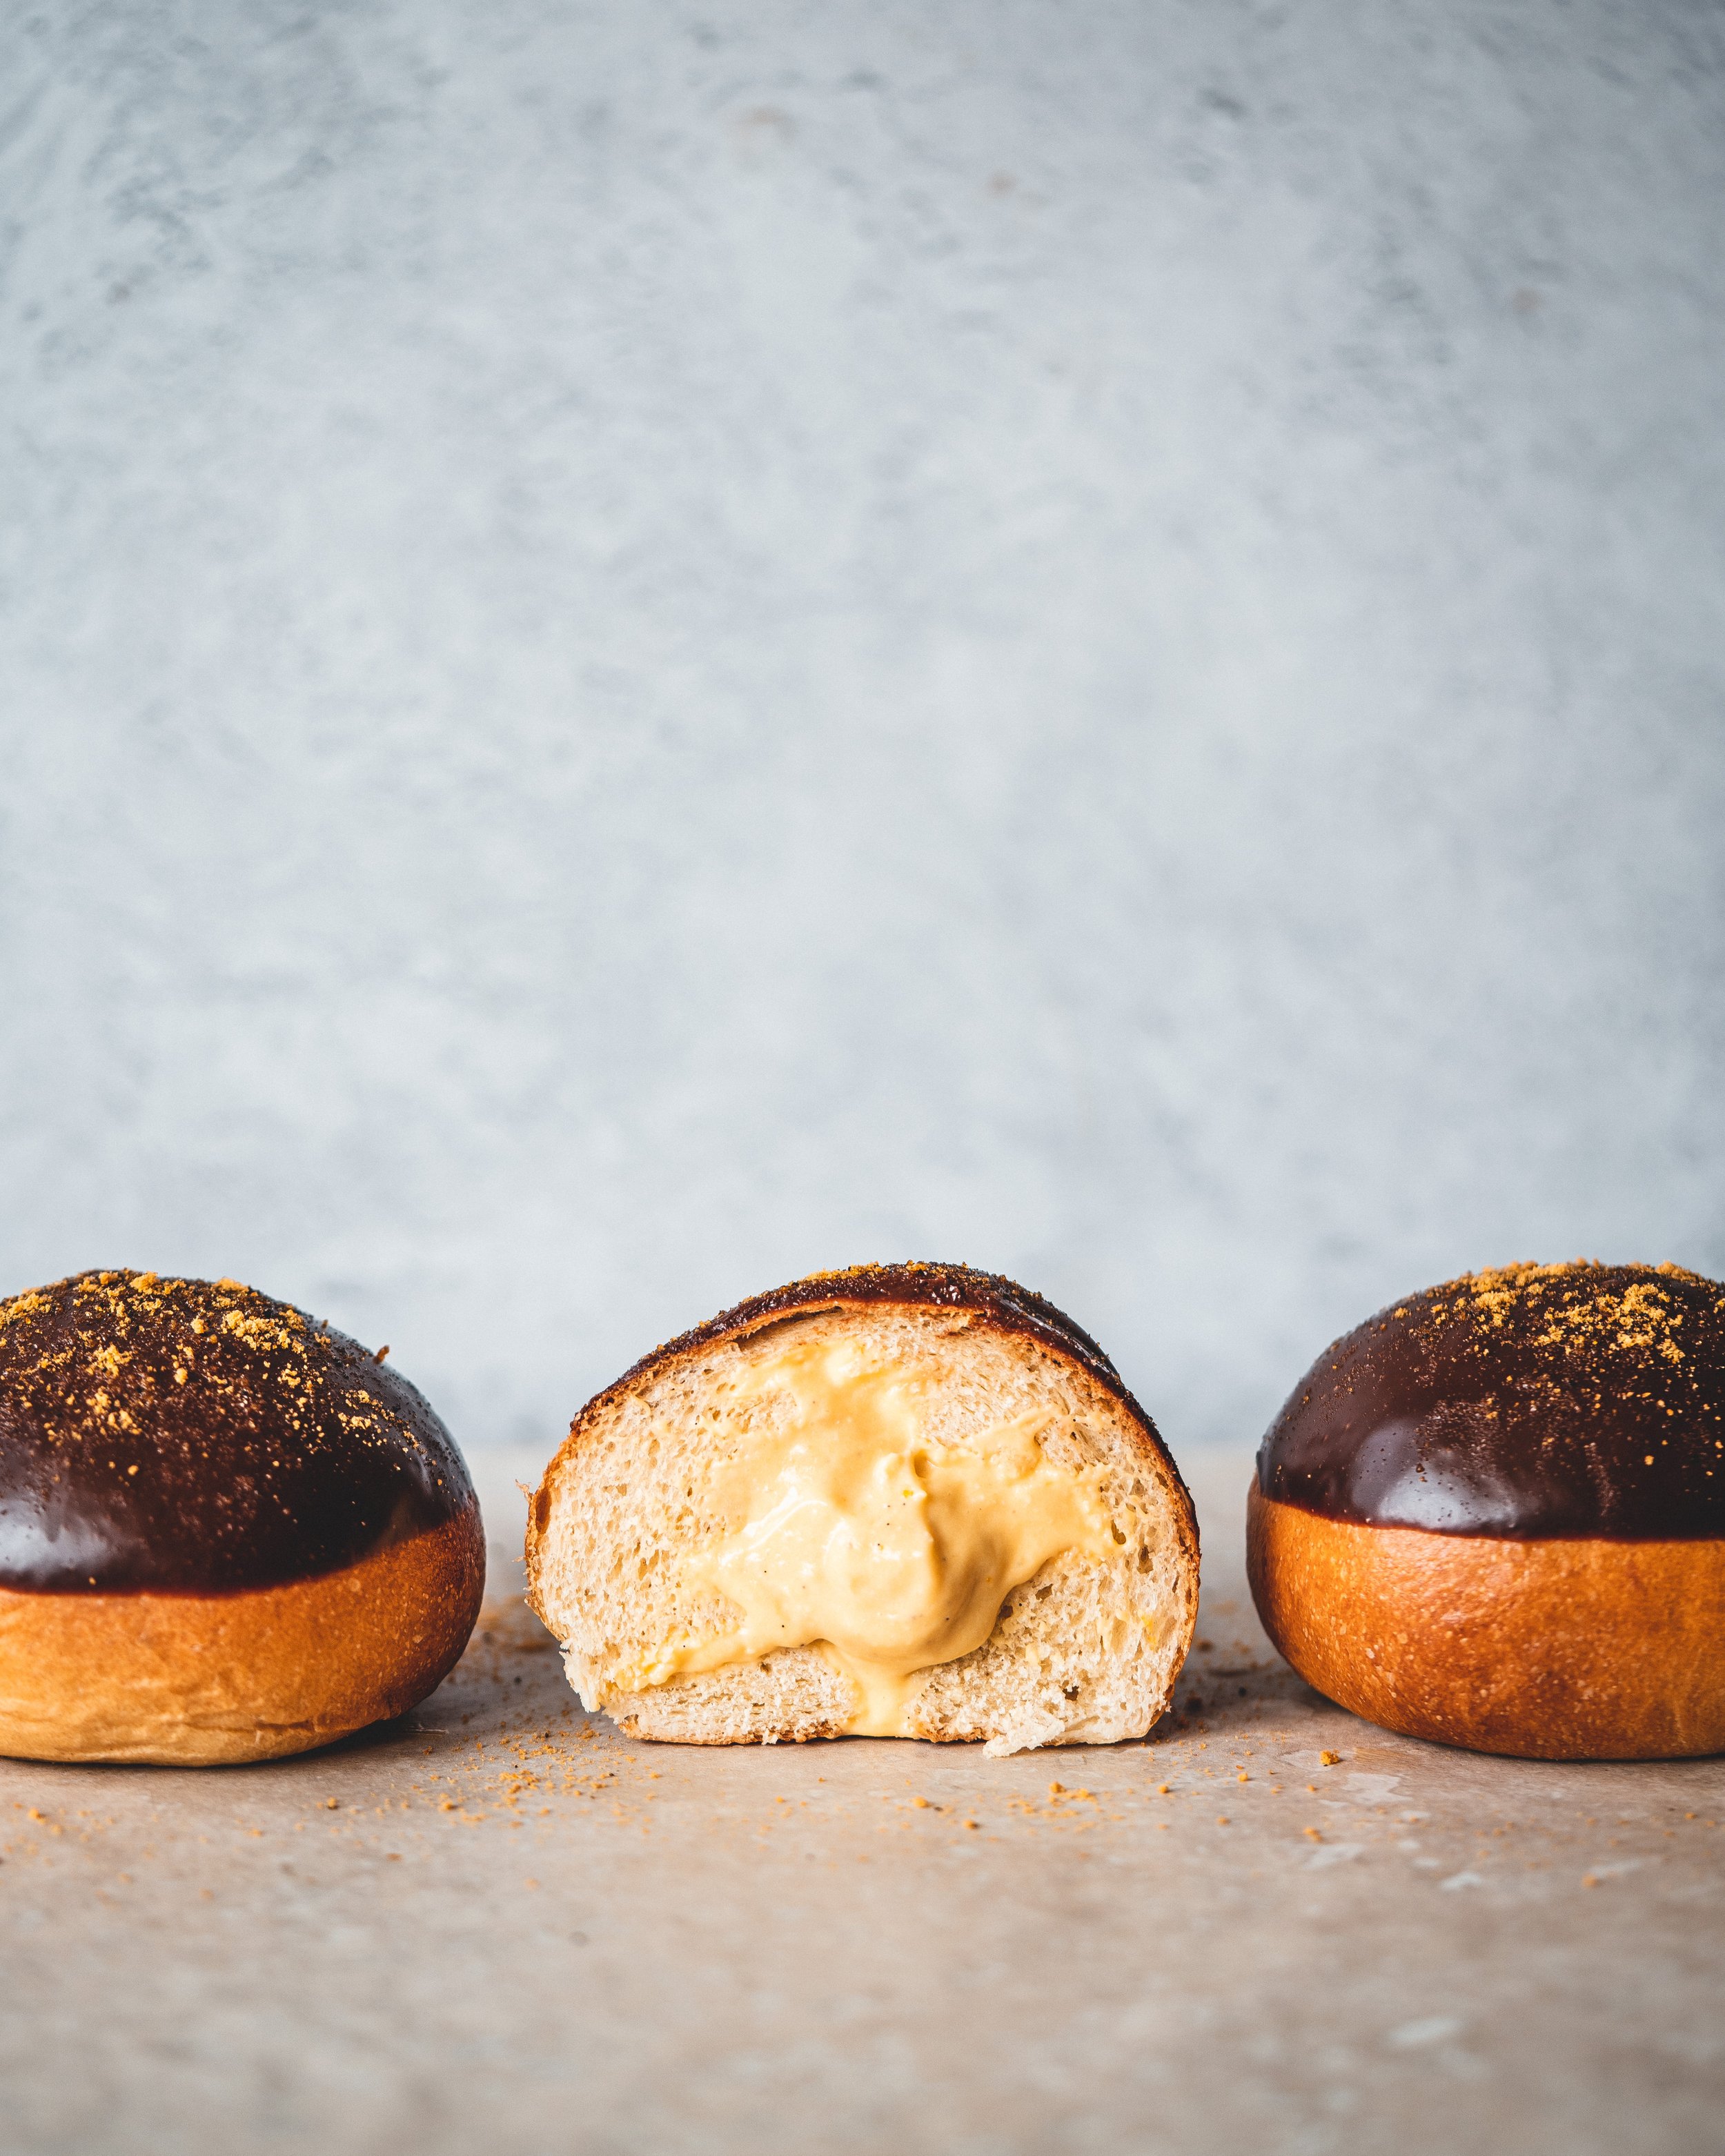
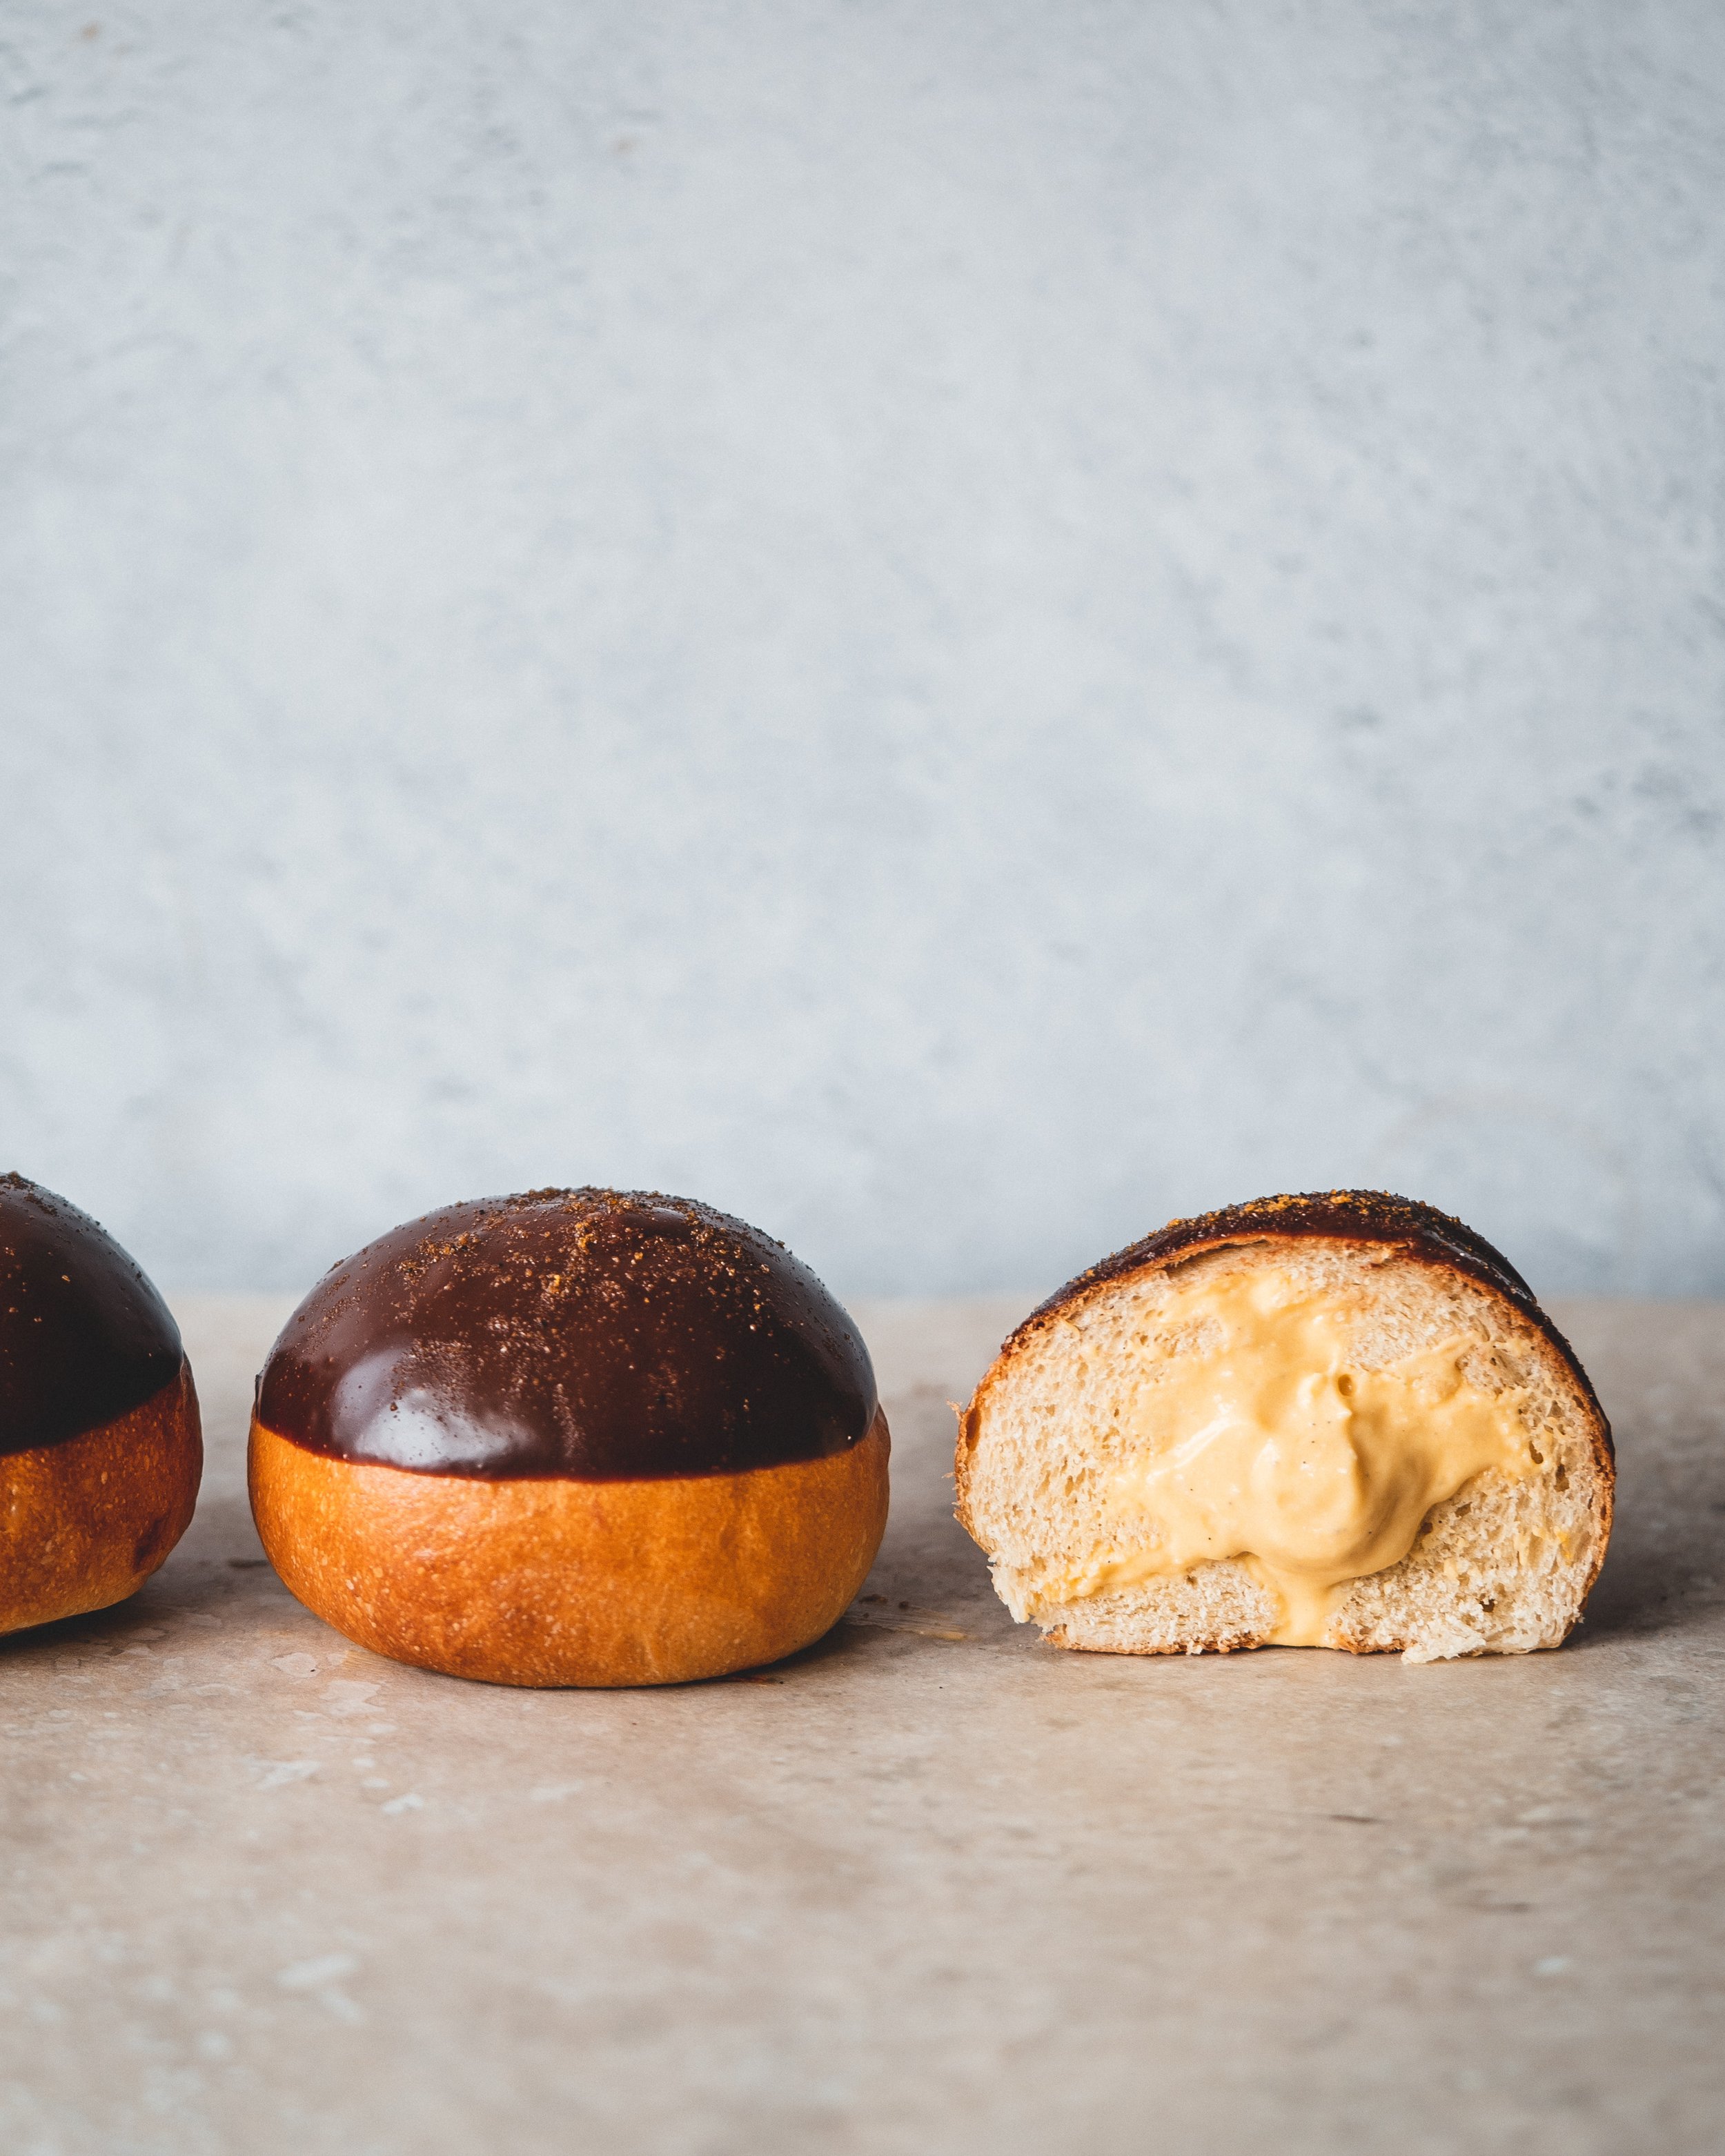
For these brioche buns I drew inspiration from the flavour combo and a form from Aroma Bakery in London, who make a brioche filled with cream and dipped in chocolate. These buns are flavoured with a little lemon zest filled with a passion fruit pastry cream lightened with a little whipped cream. The finished buns are dipped in a thin milk chocolate ganache that has been spiked with a little extra passion fruit puree. 

Before we get to the recipe a quick note on passion fruit. They are expensive, at least here in the UK, especially considering how many you often need to get the need amount of puree for a recipe. So whilst I generally like using fresh fruit in recipes that use a lot of passion fruit I splurge on passion fruit puree, which is sold in cartons. Yes you have to buy these online (or a good alcohol shop if you have one close by, this is where I get it in London) and they only come in litre sized packs, it does however work out significantly cheaper than buying the fresh fruit. If you love using passion fruit in baking this is my preferred method, for ease and for value. It is also worth noting you can also freeze the puree you don’t use and save it for a later purpose. 

Chocolate Passion Fruit Brioche Bun
Makes 8

Brioche
250g strong white bread flour
1/2 tsp fine sea salt
1 tsp fast action dried yeast
20g caster sugar
Zest of 1 lemon
125ml whole milk
1 large egg, plus one for egg wash
50g unsalted butter, room temperature

Passion Fruit Pastry Cream
225ml passion fruit puree
75g caster sugar
20g cornflour
3 large egg yolks
Pinch of fine sea salt
20g unsalted butter
100ml double cream
1 tsp vanilla bean paste

Chocolate Glaze
50g milk chocolate (I like a dark milk chocolate, something around 50% cocoa solids)
50ml double cream
15ml passion fruit puree

The day before you want to bake these buns make the brioche and the pastry cream. For the brioche place 20g of the flour and 80ml of the milk into a small butter pan and cook over medium heat, stirring with a small whisk or spatula, until the mixture cooks into a thick paste. Scrape into a small bowl and set aside for the moment. 

In the bowl of a stand mixer add the remaining flour, salt and yeast and whisk to combine. Add the sugar and lemon zest to a small bowl and use your fingers to rub together until the sugar resembles moist sand and you can smell the aroma from the lemon. Add this to the bowl along with the remaining milk and egg, and the cooked flour mixture. With the dough hook attached mix on low speed until the mixture forms a shaggy dough. Continue mixing for 10-15 minutes or until the dough no longer sticks to the sides of the bowl. Add the butter a little bit at time until all of it has been added. Continue mixing on low speed until the butter has been combined and the dough is once again no longer sticking to the sides of the bowl and has formed a ball of dough around the dough hook. The finished dough should have a slight sheen and be stretchy and elastic. Scrape the dough onto the worksurface and form into a ball. Place into a bowl and cover with clingfilm and refrigerate overnight until ready to use (the dough can be stored in the fridge for a couple days before using). 

To make the pastry cream place the passion fruit puree into a saucepan with half of the sugar. Place the pan over medium heat and bring to a simmer. Meanwhile, in another bowl, mix together the remaining sugar and cornflour. Add the egg yolks and salt and whisk together until smooth. When the puree is simmering pour over the yolk mixture, whisking as you pour to prevent the yolks from scrambling. Pour the custard back into saucepan and place back over medium/high heat and cook, whisking constantly, until the custard comes to a boil and is thick. Immediately scrape the custard into the bowl, add the butter and stir until fully combined. Press a sheet of clingfilm onto the surface of the custard and refrigerate until needed. The custard can be stored in the fridge for 2-3 days before using. 

On the day you want to bake the buns remove the dough from the fridge and divide into 8 equal sized pieces. Form the dough into neat round buns and place them on a large parchment lined baking tray. Cover the buns lightly with clingfilm and set aside for about 60-90 minutes or until the buns have almost doubled in size. Just before they have finished proofing preheat the oven to 200ºC (180ºC Fan). Lightly beat the remaining egg with a fork and brush each bun with the egg wash. Bake in the preheated oven for about 15-20 minutes or until the buns are golden. Remove and set aside to cool. 

For the pastry cream remove the bowl from the fridge and beat the custard until smooth and lump free. In a separate bowl beat the cream and vanilla until it holds soft peaks. Add the cream to the custard and fold together until smooth and fully combined. 

Using a skewer, poke a hole in the bottom of each bun. Scrape the custard into a piping bag fitted with a Bismarck piping tip (you can use whatever thin round piping tip you have but anything doughnut-like is much easier with a bismarck tip). Pipe in as much custard as each bun will take before it squeezes out. Once filled the buns should feel a little heavy, if they feel light they need more custard. 

For the glaze melt together the cream and chocolate until fully melted and a smooth ganache is formed. Scrape the ganache into a small bowl and whisk in the passion fruit puree. Dip the buns into the ganache, allowing any excess to dip back into the bowl. Place back onto the baking tray and set aside until the ganache is set. If you want to can decorate the buns, either with a little grated chocolate like Arome do with their buns, a little cocoa powder or a little freeze dried passion fruit powder as I did. 

Kept covered these buns will keep for 2-3 days. 

In Breads and Quickbreads Tags passion fruit, brioche, chocolate, ispahan, arome, pierre herme, buns
2 Comments
Tahini Babka Buns WEb small.jpg

Chocolate Tahini Babka Buns

Edd Kimber June 20, 2020

The countdown is on, with only a few days left until One Tin Bakes is finally out in the world. After waiting well over a year my new book is finally published and to say I am excited is an understatement. I can’t wait for you guys to see it, to bake from it and to have it in your kitchens. Always the impatient baker, I couldn’t wait until publication to share a recipe from the book with you, so today I am sharing one of my favourites, the Chocolate Tahini Babka Buns. I am also telling you that the book is out NEXT THURSDAY and if you want it on the day there is still time to preorder, hint there is a link here.

Think of these buns as the meeting of cinnamon buns and babka with tahini thrown in for good measure. The story I tell in the book is how these were inspired after spending the afternoon in the kitchen with Uri Scheft, the baker who led the recent rise in popularity of babka, in the United States and around the world. The traditional babka, of Eastern European Jewish origin, is made with leftover challah dough rolled up with jam or cinnamon, It’s a world away from the babka that most people are making these days, it also lacks the adoration the modern version receives, it seems to have a love it or hate it quality, denser and drier than its modern counterpart. So, what changed the babka’s fortunes? Well, the answer seems to be simple…butter. Traditional Jewish breads would have been made with oil to keep them parve, but when non-jewish or non-parve chefs took on the babka in the early 2000’s they started making them with butter, the doughs became more brioche in style and the fillings became richer with more and more chocolate added. The one modern recipe that can fairly claim the crown, for pushing the babka into a wider public consciousness, is the one served at Breads Bakery in New York. The bakery was founded with Israeli baker Uri Scheft, of Lehamim Bakery (the partnership has since dissolved), and the babka that the bakery introduced to NYC became a true media darling, it was quite literally everywhere. Every magazine, every paper, every blog, it was a bread that went viral. And more importantly, it became the standard, the version that most people now think of when they think of babka, a swirled bread made with a brioche like dough and swirled with chocolate.

Tahini Babka Buns small.jpg

I was lucky to spend the afternoon in the kitchen with Scheft early last year where he taught me his famous babka recipe, as good as I remembered when I first tried in NYC. During that trip, where babka and tahini seemed to be two daily staples, the idea of sneaking in a little tahini into a chocolate babka seemed like an obvious one. On arriving back home I tried out the idea immediately, before my bags were even unpacked, with the memory or Uri’s version still fresh in my mind. I knew immediately it was a good thing, have a second slice good. The version I am finally posting is the one I made for One Tin Bakes, adapting the idea to the form of cinnamon buns which made the recipe 9x13 friendly. If you don’t follow me online elsewhere or you have managed to miss my last few posts let me briefly explain the book. The idea is that every single recipe is baked in the same 9x13 tin (its a classic brownie tin) making the required equipment so much lower than most baking books, hopefully making it more approachable. The recipes run the gamut in terms of style, required skill, and time required to bake them. There is something for everyone and no matter whether lockdown has got you baking for the first time or you’ve baking since you were a kid you’ll find something you will love. 

COMPETITON TIME

Before we get to the recipe I have one last thing to tell you, its competition time! To celebrate the release of the book I have partnered with Nordicware, Guittard Chocolate and Belazu to create a brilliant prize package. The prize is a signed copy of the book, a One Tin Bakes tote bag, the Nordicware 9x13 tin I recommend in the book plus one of their iconic bundt pans, a whopping 3kg bag of Guittard Chocolate (they’re providing a bag of one of my favourites) and belazu are proving a selection of their tahinis (classic and their new black tahini) and oils. To enter the competition all you have to do is make one of the recipes from the book and post a picture on instagram saying that it came from my new book One Tin Bakes and tagging me using the hashtag #OneTinBakes. Obviously the book comes out halfway through the window for this competition so feel free to make these babka buns or get yourself a copy of the June issue of Olive magazine which has a bunch of other recipes from the book. Competition is only open to UK residents and the winner will be picked at random. 

Chocolate Tahini Babka Buns
Taken From my book One Tin Bakes (Kyle Books 2020)
Makes 12 

Brioche Dough
500g strong white bread flour, plus extra for dusting
25g caster sugar
1 teaspoon fine sea salt
7g fast-action dried yeast
250ml whole milk
2 large eggs
100g unsalted butter, at room temperature, diced, plus extra for greasing 

Chocolate Tahini Filling
100g dark chocolate (65–70% cocoa solids), finely chopped
100g unsalted butter, diced
55g light brown sugar
100g tahini
flaked sea salt, for sprinkling 

Vanilla Syrup
65g caster sugar
1 teaspoon vanilla extract
2 teaspoons sesame seeds 

OTB pink swirl.png

For the bread dough add the flour, sugar, salt and yeast to the bowl of an electric stand mixer with the dough hook attachment and mix briefly to combine. Add the milk and eggs and knead on medium-low speed for about 10 minutes, or until the dough is smooth, elastic and pulling away from the sides of the bowl. With the mixer still running, add the butter, a little bit at a time. Once the butter has been worked into the dough, continue kneading for a further 10 minutes or so until the dough is once again pulling away from the sides of the bowl. Place the dough in a lightly greased bowl, cover with clingfilm and refrigerate overnight or for up to 2 days. If you prefer, you can let the dough rise at room temperature, but it’s worth making this in advance as the dough is much easier to handle when thoroughly chilled.

The next day, lightly grease or line the base of the 9x13 baking tin with a piece of parchment paper. Make the filling. Place the chocolate and butter in a heatproof bowl set over a pan of simmering water (ensuring the bottom of the bowl doesn’t touch the water underneath) until melted. Remove from the heat, stir in the brown sugar and tahini, then set aside. 

Remove the dough from the refrigerator and, working on a lightly floured surface, roll out into a large 50 x 50cm (20 x 20in) square. Spread the chocolate tahini mixture evenly over the dough. At this point, the tahini mixture will be loose and glossy, so if you attempt to roll the dough up now it will be very messy, therefore, allow the mixture to sit for a couple of minutes until it goes a little tackier and loses its shine (don’t leave this too long though, because the filling will eventually set, meaning it won’t stick to the dough when it’s rolled). Sprinkle over a little flaked sea salt and roll up the dough into a tight sausage. 

Cut the sausage into 12 equal-sized slices and place them, cut-side up, into the prepared baking tin. Cover with clingfilm and set aside to prove in a warm place for 45 minutes to 1 hour, or until the rolls are touching each other and feel puffy to the touch. 

Meanwhile, preheat the oven to 190°C (375°F), Gas Mark 5. Bake the buns for 30–35 minutes, or until golden brown. 

Meanwhile, make the syrup. Place the caster (superfine) sugar and 60ml (1⁄4cup) water in a small saucepan and cook over a low heat just until the sugar has dissolved. Remove from the heat and add the vanilla. 

When the buns come out of the oven, while still hot, liberally brush them with the syrup and then sprinkle over the sesame seeds. Leave the buns to cool completely in the tin before removing and serving. 

Stored covered, these buns will keep for 2–3 days. 

In Breads and Quickbreads, Chocolate Tags babka, buns, tahini, cinnamon buns, cinnamon rolls, one tin bakes, sesame, sesame seeds
20 Comments

Twitter

  • Was 8 original films, 3 spin off films, a two part play not enough. Can we have something new. https://t.co/cBZdGEGeyv
    Apr 4, 2023, 1:46 PM
  • RT @deliciousmag: Cacio e pepe, but make it buns! These seriously cheesy bread rolls from @TheBoyWhoBakes are inspired by his favouri… https://t.co/oDZlaDgnN2
    Apr 2, 2023, 11:08 AM
  • RT @TheDailyShow: Congrats to Donald Trump on finally winning a majority of votes! https://t.co/ezP55HZgl0
    Mar 31, 2023, 12:43 AM

Instagram

This weeks bonus recipe, for subscribers to my newsletter, is this gorgeous sour cherry and coconut gateau basque. The crust is a buttery cross between pastry and cake, think a cakey cookie. The filling is a layer of sour cherry topped with a rich coconut custard. A real fun one to make too! Link to my newsletter can be found in my bio - #gateaubasque #pastrycream #coconut #sourcherry
In this months @olivemagazine (out today) the team came and photographed my petit kitchen and we talked about how we put our stamp on the place, without spending a fortune. We hated the bland kitchen that we inherited but, as it was relatively new an
In this months @olivemagazine (out today) the team came and photographed my petit kitchen and we talked about how we put our stamp on the place, without spending a fortune. We hated the bland kitchen that we inherited but, as it was relatively new and in good condition, it felt a waste to rip it out and we also didn’t want to spend the money it would take to rip out the whole thing and replace it (it’s a howdens shell so we could have done something cheaper like @plykeakitchens @holte.studio @madebyhusk) so instead I painted all of the cabinets, using @makeitrustoleum kitchen cabinet paint, to give it some personality and lighten the whole thing. Check out the magazine for the full run down. - #kitchendesign #kitchenremodel #rustoleumcabinettransformations #rustoleumkitchencupboardpaint #kitcheninspiration #theboywhobakes #olivemagazine
Are you making scones all wrong? Maybe, maybe not? But I do want to show you how I make them! This recipe is based on the method I learnt at @belmondlemanoir 12 years ago when I did a stage, and it makes the absolute lightest scones. And shock horror, it involves kneading the dough, albeit very lightly. You can get the full recipe in this weeks newsletter (free) linked in my bio. - #scones #bakingday #worldbakingday #afternoontea #hightea #englishscones #clottedcream #creamtea #theboywhobakes
facebook
  • Contact

The Boy Who Bakes

Edd Kimber

facebook