The Boy Who Bakes

Edd Kimber
  • Home
  • Recipes
  • My Books
  • Blog
  • Recipe Index
  • About
  • Home
  • Recipes
  • My Books
  • Blog
  • Recipe Index
  • About

Recipes

  • All
  • baking
  • Biscuits and Cookies
  • Breads and Quickbreads
  • Bundts
  • Cakes
  • Chocolate
  • Dessert
  • drinks
  • Holidays
  • Pastry
  • Scones and Quickbreads
chocolate coated madeleines with chopped hazelnuts

Brown Butter Hazelnut Chocolate Madeleines

Edd Kimber August 11, 2022

Following on from the previous recipe for classic madeleines, we can make a few simple changes and make some wonderful Madeleine variations including these fantastic brown butter madeleines stuffed with chocolate hazelnut spread and coated in dark chocolate. The key to keeping the texture of these madeleines the same as with the classic recipe is that once you’ve browned the butter you need to add back the moisture that has been cooked off, otherwise the madeleines dry out very quickly. You can simply add water, as this the butter loses through evaporation, or you can add milk which adds a little extra fat. Make sure you check out the previous blog post for more tips on making the perfect Madeleine.

Hazelnut Brown Butter Madeleines
Makes 15-18 (depending on tin size)

125g unsalted butter, diced
20ml water (or milk)
125g caster sugar
2 large eggs
1 tsp vanilla bean paste
125g plain flour
1 tsp baking powder
Pinch of fine sea salt
35g roasted hazelnuts, roughly chopped

Filling and Topping

100g chocolate hazelnut spread
150g dark chocolate, finely chopped

Place the butter into a small saucepan and place over medium heat. Cook the butter until melted, once melted it will start spattering, this is the water cooking out of the butter, it will then foam up and the milk solids will sink to the bottom of the pan and then brown. Once the butter starts to foam, keep your eyes on the butter because it can go from browned to burnt very quickly. Tip the butter into a small bowl, making sure to scrape out all of the browned milk solids, add the water or milk and then set aside to cool slightly.

To make the batter place the sugar, eggs and vanilla and whisk briefly just until the sugar has dissolved, you don’t need to incorporate any air in this stage.

Sieve the flour, baking powder and salt into the batter and using the whisk stir together until a smooth and thick batter is formed. Pour in the melted browned butter butter and stir until a smooth batter is formed. Scrape the batter into a piping bag then seal either by tying the end in a not or using a sandwich bag clip. Refrigerate the batter for at least an hour but preferably overnight.

When ready to bake preheat the oven to 210ºC (190ºC Fan). Whilst the oven preheats lightly grease a 12-hole Madeleine pan (I prefer traditional metal tins without a non-stick coating) with softened butter and dust with a thin layer of flour. Tip out any excess flour so that you have a very thin coating. Place the tin into the freezer.

To make the madeleines, make the batter as above using the browned butter. Once you have piped the madeleines scatter the chopped hazelnuts over the madeleines before baking. Bake for 10-12 minutes until the madeleines are risen and browned around the edges but still a little pale in the centre. Remove from the oven and allow to cool for a minute or so before turning out from the tin to cool.

When the madeleines have cooled scrape the chocolate spread into a piping bag fitted with a thin narrow piping tip (a Bismarck tip is perfect for this). Stick the piping tip into the middle of the Madeleine and pipe in some of the spread.

To coat the madeleines in chocolate you can simply melt the chocolate or if you want a more polished and professional finish you can also temper the chocolate. Whichever method you choose simply add about a tablespoon of chocolate to each depression in your Madeleine tin and gently press in a Madeleine to each depression. Place the tray into the freezer for 10-15 until the chocolate is set then turn out and enjoy. Because these madeleines are not fully coated in chocolate or a glaze like the lemon madeleines they are best enjoyed as close to baking as possible.

In Cakes Tags madeleines, chocolate coated, chocolate, hazelnut, nutella
Comment

Double Chocolate Loaf Cake with Whipped Caramelised White Ganache

Edd Kimber April 11, 2022

THIS POST IS SPONSORED BY DOVES FARM

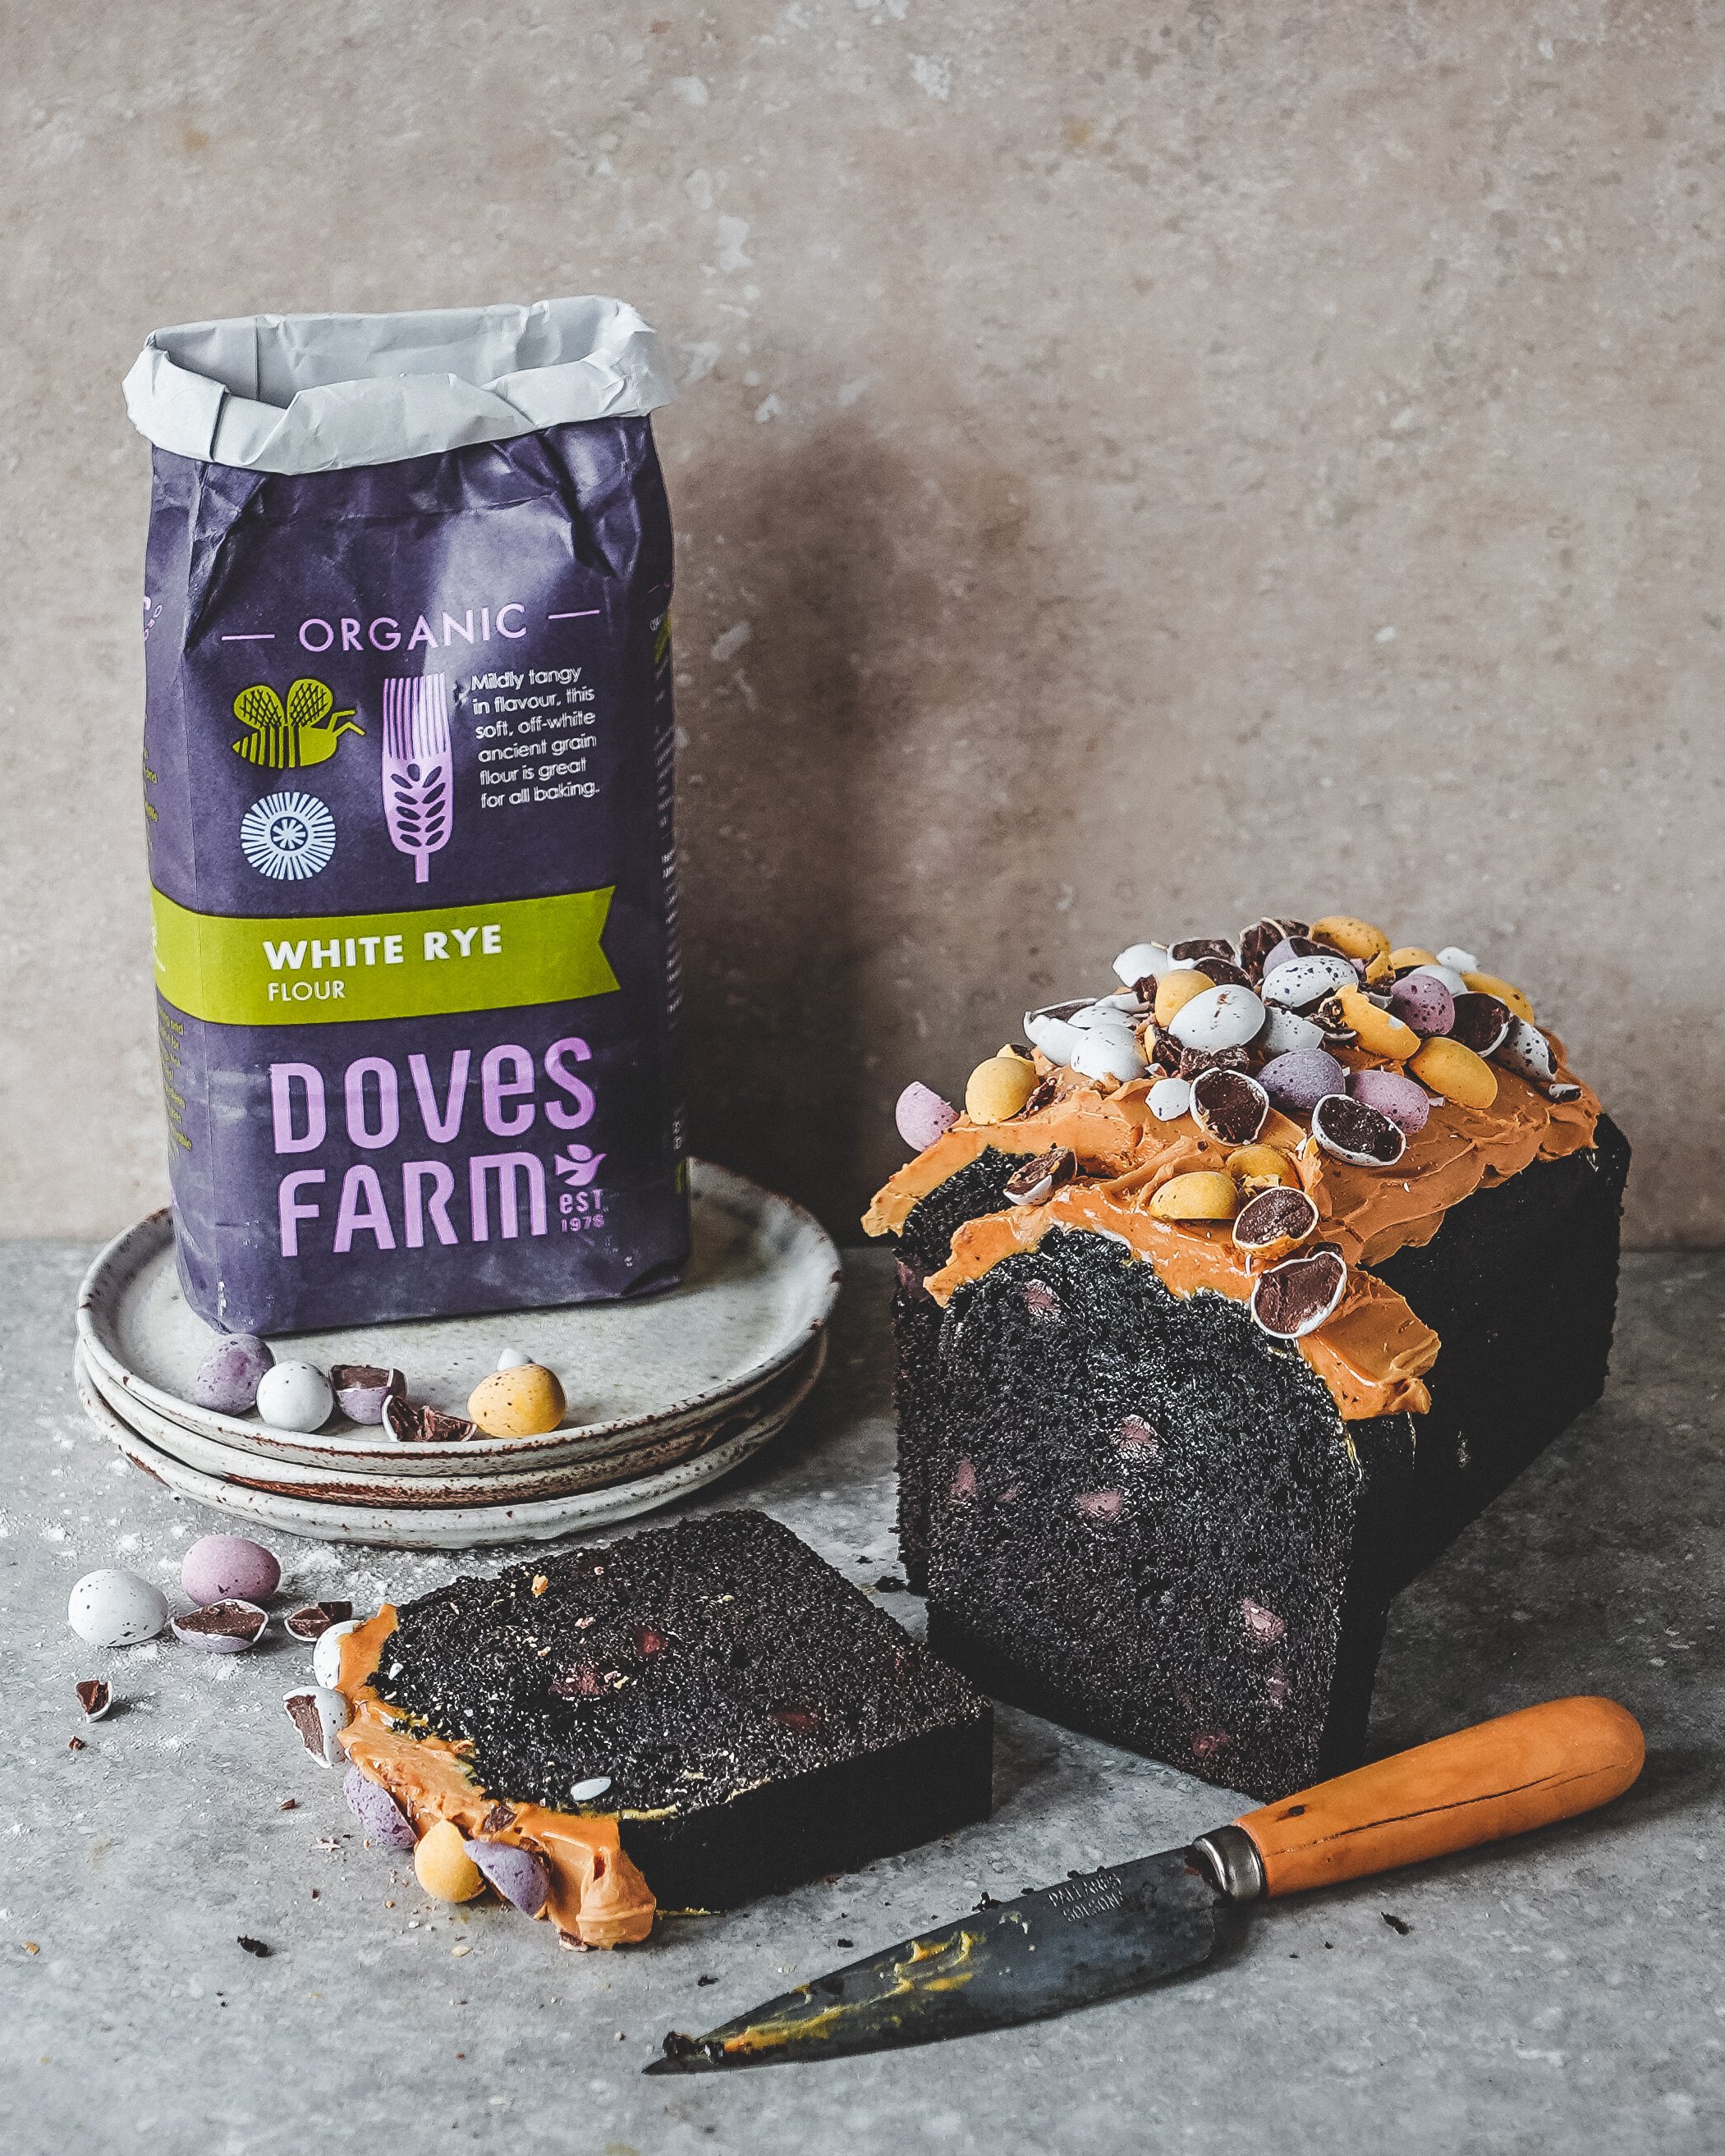
Easter and Chocolate, it is a match made in heaven, or maybe just an excuse to enjoy more chocolate. Either way I couldn’t let the holiday pass without a very special chocolate recipe for you all. I wasn’t in the mood for anything too complicated but I did want a big hit of flavour, high impact, low effort. This bakery style loaf is dense but tender and has a rich chocolate flavour backed up with some Doves Farm Organic White Rye Flour. Wholemeal rye flour, which you may have seen me use many times before, especially paired with chocolate, has a strong tangy rye flavour and the added texture that comes with wholemeal flours. For this cake I wanted something that backed up the chocolate flavour but didn’t add as much of its own flavour, more of a team player than the star of the show if you will. For the frosting I went with a very simple whipped caramelised white chocolate ganache, topped with chopped mini eggs (it’s easter, they’re mandatory). If you’ve never made this type of chocolate before you can learn how to make it here, or you could just buy it.

Doves Farm Organic White Rye has a creamy off-white colour and a mild tangy flavour that is amazing in this cake. I call it a bakery style loaf, partly because it’s a large loaf but also because it’s a dense but tender loaf, it’s like if a British tea shop cake met an American pound cake and had loaf shaped baby. The rye flour adds a subtle tang which helps intensify the chocolate flavour and also helps gives this cake its characteristic texture. When you bake with rye, especially if you are substituting it for regular wheat flour, you’ll notice it absorbs more liquid than wheat flour. In this cake for example I have made versions with regular plain flour and a rye version and the latter was a noticeably thicker batter when made to the exact same recipe. To compensate for this, I have included a little more moisture than if making it with plain flour. As a general piece of advice, when it comes to alternative/ancient grains such as rye, when adding them into your baking it’s a good idea to start with a smaller amount and see how it affects your recipe. Generally if I am adding some to an existing recipe I would sub in 25% of the grain and this normally adds a new depth of flavour without changing the texture of the finished bake in any dramatic way. After that point you can add more of the grain should you think you’d like more of the flavour and if it hasn’t affected the texture in any negative way. In this cake for example I ended up using a 50% wheat flour cocoa powder mix and 50% Doves Farm Organic White Rye Flour for the perfect balance of flavour and texture. 

Doves Farm are a family owned British organic flour and food company, founded in 1978. Their Organic White Rye Flour is available direct from www.dovesfarm.co.uk or from Ocado, Sainsbury’s or Tesco. 

Double Chocolate Loaf Cake with Whipped Caramelised White Ganache
Serves 10-12

125g unsalted butter, diced
150g caster sugar
150g light brown sugar
5 large eggs
125ml sour cream
75ml strong black coffee
100g plain flour
50g cocoa powder (dutched/black)
150g Doves Farm Organic White Rye Flour
1 1/2 tsp baking powder
1/2 tsp fine sea salt
150g dark chocolate chips

Whipped Caramelised White Chocolate Ganache
150g caramelised white chocolate, finely chopped
75ml double cream
Chocolate mini eggs, roughly chopped, for decoration

@theboywhobakes When caramel meets chocolate #caramelizedwhitechocolate #caramel #bakinghacks #SixNationsRugby #JDAirMaxMode #GameTok #fypシ #tiktokbaker #chocolatelover #chocolaterecipe ♬ Why Are There Boundaries - FKJ
@theboywhobakes Whipped caramelised white chocolate ganache #caramelizedwhitechocolate #whippedganache #SixNationsRugby #JDAirMaxMode #caramel #fypシ #tiktokbaker #chocolatelover #chocolaterecipe #ganache ♬ Orange Juice - Tomppabeats

To make the cake you’ll need a loaf pan that measures 9x4x4 (the type I prefer is known as a small Pullman pan and is available here). If you only have a traditional 1lb loaf pan (the type normally called for in a loaf recipe) you can make a batter 3/5’s of the above recipe and bake for about 45 mins.

Preheat the oven to 180ºC (160ºC Fan) and lightly grease your loaf pan and line with a strip of parchment paper that overhangs the long sides of the tin, securing in place with metal binder clips.

Place the butter in a small saucepan and place over low/medium heat and cook until the butter is fully melted. Remove from the heat and set aside for the moment. 

In a large bowl add the sugars and eggs and using an electric mixer whisk together for a minute or two until fully combined. Add the sour cream, and coffee and whisk briefly to combine. In a separate bowl whisk together the plain flour, cocoa powder, Doves Farm Organic White Rye Flour, baking powder and salt. As we are using both light brown sugar and cocoa powder it is advisable to sieve this mixture as both of these ingredients have a nasty habit of clumping. Add the dry goods to the egg mixture and use a balloon whisk to gently stir the batter together. Pour in the cooled melted butter and fold with the whisk until combined. Add the chocolate chips and very briefly mix into the batter. Be careful to only mix as needed, cakes with rye flour can become gummy if mixed for too long. Scrape the batter into the prepared loaf pan and bake in the preheated oven for about 60 minutes or until a skewer inserted into the cake comes out clean. Remove the pan from the oven and set aside for 20 minutes before carefully unfolding and setting onto a wire rack to cool completely. To ensure the crust of the cake is tender and hasn’t dried out, whilst the cake is still warm cover with a clean kitchen towel. The warmth of the cake is caught by the towel and slightly steams the outside of the cake helping ensure it stays tender.

For the ganache place the chocolate and the cream into a small bowl and place over a pan of simmering water. Stir occasionally until the chocolate has fully melted. Remove from the heat and stir until you have a smooth silky ganache. Refrigerate for up to 30 minutes or until the ganache has thickened up but is still spreadable. Remove from the fridge and using an electric mixer whisk the ganache until it turns into a pale and fluffy cream like texture. Spread this over the top of the cake and decorate with the chopped mini eggs.

Kept covered this cake will keep for at least 3 days.

In Cakes Tags chocolate cake, loaf cake, chocolate, rye flour, rye, chocolate chips, caramelised white chocolate, caramelized white chocolate, easter
3 Comments

Chocolate Passion Fruit Brioche Buns

Edd Kimber March 22, 2022

Is there a flavour pairing you go back to time and time again, something you just cant get enough of? Chocolate and mint, matcha and white chocolate or maybe pear and ginger? For me the pairing is the joyous matching of chocolate and passion fruit (works brilliantly with both milk and dark chocolate but milk is what I normally go for). I first tried this pairing in a macaron at famed pastry chef, Pierre Herme’s, Parisian boutique. It just works, the brightness of the passion fruit and the rich creaminess of the milk chocolate, I will never bore of it. 

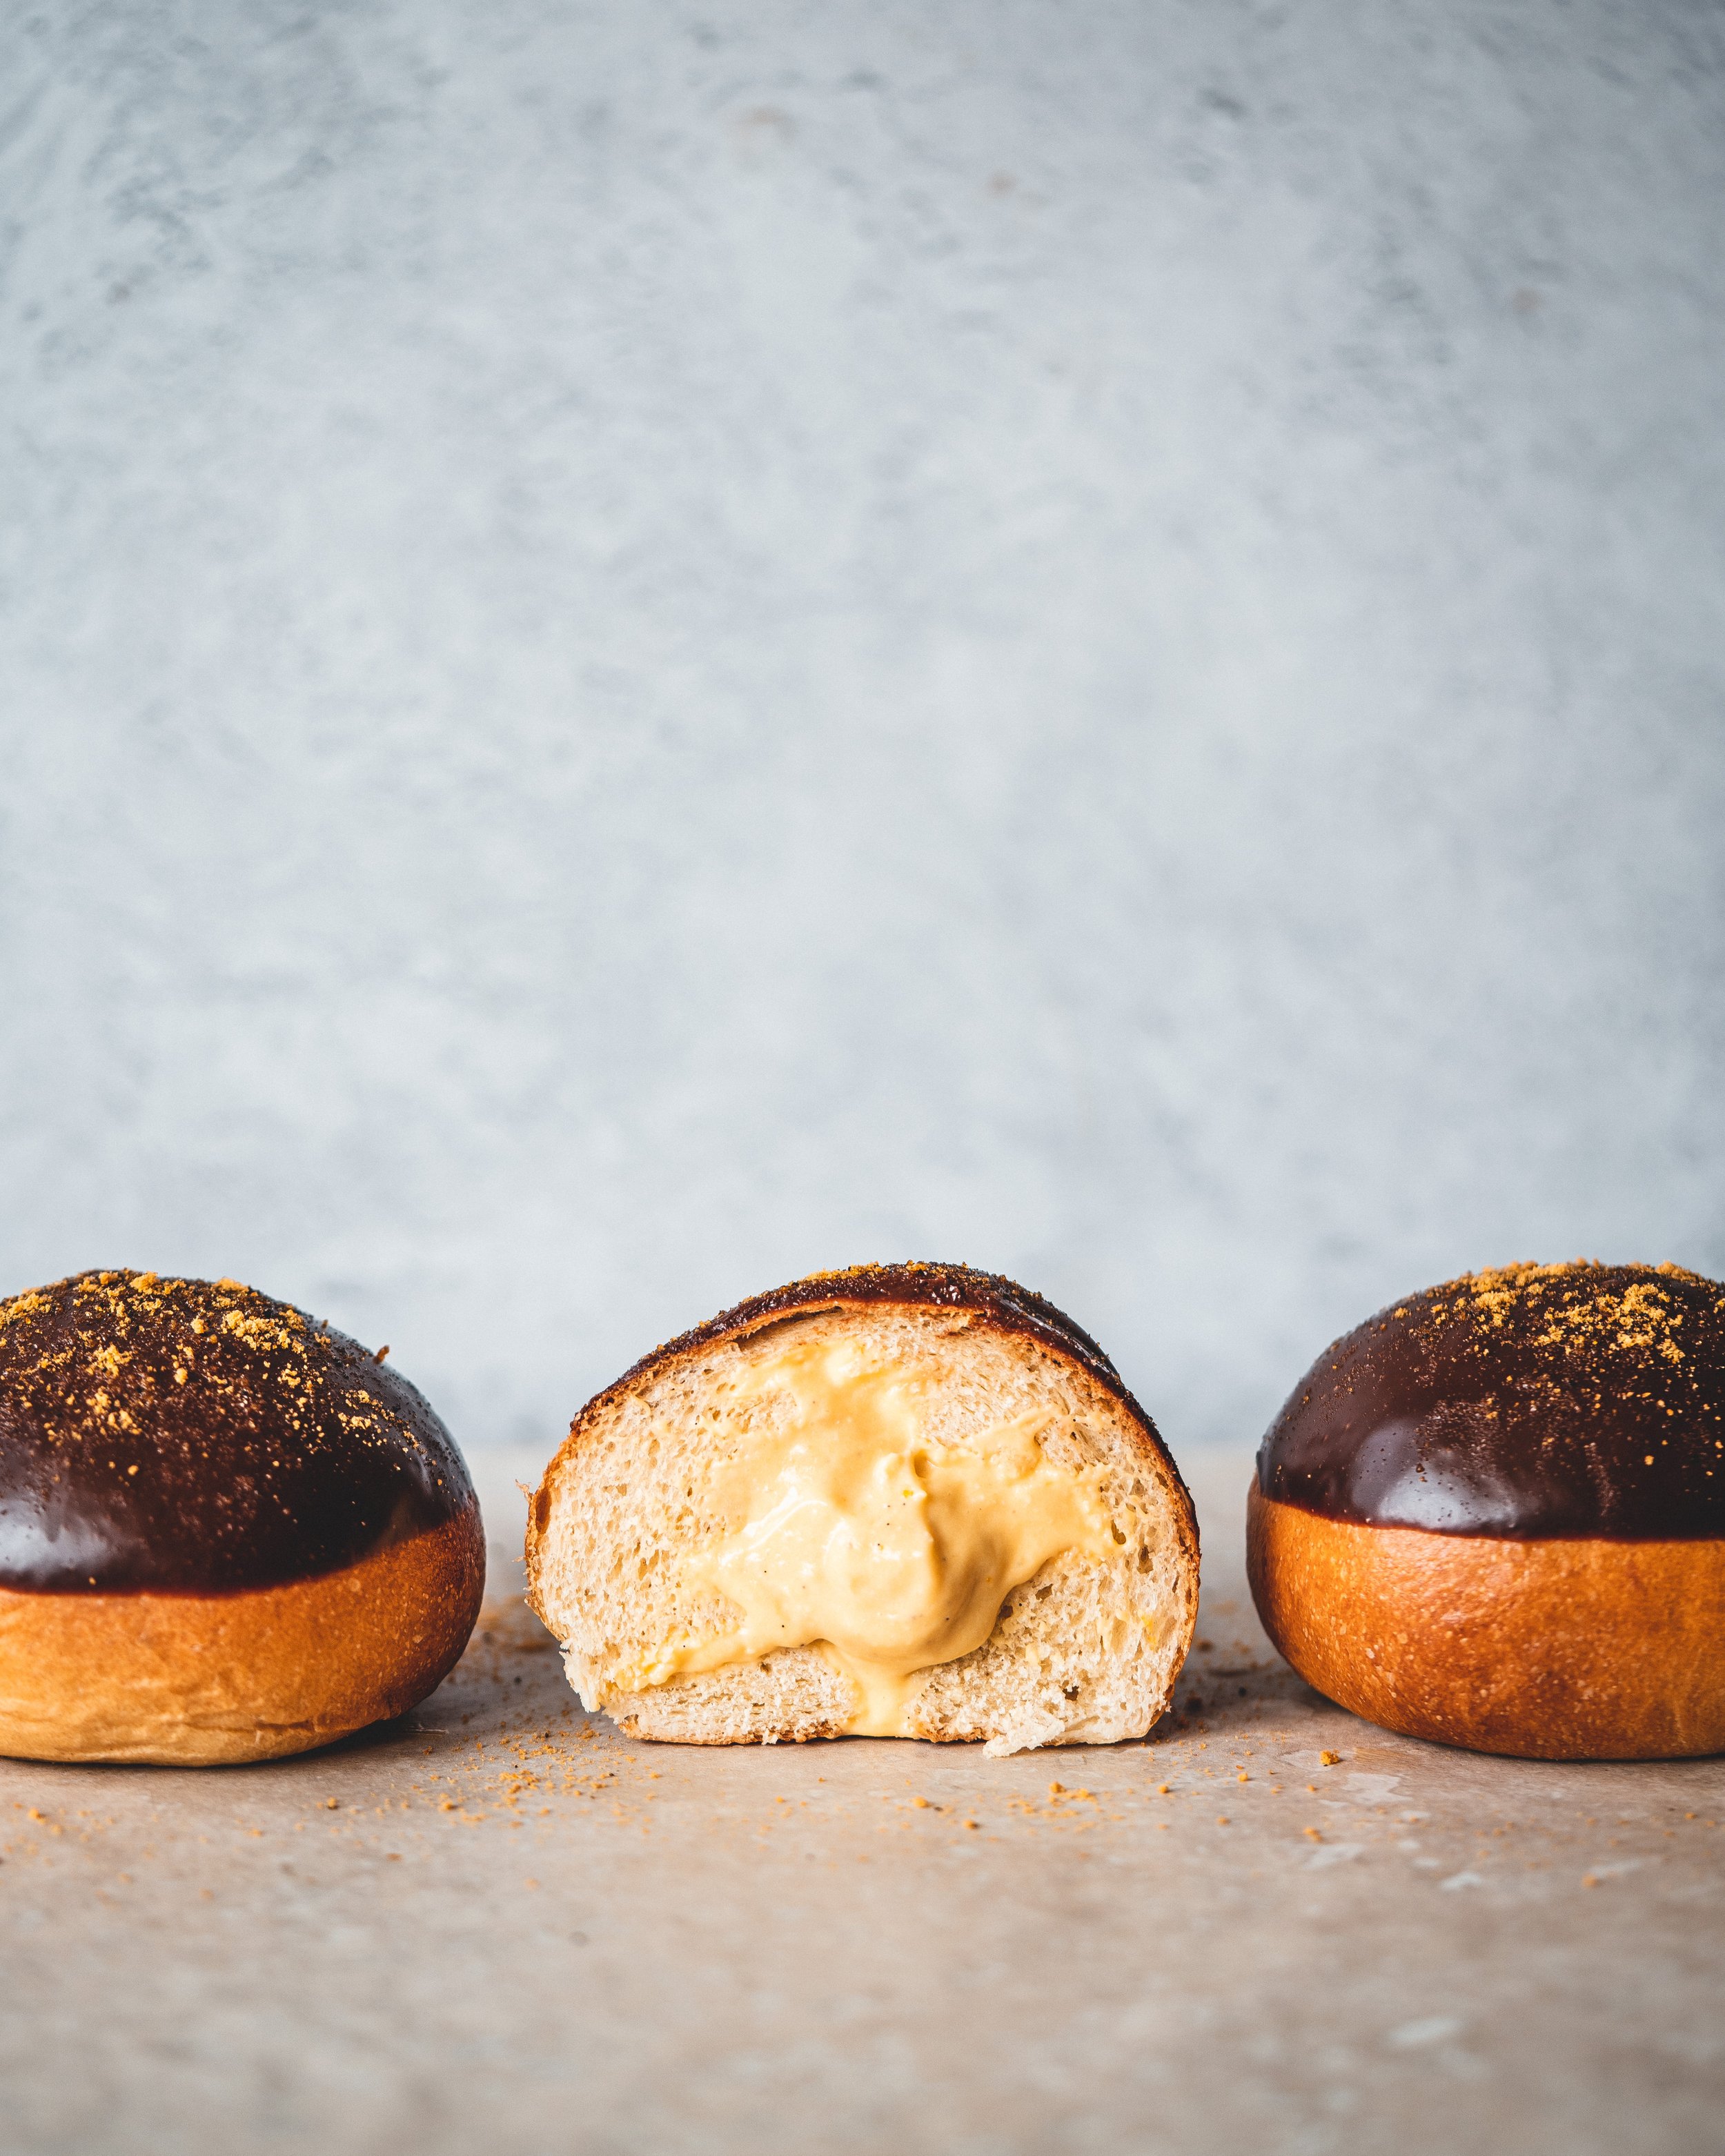
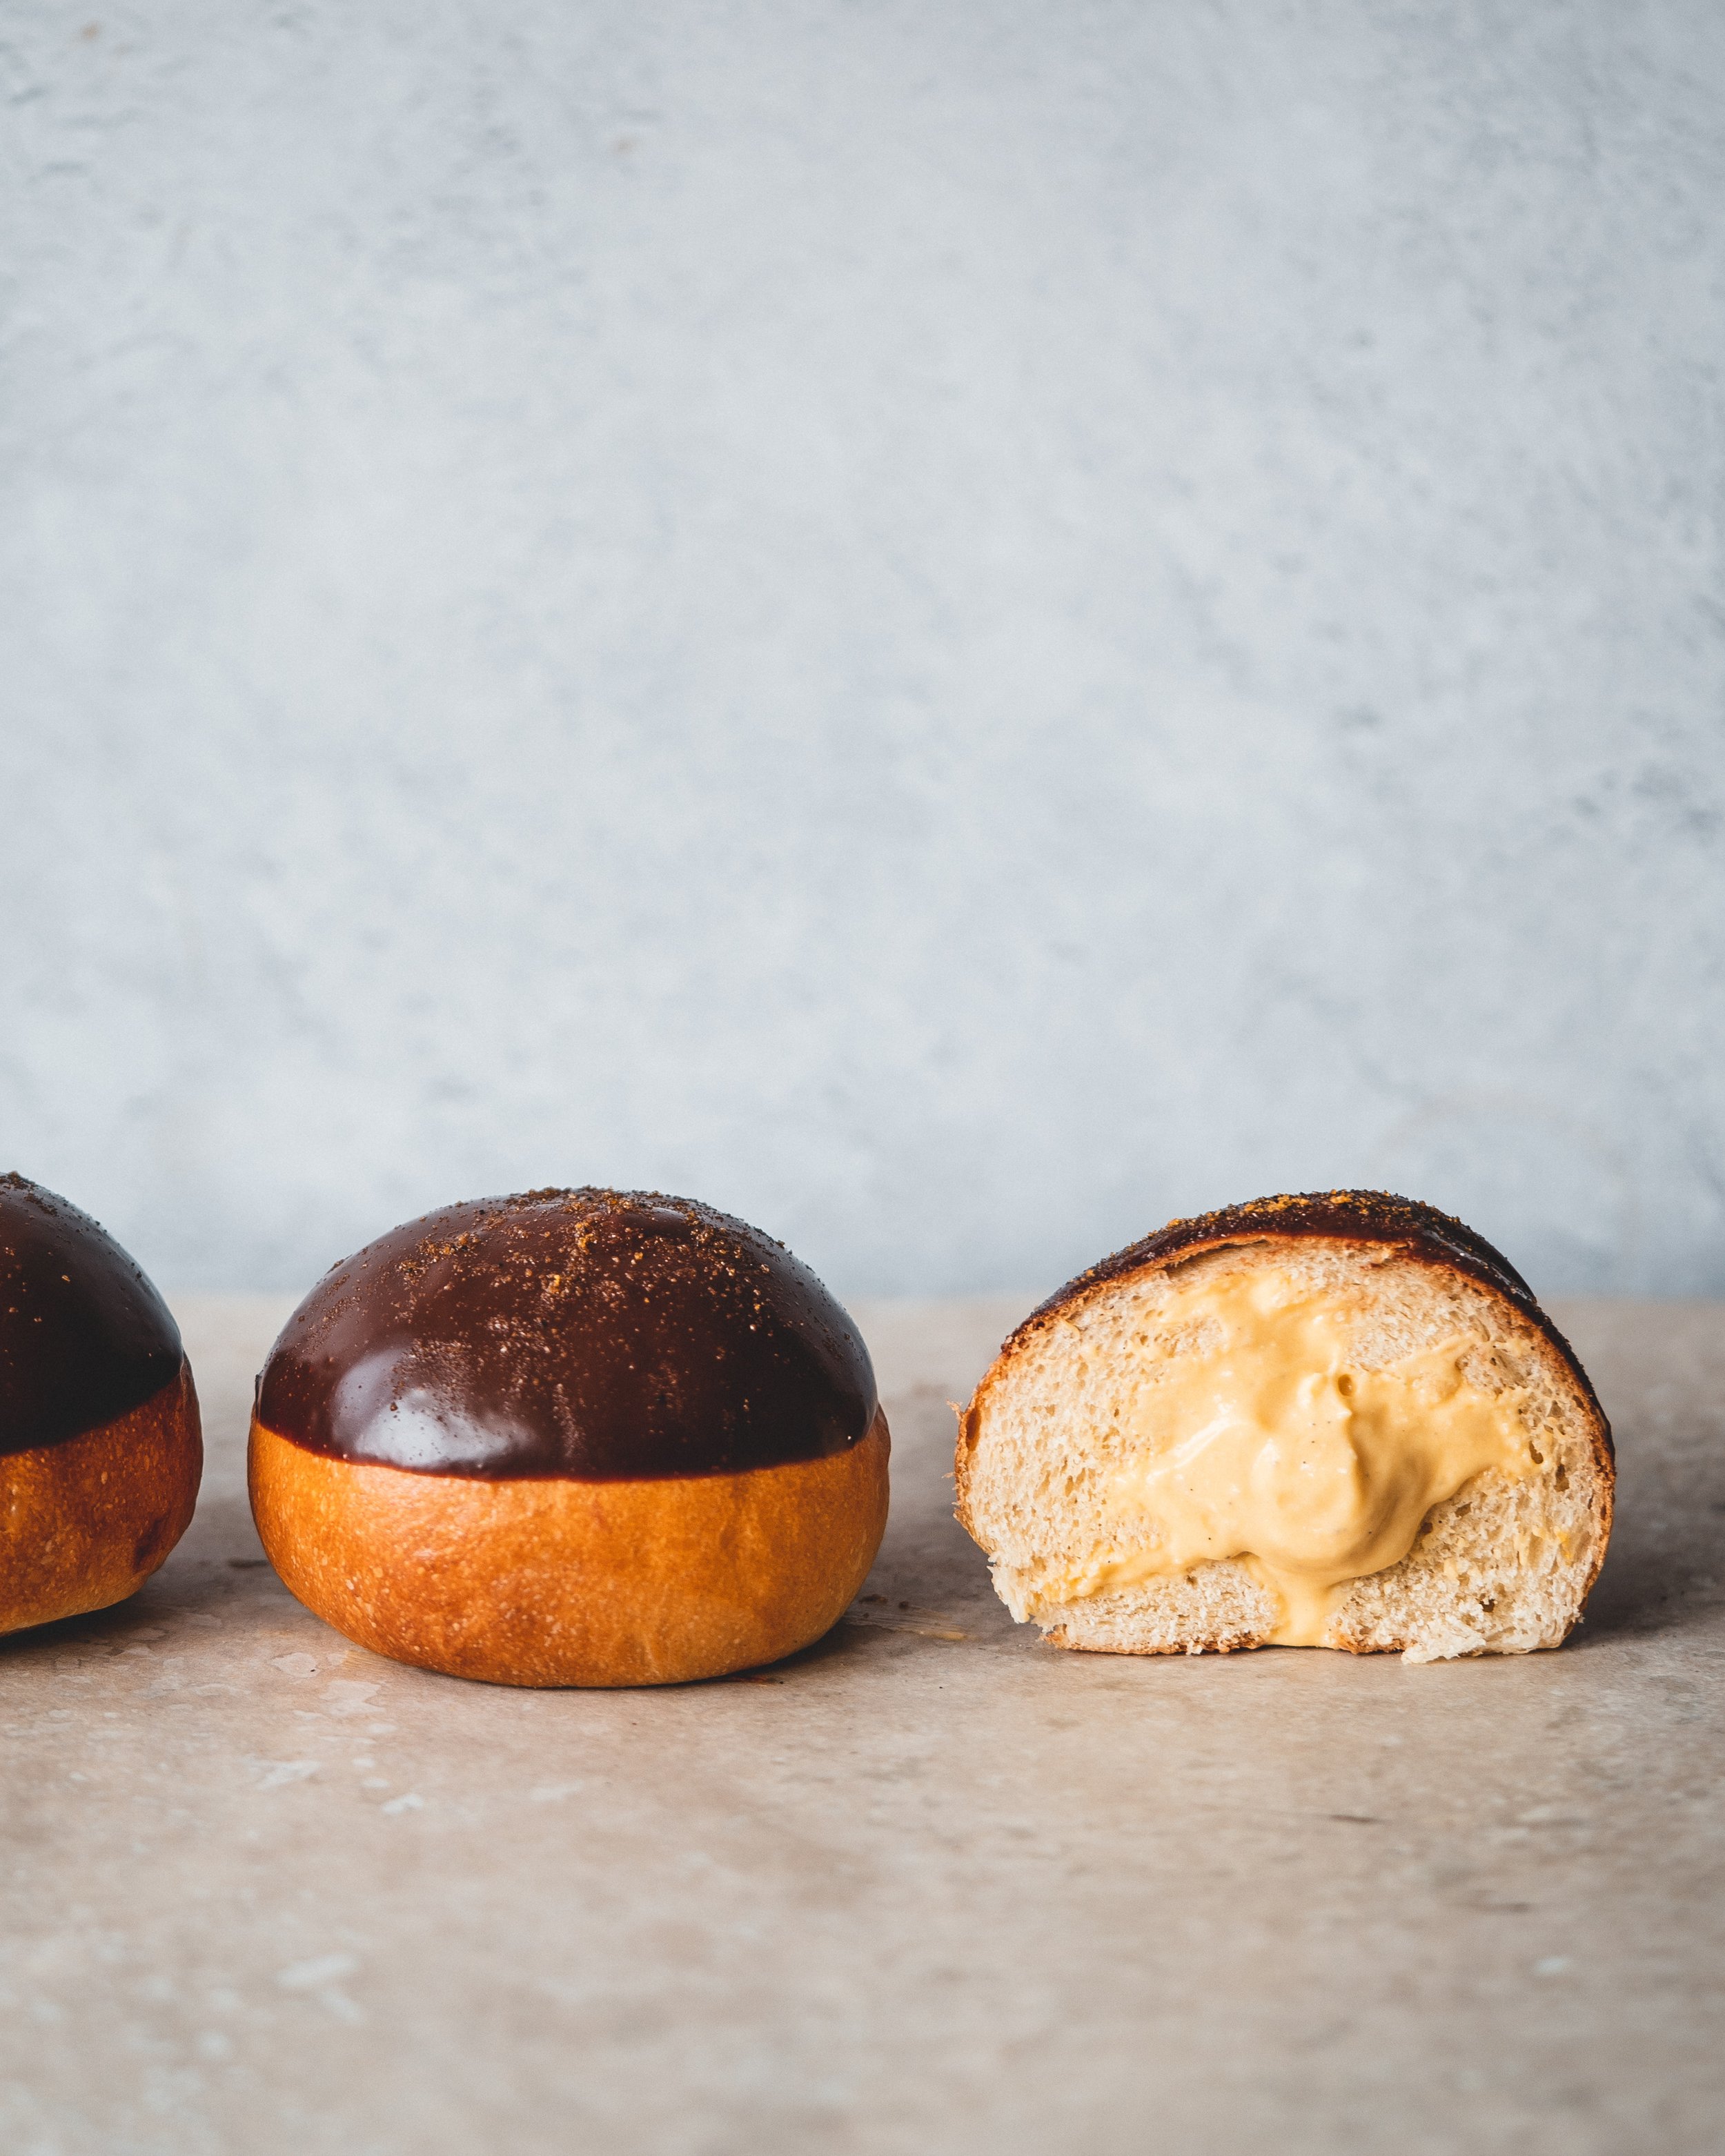
For these brioche buns I drew inspiration from the flavour combo and a form from Aroma Bakery in London, who make a brioche filled with cream and dipped in chocolate. These buns are flavoured with a little lemon zest filled with a passion fruit pastry cream lightened with a little whipped cream. The finished buns are dipped in a thin milk chocolate ganache that has been spiked with a little extra passion fruit puree. 

Before we get to the recipe a quick note on passion fruit. They are expensive, at least here in the UK, especially considering how many you often need to get the need amount of puree for a recipe. So whilst I generally like using fresh fruit in recipes that use a lot of passion fruit I splurge on passion fruit puree, which is sold in cartons. Yes you have to buy these online (or a good alcohol shop if you have one close by, this is where I get it in London) and they only come in litre sized packs, it does however work out significantly cheaper than buying the fresh fruit. If you love using passion fruit in baking this is my preferred method, for ease and for value. It is also worth noting you can also freeze the puree you don’t use and save it for a later purpose. 

Chocolate Passion Fruit Brioche Bun
Makes 8

Brioche
250g strong white bread flour
1/2 tsp fine sea salt
1 tsp fast action dried yeast
20g caster sugar
Zest of 1 lemon
125ml whole milk
1 large egg, plus one for egg wash
50g unsalted butter, room temperature

Passion Fruit Pastry Cream
225ml passion fruit puree
75g caster sugar
20g cornflour
3 large egg yolks
Pinch of fine sea salt
20g unsalted butter
100ml double cream
1 tsp vanilla bean paste

Chocolate Glaze
50g milk chocolate (I like a dark milk chocolate, something around 50% cocoa solids)
50ml double cream
15ml passion fruit puree

The day before you want to bake these buns make the brioche and the pastry cream. For the brioche place 20g of the flour and 80ml of the milk into a small butter pan and cook over medium heat, stirring with a small whisk or spatula, until the mixture cooks into a thick paste. Scrape into a small bowl and set aside for the moment. 

In the bowl of a stand mixer add the remaining flour, salt and yeast and whisk to combine. Add the sugar and lemon zest to a small bowl and use your fingers to rub together until the sugar resembles moist sand and you can smell the aroma from the lemon. Add this to the bowl along with the remaining milk and egg, and the cooked flour mixture. With the dough hook attached mix on low speed until the mixture forms a shaggy dough. Continue mixing for 10-15 minutes or until the dough no longer sticks to the sides of the bowl. Add the butter a little bit at time until all of it has been added. Continue mixing on low speed until the butter has been combined and the dough is once again no longer sticking to the sides of the bowl and has formed a ball of dough around the dough hook. The finished dough should have a slight sheen and be stretchy and elastic. Scrape the dough onto the worksurface and form into a ball. Place into a bowl and cover with clingfilm and refrigerate overnight until ready to use (the dough can be stored in the fridge for a couple days before using). 

To make the pastry cream place the passion fruit puree into a saucepan with half of the sugar. Place the pan over medium heat and bring to a simmer. Meanwhile, in another bowl, mix together the remaining sugar and cornflour. Add the egg yolks and salt and whisk together until smooth. When the puree is simmering pour over the yolk mixture, whisking as you pour to prevent the yolks from scrambling. Pour the custard back into saucepan and place back over medium/high heat and cook, whisking constantly, until the custard comes to a boil and is thick. Immediately scrape the custard into the bowl, add the butter and stir until fully combined. Press a sheet of clingfilm onto the surface of the custard and refrigerate until needed. The custard can be stored in the fridge for 2-3 days before using. 

On the day you want to bake the buns remove the dough from the fridge and divide into 8 equal sized pieces. Form the dough into neat round buns and place them on a large parchment lined baking tray. Cover the buns lightly with clingfilm and set aside for about 60-90 minutes or until the buns have almost doubled in size. Just before they have finished proofing preheat the oven to 200ºC (180ºC Fan). Lightly beat the remaining egg with a fork and brush each bun with the egg wash. Bake in the preheated oven for about 15-20 minutes or until the buns are golden. Remove and set aside to cool. 

For the pastry cream remove the bowl from the fridge and beat the custard until smooth and lump free. In a separate bowl beat the cream and vanilla until it holds soft peaks. Add the cream to the custard and fold together until smooth and fully combined. 

Using a skewer, poke a hole in the bottom of each bun. Scrape the custard into a piping bag fitted with a Bismarck piping tip (you can use whatever thin round piping tip you have but anything doughnut-like is much easier with a bismarck tip). Pipe in as much custard as each bun will take before it squeezes out. Once filled the buns should feel a little heavy, if they feel light they need more custard. 

For the glaze melt together the cream and chocolate until fully melted and a smooth ganache is formed. Scrape the ganache into a small bowl and whisk in the passion fruit puree. Dip the buns into the ganache, allowing any excess to dip back into the bowl. Place back onto the baking tray and set aside until the ganache is set. If you want to can decorate the buns, either with a little grated chocolate like Arome do with their buns, a little cocoa powder or a little freeze dried passion fruit powder as I did. 

Kept covered these buns will keep for 2-3 days. 

In Breads and Quickbreads Tags passion fruit, brioche, chocolate, ispahan, arome, pierre herme, buns
2 Comments

Boston Cream Bundt Cake

Edd Kimber August 25, 2021

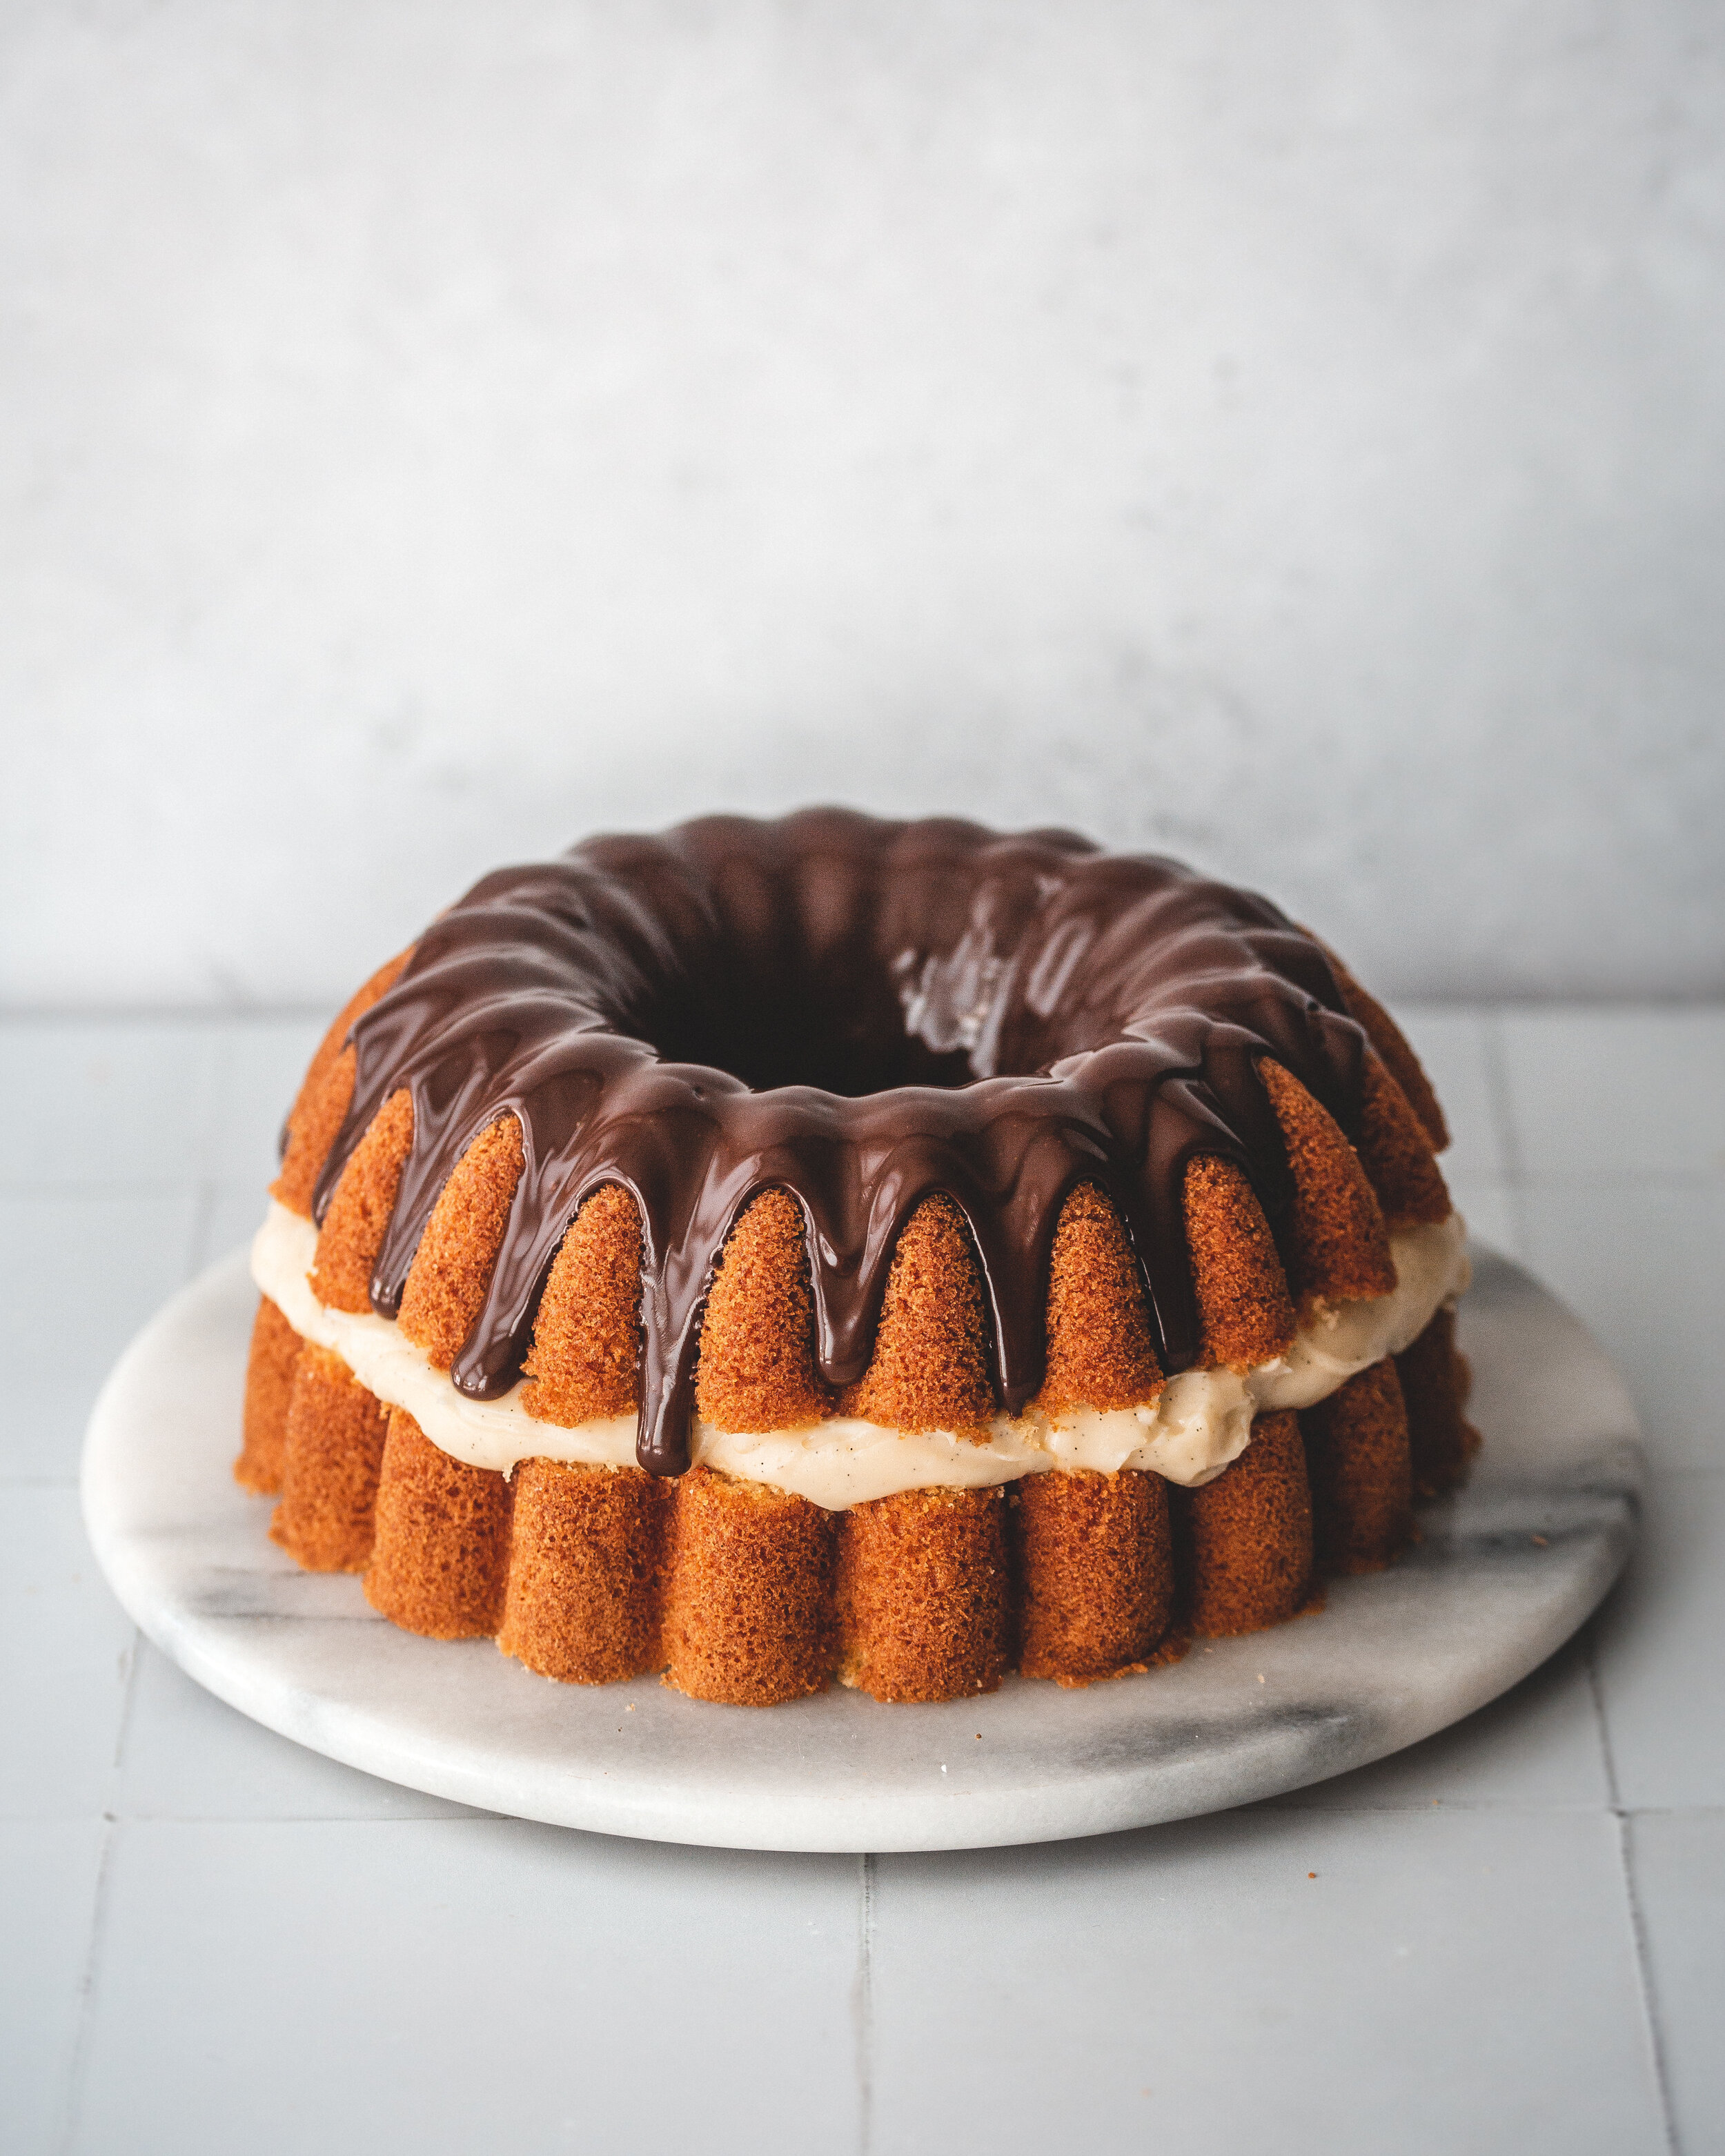
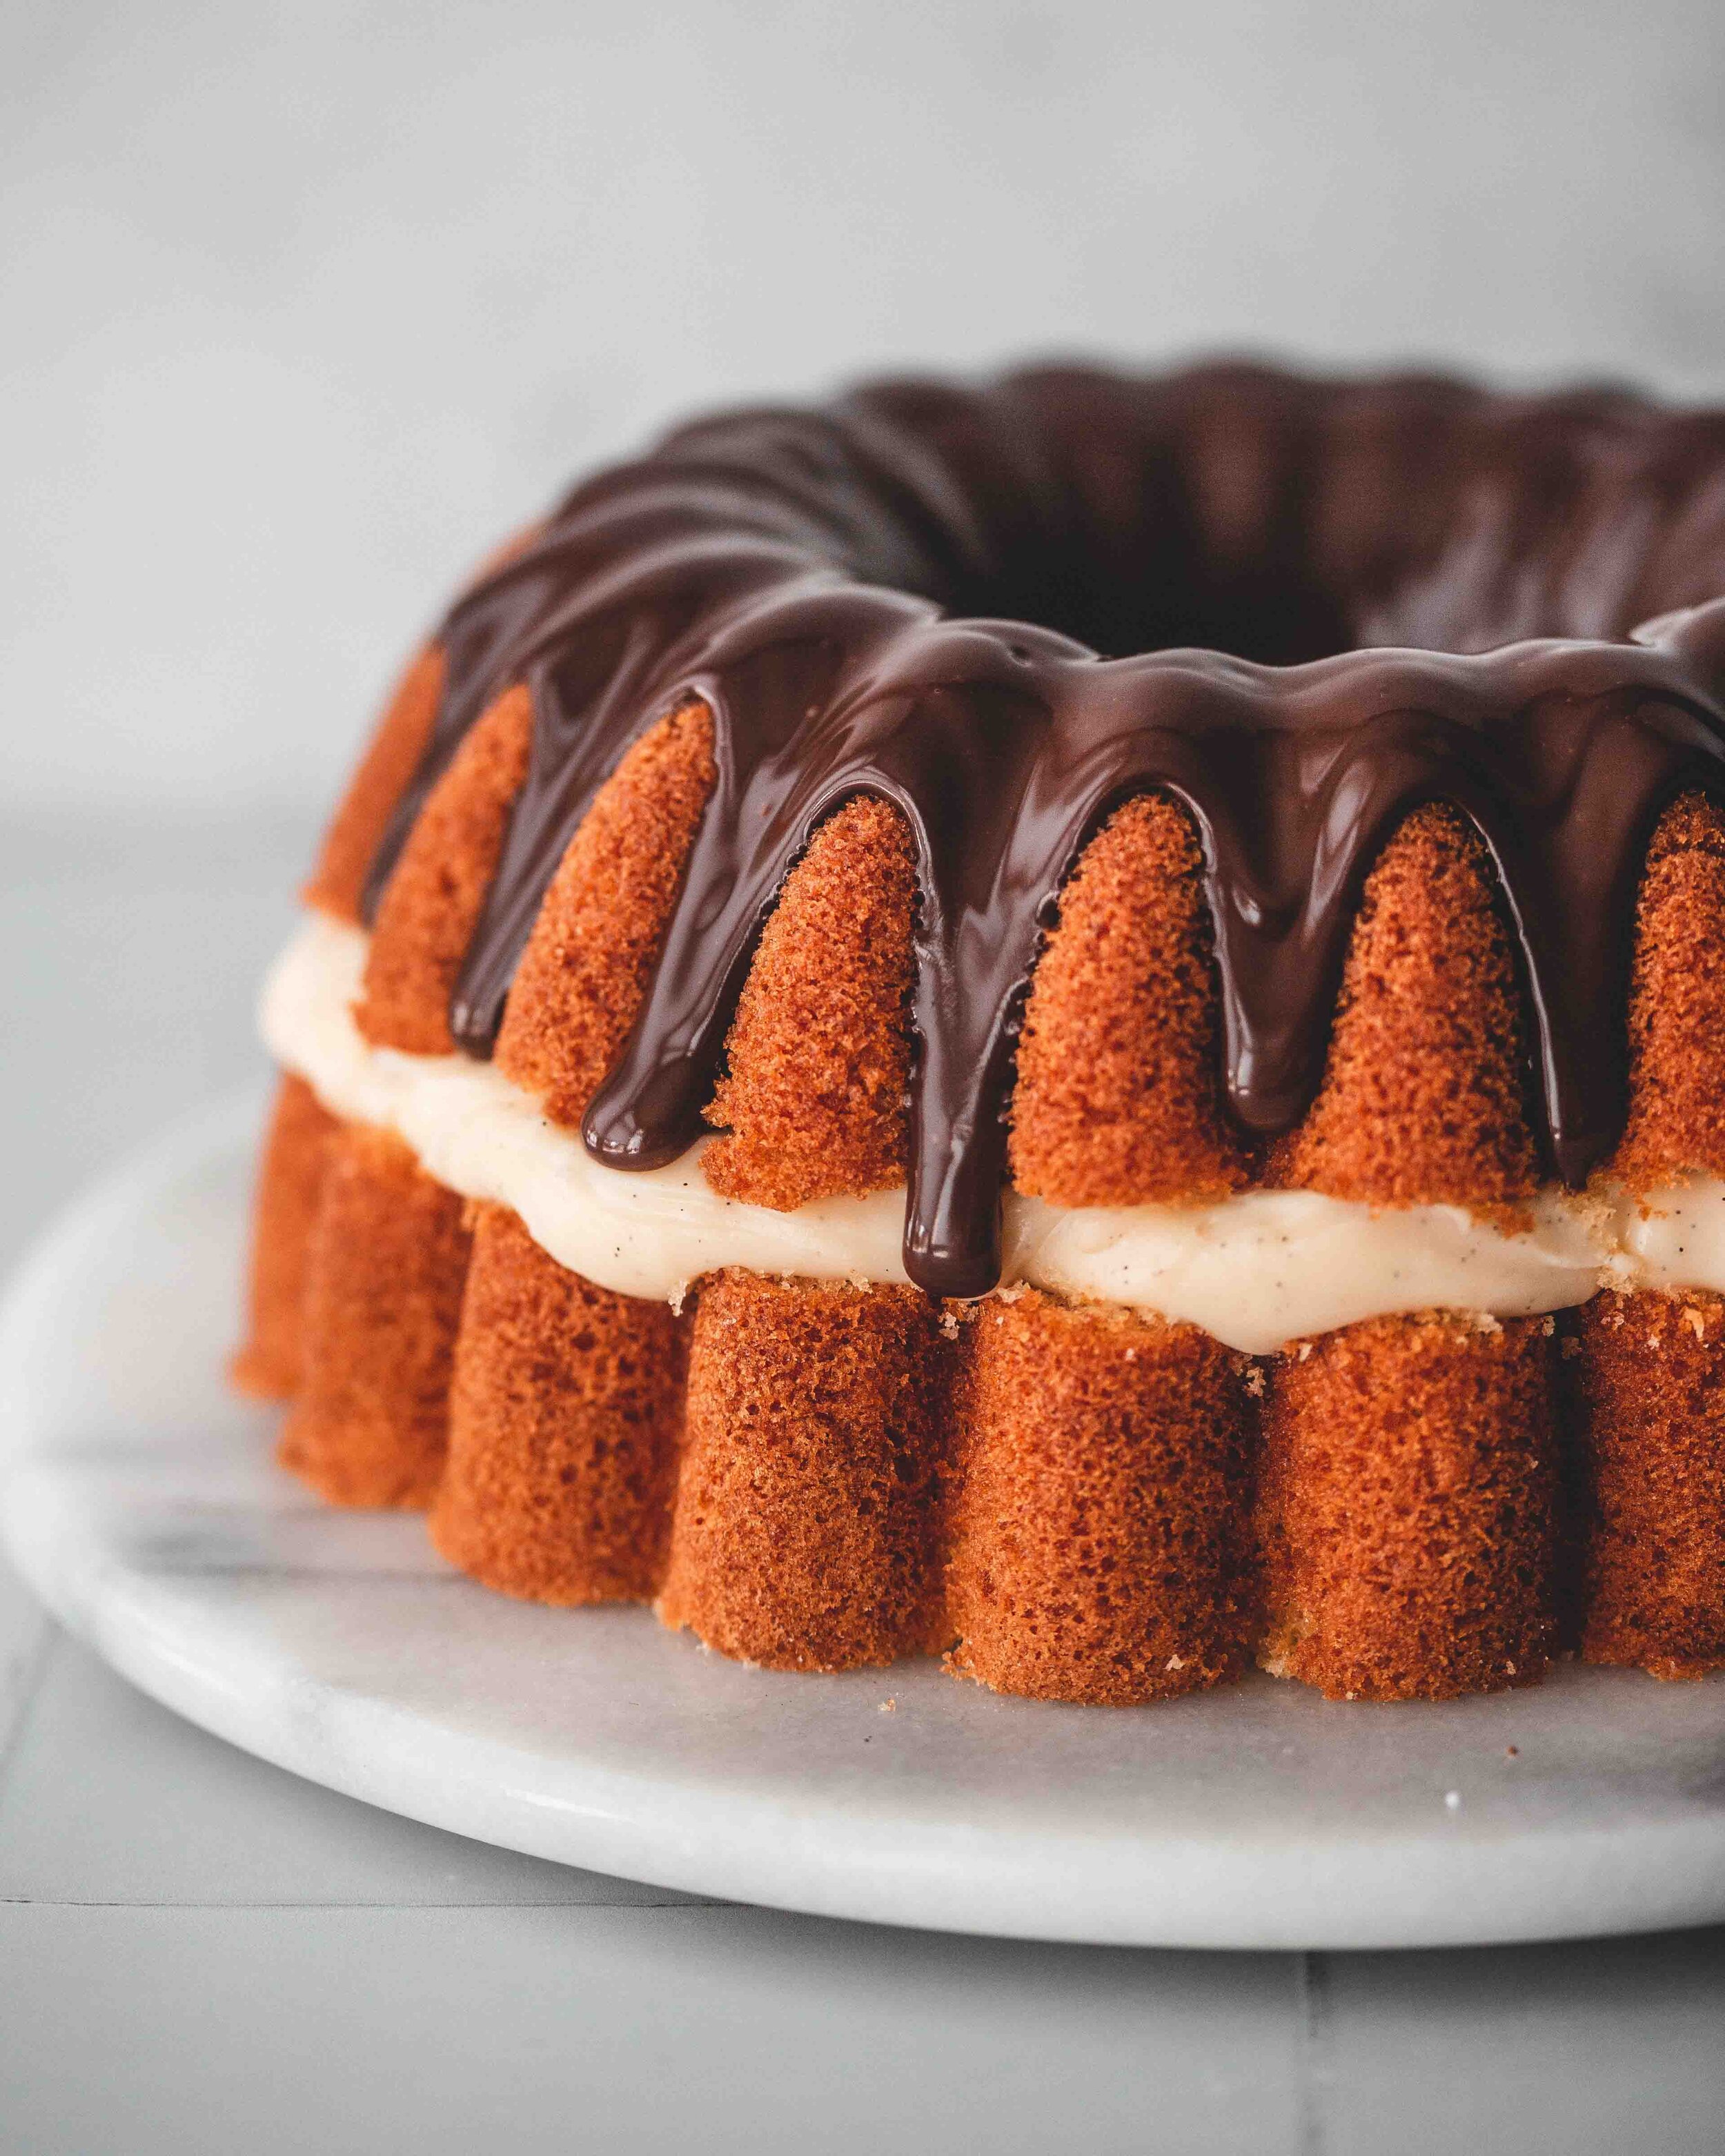
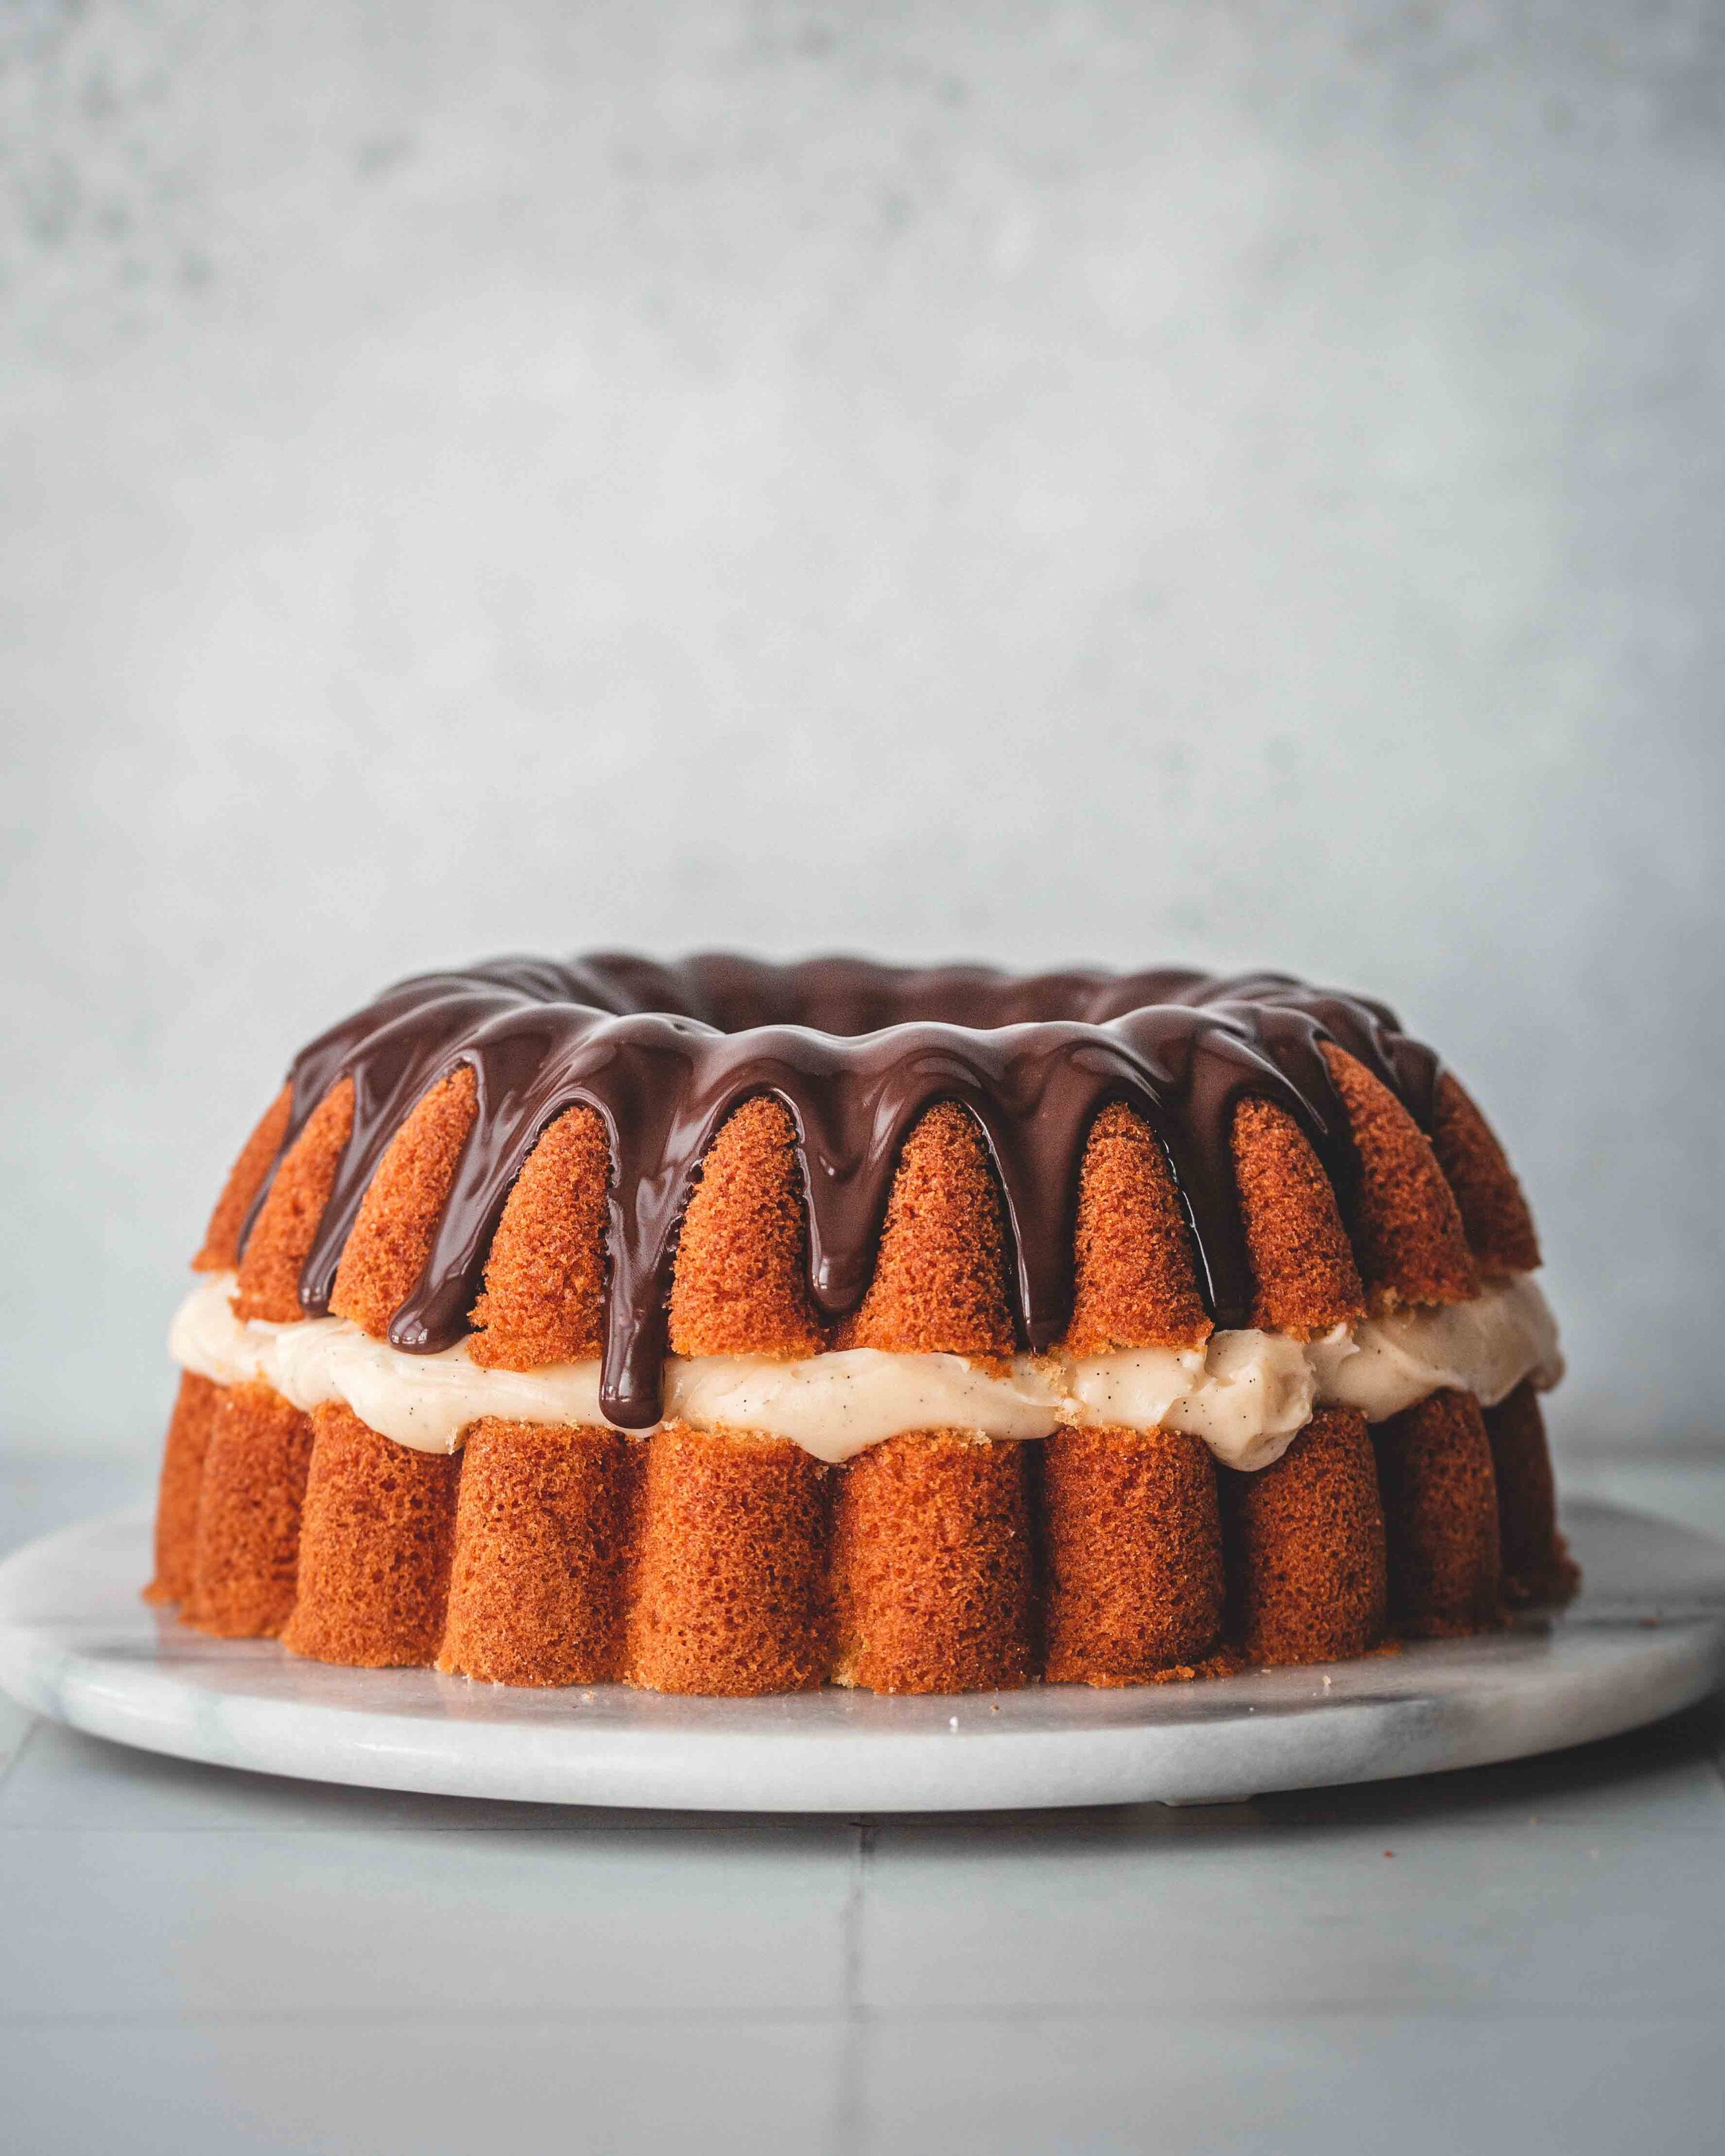
Boston Cream Pie, as it is traditionally called, is a bit of a misnomer in that it is clearly a cake and not a pie. The name, supposedly, harks back to the 1800’s when the line between what was a cake and what was a pie was blurred somewhat, the names being used in more of an interchangeable manner. Either way, what is known about the origins of the cake are murky at best, with the Parker House Hotel claiming they invented the cake but food historians saying its origins are much more likely older than the hotel itself. Traditionally the cake would be made with either a rich butter cake or a lighter whisked sponge, the latter being the version I am more au fait with. The filling was always a rich pastry cream but the topping, which used to be a chocolate fondant, has morphed into a more common chocolate ganache glaze. My version sticks very close to this formula with a whisked sponge in the style of a chiffon cake, filled with a vanilla rich pastry cream and topped with a silky ganache glaze. The only thing I have omitted in this version is the traditional sliced almonds that coat the outside of the cake. Feel free to scatter almonds over the finished cake if you wish.

Boston Cream Bundt Cake
Serves 12-15

Bundt Cake
250g caster sugar
4 large eggs
2 tsp vanilla bean paste
120ml olive oil
80ml whole milk
200g plain flour
1 + 1/2 tsp baking powder
1/2 tsp fine sea salt

Custard Filling
300ml whole milk
1 tsp vanilla bean paste
100g caster sugar
25g cornflour 
2 large egg yolks
1 large egg
30g unsalted butter
Pinch of fine sea salt

Chocolate Glaze
70g dark chocolate, finely chopped
100ml double cream

For the custard filling place the milk, vanilla and roughly half the sugar into a saucepan and place over medium heat and bring to a simmer. Meanwhile, place the remaining sugar and the cornstarch into a mixing bowl and whisk together until combined. Just before the milk is at temperature add the egg yolks and whole egg to the sugar and cornflour mixture and whisk together until smooth. 

When the milk is at temperature remove from the heat and slowly pour over the egg mixture, whisking as you do you. Pour the custard back into the pan and place on the heat and whisk constantly until the custard is very thick and has bubbled. Immediately scrape the custard into a bowl and stir in the butter and a pinch of salt, mixing until smooth. Press a sheet of clingfilm onto the surface of the custard and refrigerate until needed. 

Preheat the oven to 180ºC (160ºC Fan). Grease a 10-cup bundt pan, using either a cake release spray or brushing with softened butter and then dusting with flour. My preference is using a homemade ‘cake goop’ made from an equal volume measure of shortening, neutral oil and all purpose flour, mixed to a paste. 

Place the sugar, eggs and vanilla into the bowl of a stand mixer, fitted with the whisk attachment. On medium/high speed whisk for about 7 minutes or until ribbon stage. Turn the mixer to medium/low and slowly pour in the olive oil and then the milk. Sieve in the flour, baking powder and salt and fold the flour until the batter is smooth and no signs of flour remain. Pour the batter into the prepared pan and then give the pan a couple firm taps on the work surface to pop any large bubbles. 

Bake in the preheated oven for about 35 minutes or until the cake springs back to a light touch. Remove from the oven and set aside for 10 minutes before inverting the cake onto a wire rack to cool completely. 

Once cooled use a serrated knife to cut the cake into two layers. Remove the custard from the fridge and beat to loosen. Place the bottom layer of the cake onto a cake stand or plate and spread the custard over the cut surface. Top with the second cake layer and refrigerate while you make the glaze. 

Place the chocolate into a jug and set aside for the moment. Place the cream into a small milk pan and over medium heat bring to a simmer. Pour into the jug with the chocolate and set aside for a couple minutes before stirring with a small sauce whisk to form a silky ganache. Remove the cake from the fridge and then pour over the glaze, allowing it to drip down the sides of the cake.

The cake is best used within a day or two


In Bundts, Cakes Tags bundt, bundt cake, chocolate, chocolate glaze, pastry cream, creme patissier
9 Comments
  • Recipes
  • Older
  • Newer

Twitter

  • Was 8 original films, 3 spin off films, a two part play not enough. Can we have something new. https://t.co/cBZdGEGeyv
    Apr 4, 2023, 1:46 PM
  • RT @deliciousmag: Cacio e pepe, but make it buns! These seriously cheesy bread rolls from @TheBoyWhoBakes are inspired by his favouri… https://t.co/oDZlaDgnN2
    Apr 2, 2023, 11:08 AM
  • RT @TheDailyShow: Congrats to Donald Trump on finally winning a majority of votes! https://t.co/ezP55HZgl0
    Mar 31, 2023, 12:43 AM

Instagram

This weeks bonus recipe, for subscribers to my newsletter, is this gorgeous sour cherry and coconut gateau basque. The crust is a buttery cross between pastry and cake, think a cakey cookie. The filling is a layer of sour cherry topped with a rich coconut custard. A real fun one to make too! Link to my newsletter can be found in my bio - #gateaubasque #pastrycream #coconut #sourcherry
In this months @olivemagazine (out today) the team came and photographed my petit kitchen and we talked about how we put our stamp on the place, without spending a fortune. We hated the bland kitchen that we inherited but, as it was relatively new an
In this months @olivemagazine (out today) the team came and photographed my petit kitchen and we talked about how we put our stamp on the place, without spending a fortune. We hated the bland kitchen that we inherited but, as it was relatively new and in good condition, it felt a waste to rip it out and we also didn’t want to spend the money it would take to rip out the whole thing and replace it (it’s a howdens shell so we could have done something cheaper like @plykeakitchens @holte.studio @madebyhusk) so instead I painted all of the cabinets, using @makeitrustoleum kitchen cabinet paint, to give it some personality and lighten the whole thing. Check out the magazine for the full run down. - #kitchendesign #kitchenremodel #rustoleumcabinettransformations #rustoleumkitchencupboardpaint #kitcheninspiration #theboywhobakes #olivemagazine
Are you making scones all wrong? Maybe, maybe not? But I do want to show you how I make them! This recipe is based on the method I learnt at @belmondlemanoir 12 years ago when I did a stage, and it makes the absolute lightest scones. And shock horror, it involves kneading the dough, albeit very lightly. You can get the full recipe in this weeks newsletter (free) linked in my bio. - #scones #bakingday #worldbakingday #afternoontea #hightea #englishscones #clottedcream #creamtea #theboywhobakes
facebook
  • Contact

The Boy Who Bakes

Edd Kimber

facebook