The Boy Who Bakes

Edd Kimber
  • Home
  • Recipes
  • My Books
  • Blog
  • Recipe Index
  • About
  • Home
  • Recipes
  • My Books
  • Blog
  • Recipe Index
  • About

Recipes

  • All
  • baking
  • Biscuits and Cookies
  • Breads and Quickbreads
  • Bundts
  • Cakes
  • Chocolate
  • Dessert
  • drinks
  • Holidays
  • Pastry
  • Scones and Quickbreads

Espresso Caramel Sheet Cake

Edd Kimber November 16, 2021

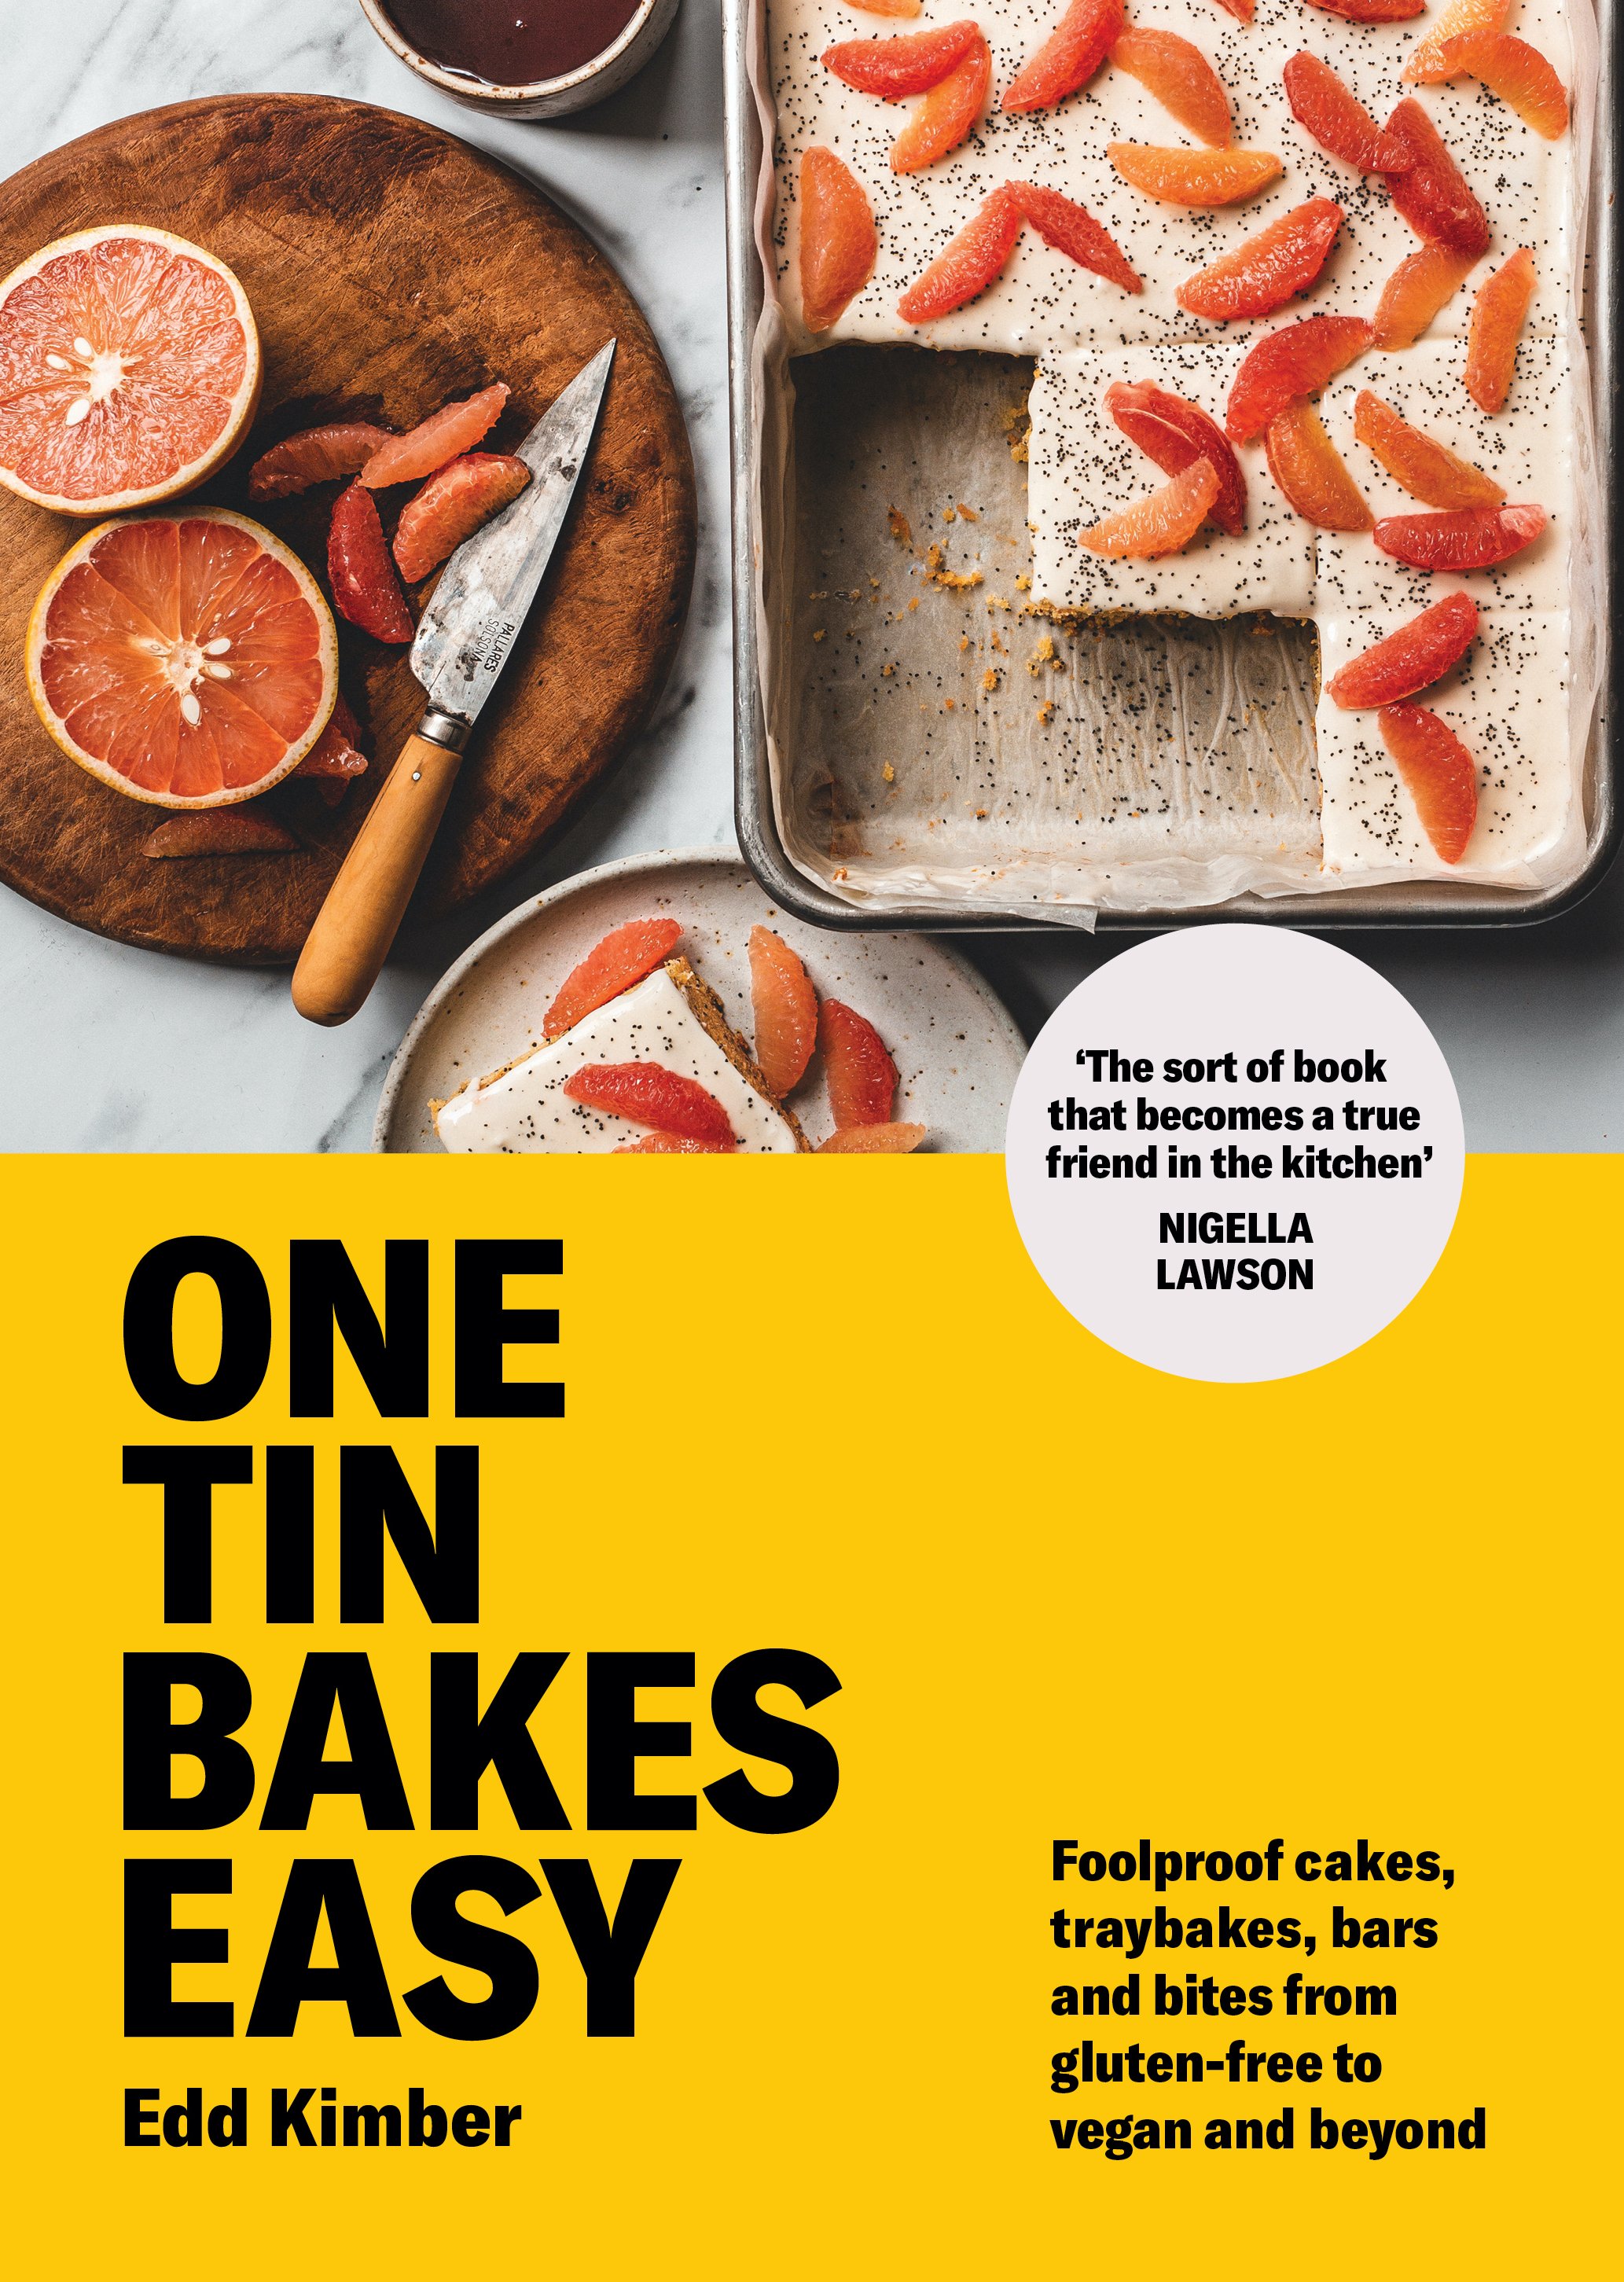
Today I have a fabulous treat for you, a sneak peek at a seriously delicious recipe from my new book One Tin Bakes Easy which has now been out in the UK, Aus and NZ for a month and from today is also on sale in the USA and Canada.

If you haven’t heard about the book yet let me give a quick 30 second explanation. Last year I released my book One Tin Bakes, a collection of 70 recipes that are all made in the same 9x13 tin. I was blown away by the response, the book became a bestseller and even a year later I still see you guys baking from it every single day. The book came out in the midst of the pandemic and right in the middle of lockdowns all over the world. People were stuck at home and baking became one the things they relaxed with, everyone and their grandmother was making banana bread or turning out loaves of sourdough. When people picked up a copy One Tin Bakes it became really clear to me, through the emails and instagram DM’s I was receiving, that so many people baking last year were doing so for the very first time. Even though the recipes in One Tin Bakes are relatively simple there was still some nervousness with new bakers around many basics of baking. Because of this and the success of the book I decided to write a second volume in the series, a collection of 70 brand new recipes that were even easier than the original book. I am talking one bowl cakes that use the all in one method, treats that are no-bake, recipes that only use 5 ingredients. 

One Tin Bakes Easy shares the same DNA as One Tin Bakes but the recipes are as simple as I could possibly manage. They may be easy but the recipes never compromise on flavour, they’re easy but delicious. If that sounds like something you’d appreciate the book is now available everywhere books are sold in America, Canada, the UK, New Zealand and Australia. You can also buy copies anywhere in the world via The Book Depository.

If you are thinking you’d like to buy a copy as a present (the holiday season is upon us after all) There are a number of places you can buy signed copies. In the UK Waterstones have a stock of signed copies that you can buy online and from some stores in person (check their site for availability. In the US the Book Larder in Seattle have signed copies and they can ship anywhere in the country. I am also working on trying to get signed copies in more countries so bear with me if you’re looking to get one elsewhere. 

The recipe I have chosen to show you is my Espresso Caramel Sheet Cake. The cake is an all in one affair made with sour cream and a very healthy dose of espresso (or the strongest coffee you can make at home). The topping is a truly heavenly mix of dulce de leche, cream cheese and cream whisked until billowy and soft. It is spread over the cake and finished with a sprinkling of flaked sea salt. Trust me when I say you need to make this.

Espresso and Caramel Sheet Cake
Recipe from my new book One Tin Bakes Easy

Note: as you will see the measurements in this recipe are in both metric and imperial and this is how they appear in the book so no matter what style of measurement you prefer you are covered

170g (6oz/11⁄2 sticks) very soft unsalted butter, plus extra for greasing
320g (111⁄4oz/21⁄2 cups + 1 tablespoon) plain (all-purpose) flour
3 teaspoons baking powder 1⁄2 teaspoon fine sea salt
175g (6oz/3⁄4 cup + 2 tablespoons) caster (superfine) sugar
175g (6oz/3⁄4 cup + 2 teaspoons) light brown sugar
3 large eggs
2 teaspoons vanilla extract 100ml (31⁄2fl oz/1⁄3 cup + 4 teaspoons) cold espresso or very strong black coffee
75ml (23⁄4fl oz/5 tablespoons) sour cream Flaked sea salt, for sprinkling 

Caramel Cream Cheese Frosting

170g (6oz/3⁄4 cup) cream cheese, at room temperature
397g (14oz) can dulce de leche
240ml (81⁄2fl oz/1 cup) double (heavy) cream, chilled 

Preheat the oven to 180oC (160oC Fan) 350oF, Gas Mark 4. Lightly grease your 23 x 33cm (9 x 13in) baking tin and line it with a strip of parchment paper that overhangs the long sides, securing it in place with two metal clips. 

Place the flour, baking powder, salt and sugars in a large bowl and whisk to combine. Add the butter, eggs, vanilla, espresso and sour cream and mix until a smooth batter forms. Pour it into the prepared tin and spread evenly. 

Bake for about 35–40 minutes, or until the cake springs back to a light touch. Set aside to cool in the tin for 15 minutes before using the parchment paper to lift the cake onto a wire rack to cool completely. 

For the frosting, place the cream cheese and dulce de leche in a large bowl and whisk until smooth. Add the cream and whisk until the mixture holds soft peaks. Spread the frosting all over the cold cake and sprinkle with flaked sea salt just before serving. 

The cake can be made a couple days in advance if stored in a sealed container, but the frosting needs to be made and served on the same da

In Cakes Tags one tin bakes easy, one tin bakes, sheet cake, caramel, espresso, coffee, all in one, easy
2 Comments

Baileys Apple Pie Custard Slices

Edd Kimber September 23, 2021

Sponsored by Baileys

When Baileys sent me a bottle of their new limited edition Baileys Apple Pie flavour I knew exactly what I wanted to make. I made a batch of caramelised apples, a cinnamon custard to which I added 50ml (0.9 units) of the Baileys and it may just be my new favourite version of the humble custard slice, they were pure autumn!

When making this recipe the key to getting them neat is simple, chill the custard for at least four hours, it needs the time to fully set so the slices come out without the custard smooshing everywhere. The second tip is optional but it really helps. When you cut the slices use a serrated knife to gently saw through the top layer of pastry and then use a chefs knife to cut through the custard and bottom layer of pastry. This helps prevent the pastry from breaking into big chunks.

Once made the slices can be refrigerated for a couple days but the pastry will be at its crispest when served as close to making as possible. 

Baileys Apple Pie Limited Edition is available from major supermarkets now, but be quick, as once it’s gone, it’s gone!

Caramelised Apples
2 granny smith apples, peeled cored and diced
20g unsalted butter, diced
20g light brown sugar

Custard Slices
500g block of puff pastry
500ml whole milk
125g caster sugar
35g custard powder (or cornflour)
1-2 tsp cinnamon (depending how strong you prefer the flavour)
1 large egg
1 large egg yolk
35g unsalted butter
50ml Baileys Apple Pie Limited Edition (0.9 units)

To prepare the apples place the diced apple, butter and sugar into a small roasting tray and bake, at 200ºC (180ºC Fan), for about 15-20 minutes or until there is no liquid remaining and the apples are golden. Remove and set aside to cool.

For the pastry roll out the puff pastry on a lightly floured worksurface, rolling into a rectangle a little bigger than 18x9inches. Trim the pastry to size and cut out two 9 inch squares. Place each square onto its own parchment lined baking tray and dock with a fork. Top each piece of pastry with a second sheet of parchment and another baking tray, preferably one that nests neatly with the first. This prevents the puff pastry from rising too much, creating nice neat layers. If you don’t have spare baking trays you can also weigh down the parchment and pastry with metal cutlery. 

Bake in the oven for 20 minutes before removing the top baking tray and parchment paper, exposing the pastry, and placing back into the oven for another 5-10 minutes or until golden brown. Make sure you bake the pastry to a nice rich golden brown, it helps the pastry stay crisp when sandwiching the custard but it also gives the pastry flavour. Once cool use a serrated knife to trim to 8 inches. 

Line a 8-inch square baking pan with a single piece of foil and place one of the pastry pieces into the bottom. 

For the custard place the milk into a saucepan and bring to a simmer. Meanwhile place the sugar, custard powder and cinnamon into a large bowl and whisk to combine. Add the egg and yolk and whisk until smooth. Once the milk is at temperature pour the milk over the egg mixture while continuing to whisk. Scrape the custard back into the pan and cook, over medium heat, whisking constantly, until thick and starting to bubble. Cook for a minute or two more to ensure the starch of the custard powder is fully cooked. Remove the pan from the heat and add the butter, Baileys Apple Pie and caramelised apple pieces and whisk to combine. Scrape the custard into the tin and spread into an even layer and top with the second piece of puff pastry, pressing gently onto the custard to secure it in place. Refrigerate the custard slices for at least four hours before serving. 

To serve use the foil to carefully lift the slices from the tin. Peel away the foil from the sides and transfer the slices to a chopping board. Use a serrated knife to mark and cut the slices into into 10 pieces. Dust with icing sugar and serve. 

In Pastry Tags custard slice, custard, puff pastry, baileys, easy, rettro, apple pie
Comment
black cocoa pb cookies-1.jpg

Black Cocoa Peanut Sandwich Cookies

Edd Kimber May 24, 2021

These cookies are so ridiculously simple and so delicious. The cookie element is based around my melting moment recipe, a melt in the mouth, incredibly tender cookie. I use black cocoa but you can also use a regular dutched cocoa powder if thats what you have on hand. The balls of cookie dough are rolled in salted peanuts and pressed into flat discs and then baked. The filling is a simple white chocolate ganache mixed with peanut butter. Its the sort of cookie you want mid morning with a strong cup of coffee. 

Before we get to the recipe lets talk about cocoa powder for a second. Cocoa powder comes from the cocoa pods and specifically the beans inside those pods, so far so obvious. The beans are fermented and then dried. Generally they are then roasted (unless the product is destined to be used for ‘raw’ chocolate or cocoa powder but I wont be talking about that process here). The beans are then cracked open and the nibs are ground into what is called cocoa liquor and then, using a hydraulic press, the liquor is pressed under great pressure to extract most of the cocoa butter leaving behind a product known as a cocoa cake. This cake is dried once again and then ground into cocoa powder. 

Why then is there such a variety in cocoa powders, what is the difference between natural, dutched and black? Natural is the cocoa powder made as above with no additional processing, it is a light almost dusty brown colour and is bright and acidic in flavour. Dutched cocoa goes through an alkalisation process which lessens the acidity and makes a deeper richer tasting cocoa powder with a darker colour. In the UK and Europe this is traditionally the main type of cocoa powder available although natural and raw cocoa have become more popular over the last few years. Black cocoa, with its characteristic charcoal black colour, is a variation of dutched cocoa powder, the process of alkalisation taken to its limit to make an intensely dark and slightly bitter cocoa powder, if you’ve ever eaten an oreo you’ve had black cocoa. I like black cocoa for its colour and its flavour but its not suitable for everything, the flavour isn’t a pronounced chocolate flavour its much more roasted than that so if you want classic chocolate flavours I would a traditional dutched powder.

Whenever I use black cocoa I am always asked where to buy it as in the UK it is a relatively unknown product, at least until recently. I would always bring some home from the US when there on holiday or for work, King Arthur Baking sell my go-to version. Someone imports that brand into the UK but it is criminally expensive so I am thankful that a few new brands have sprung up to make it easier, and cheaper, to buy. Van Houten was the first brand more widely available, selling on Amazon, but I am yet to test this brand out. When I buy the cocoa myself I get it from De Zaan, a commercial cocoa powder producer that have recently started selling in a more direct to customer facing way. You can find there cocoa powder on Amazon and on from HB ingredients. 

Before we get to the recipe a brief note on peanut butter. When baking with peanut butter you need to be careful about what style you use. Generally you want to be using a commercial peanut butter and this is for the simple reason that it is less likely to split creating odd textures in the finished recipes. By all means you can use a natural peanut butter but be aware the result might not look like you envisioned or like the images of the recipe. 

Black Cocoa Peanut Melting Moments with Peanut Butter Ganache
Makes 15 Sandwich Cookies

Cocoa Melting Moments
250g unsalted butter, room temperature
1/2 tsp vanilla extract
200g plain flour
60g black cocoa powder
85g icing sugar
30g cornflour
175g salted peanuts, roughly chopped

Peanut Butter Ganache
100ml double cream
125g white chocolate
75g smooth peanut butter 

Preheat the oven to 160ºC (140ºC Fan) and line a couple baking sheets with parchment paper.

For the cookies place the butter into a large bowl and use an electric mixer to beat until soft and creamy. Add the vanilla and beat briefly to combine. In a separate bowl whisk together the flour, cocoa, icing sugar and cornflour. Add the flour mixture to thee butter mixture and mix on slow speed just until a dough is formed. 

Divide the dough into 20g portions and roll them into balls. Roll the balls in the chopped peanuts, your not looking to fully coat the balls just get a decent amount of peanuts on each cookie. Place the balls onto parchment lined baking trays leaving a little space between each cookie. Using a glass or measuring cup press each ball into a flat disc. Spraying the glass with a little oil can help prevent them sticking. 

black cocoa pb cookies-1-2.jpg

Bake the cookies in the preheated oven for about 20-25 minutes or until the edges are set and dry.

Remove the trays from the oven and allow the cookies to cool fully. 

To make the ganache place the chocolate and cream into a small saucepan and place over low heat. Stir constantly, making sure to scrape the bottom of the pan to prevent anything from scorching, until the chocolate has melted. Pour the ganache into a small bowl and stir to make sure everything is combined. Set aside for 10 minutes before adding the peanut butter and using a small whisk to combine into the ganache. The ganache needs to be a little cool before adding the peanut butter as the heat can make the mixture split. Refrigerate the ganache until thickened enough to hold its shape but still spreadable, 60-90 minutes. Pipe or spread a small amount of ganache onto half of the cookies and sandwich together with a second cookie. Refrigerate for 30 minutes or until the ganache has fully set. 

Kept in a sealed container these will keep for 3-4 days.

In Biscuits and Cookies, Chocolate Tags black cocoa, melting moments, sandwich cookies, ganache, white chocolate, peanut butter, peanuts, easy, easy baking
4 Comments
Focaccia Feed Post 1.jpg

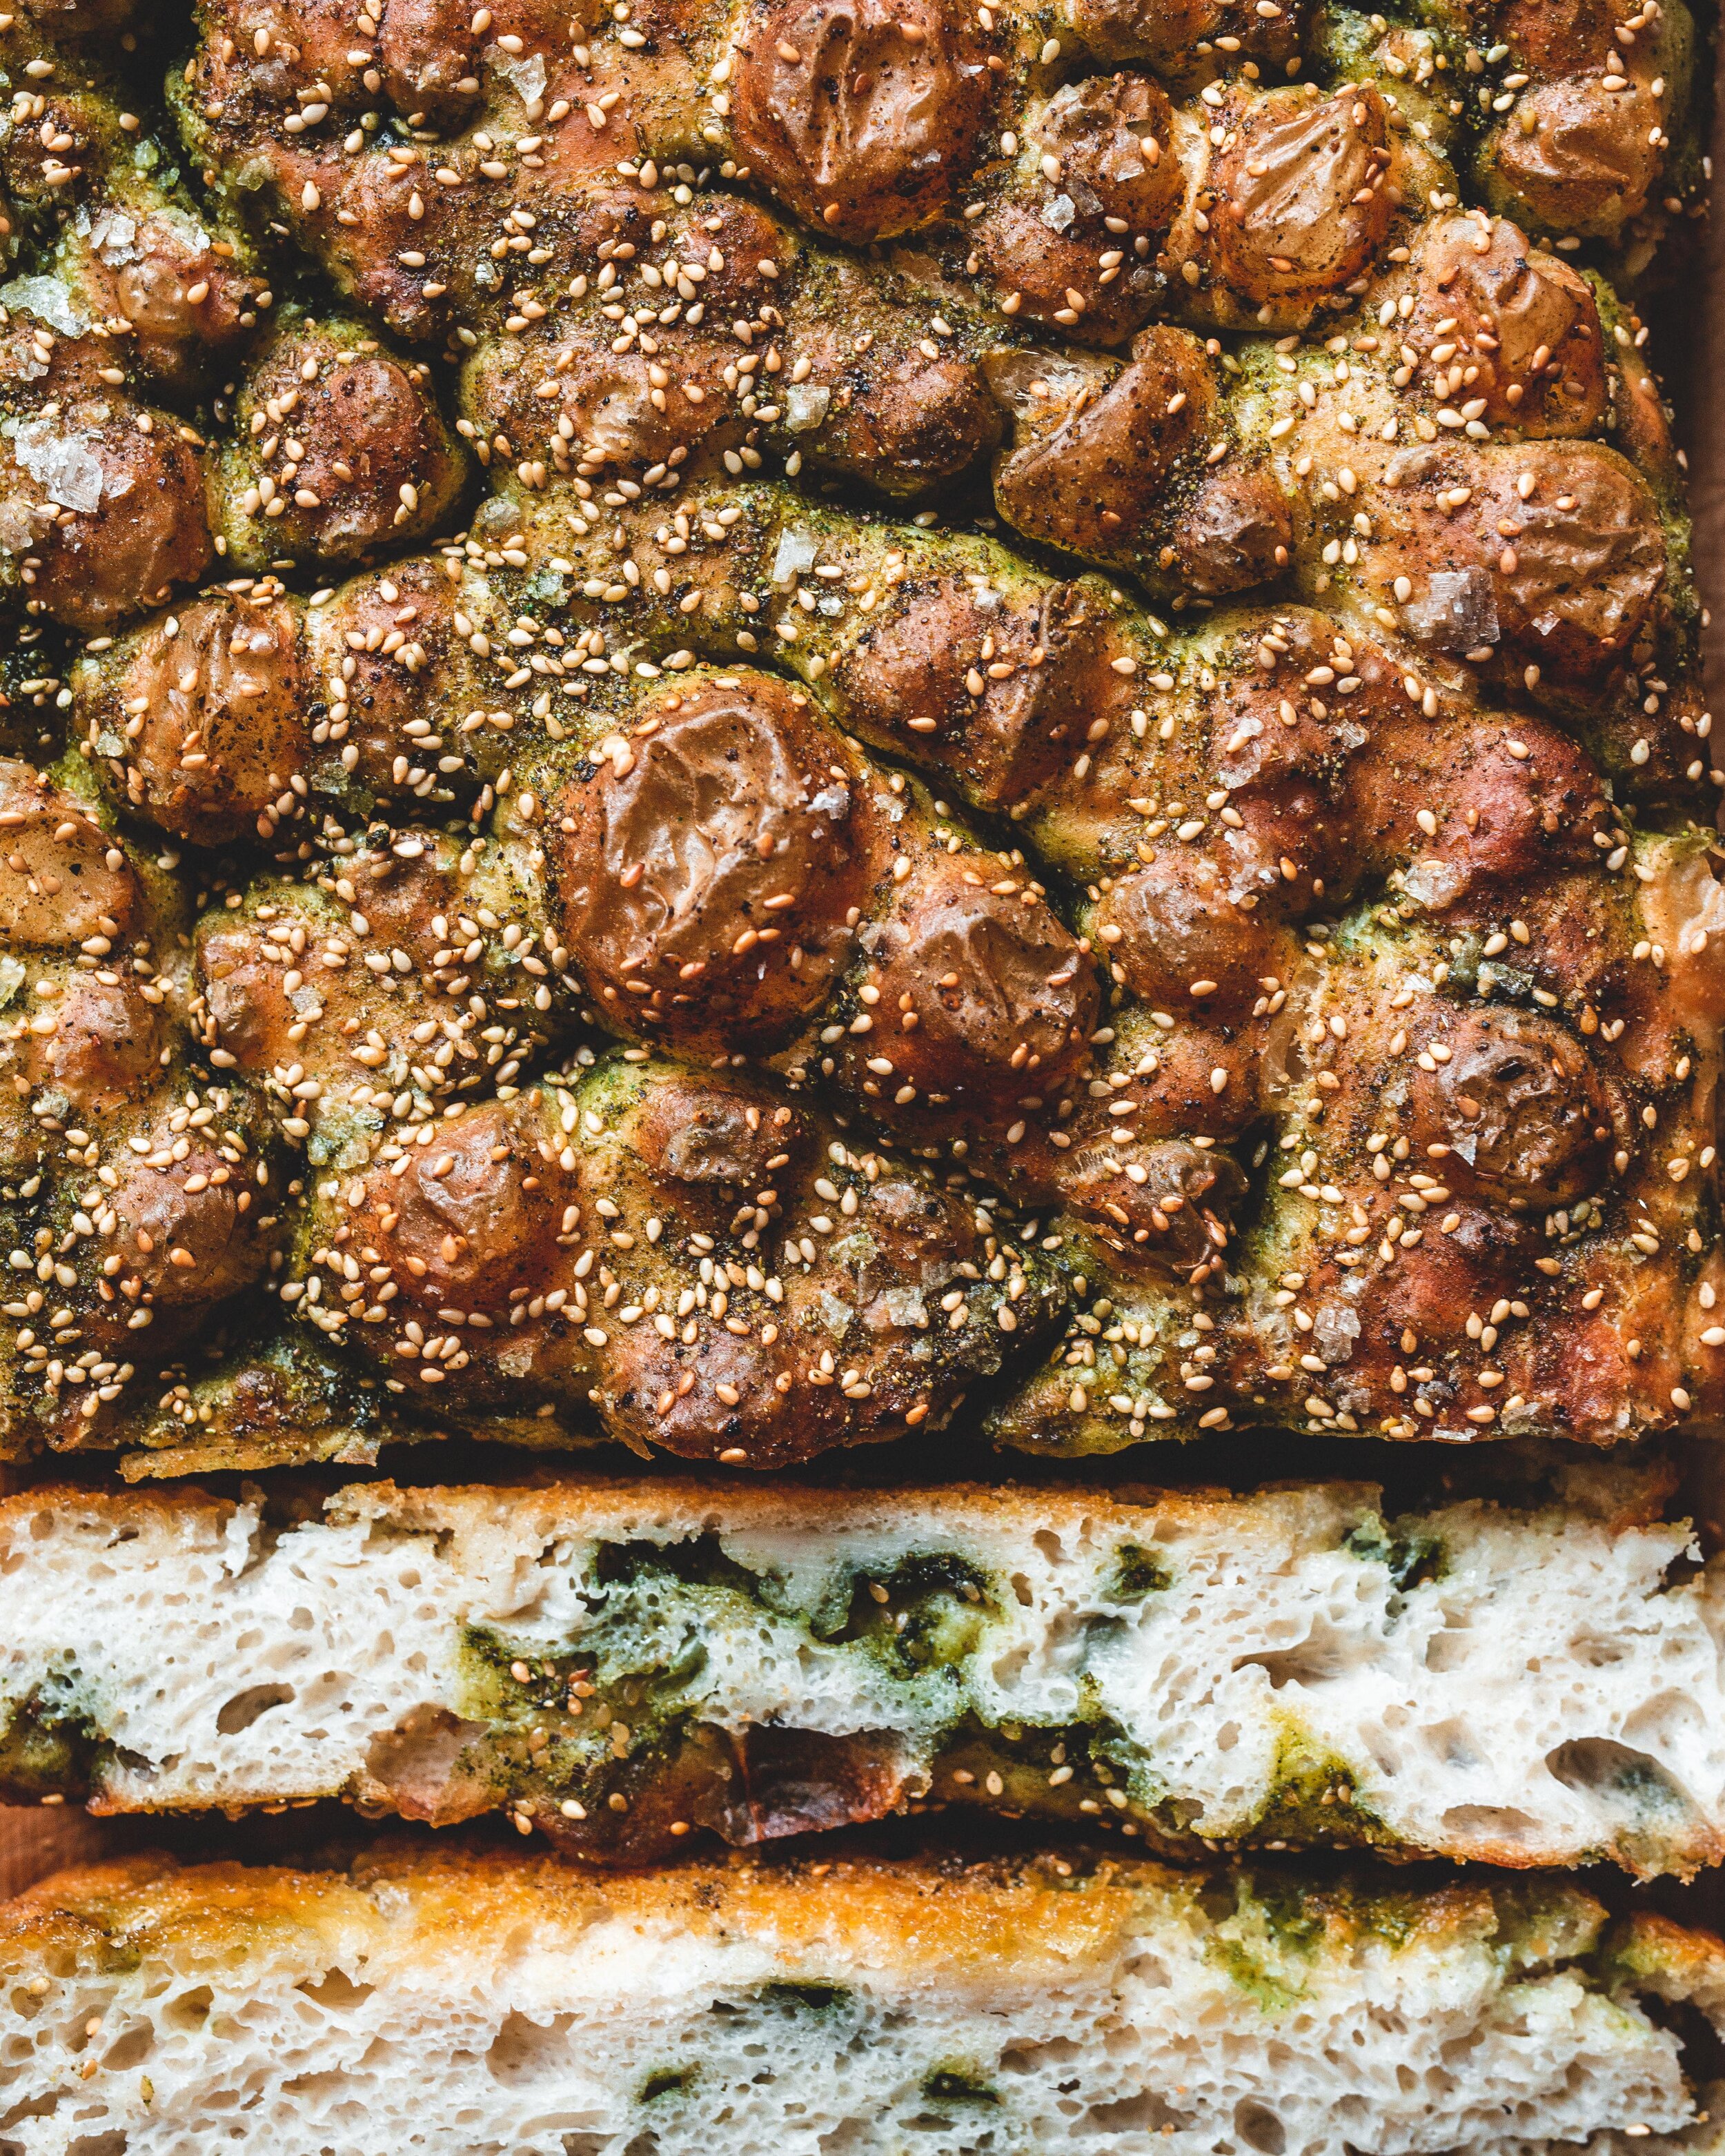
No-Knead Za'atar Focaccia

Edd Kimber March 4, 2021

Post Sponsored by AEG

If you haven’t guessed it already, I am currently a little obsessed with all things no-knead. Now look, I love sourdough but life has been a bit manic recently and my attention span is spent. No knead recipes gives you the ability to make excellent bread with almost no work. This focaccia is maybe the easiest of all no knead breads, I can’t see how you eliminate any more of the work because really there isn’t any. No knead breads work because they are risen very slowly and as they do so the gluten develops without the need for kneading. It’s an incredible technique that is widely credited to Jim Lahey a baker from NYC that help promote the technique and published the first widely popular recipe for it in the New York Times in 2006. Whilst this was the start of the techniques popularity for a new generation of bread bakers, the idea of no-knead breads actually go back much further than the early 2000’s. There is evidence that similar methods were used as far back as the 1800’s, but there is no doubt Lahey’s method brought the bread to popularity for a new generation. 

For this particular recipe I wanted to make something with za’atar, one of my favourite seasoning blends. Confusingly za’atar is both a specific herb and a herb blend, the latter being what you’re likely to have heard of before. The herb za’atar is grown across the middle east and both the herb itself and the blend are incredibly important to Levantine cooking. Traditionally the blend would be made from za’atar and mixed with sesame seeds, sumac and salt, although this blend will vary a lot depending on where it is made. These days most shop-bought blends outside of the Middle East are made with thyme, oregano and sometimes marjoram. 

Focaccia Feed Post 2.jpg

One of my favourite dishes made with za’atar is probably its most famous use, man’oushe, a thin flatbread spread with a mixture of oil and za’atar. Because I wanted to make another no knead recipe and it to be a loaf rather than individual flatbreads I settled on a focaccia, a bread made with lots of olive oil already I thought it would be the perfect pairing up, and I am thrilled with the finished recipe, its delicious. You get the wonderful flavour from the olive oil and za’atar and the chewy spongy texture of the focaccia, a match made in heaven. 

As you may also know no-knead breads are very often made inside a cast iron dutch oven, the heat of the pot helps with oven spring and crust development and a lot of this is down to steam. The pot traps the steam released from the bread which helps the bread open up fully and helps to create a light crisp crust. With focaccia a pot isn’t an option of course so instead I introduced steam using my oven. After moving in my new house and finding a disaster of an oven I needed a replacement and I settled on the AEG Steam Bake (BPS556020M), and I chose that model because of bread. The oven has all the classic functionality you’d beed but it also includes a stem bake function where water is added to a reservoir at the bottom of the oven and it creates a steamy environment which is brilliant for bread. I tested this recipe multiple times and on the occasions I used the steam function the bread rose higher and had a more crisp crust, a win-win. The oven also comes with a food sensor which you can use to check the internal temperature of your roast, or even your baked custards or breads. More importantly, because I hate cleaning my oven, it is Pyrolytic meaning it self cleans!

IMG_2435.jpg

No Knead Za’atar Focaccia

Focaccia
500g strong white bread flour
7g fast action dried yeast
2 tsp fine sea salt
2 tsp caster sugar
450ml cold water
3 tbsp extra virgin olive oil

Topping
2 tbsp za’atar
4 tbsp extra virgin olive oil, plus extra for the tin
roasted sesame seeds (optional)

To make the dough add the flour, yeast, salt and sugar to a large bowl. Pour in the water and use your hands or a wooden spoon to mix together until everything is hydrated, just making sure there are no packets of flour. Add 2 tbsp of the olive oil and mix briefly to combine, drizzle over the last of the olive oil. Thats it. Thats the entirety of the work. Cover the bowl with clingfilm and refrigerate for 12-24 hours. 

When you want to bake the loaf remove the dough from the fridge and generously oil a 9x13 tin. I’m not a big fan of non-stick bakeware but if you have one it can be helpful for this recipe as they dough can sometimes stick to the base of the tin. To prevent this you can also line the base with parchment paper. 

Deflate the dough by folding the edges of the dough away from the bowl and into the middle of the dough. Tip the ball of dough out into the prepared tin and gently press and stretch it out the corners, not worrying that it perfectly fills the tin, it will spread out as it rises. Cover the tin and set the focaccia aside until it has doubled and is visibly bubbly on the surface with a generous wobble, this will take about 2-3 hours at room temperature. 

Using the AEG Steam Bake oven add 200ml water to the reservoir in the bottom of the oven, set the oven to True Fan Cooking and press the Plus Steam Button. Set the temperature to 200ºC. Using a different oven preheat the oven to 220ºC (200ºC Fan).

For the topping mix together the za’atar and oil to make a thin paste. Drizzle this all over the risen dough and gently spread with your hands to cover the entire loaf. At this point your fingers should be nice and oiled up, but if not rub a little oil over your fingers to lubricate. Use your fingers to dimple the loaf all over. Finish by sprinkling the dough generously with flaked sea salt. The za’atar blend will already include sesame seeds but I like to sprinkle a little extra but this is optional.

Bake in the preheated oven for about 20-25 minutes or until golden brown. Remove from the oven and carefully remove from the tin, setting onto a wire rack to cool completely. 

In Breads and Quickbreads Tags no knead, focaccia, zaatar, sesame, bread, easy, simple
8 Comments
  • Recipes
  • Older
  • Newer

Twitter

  • Was 8 original films, 3 spin off films, a two part play not enough. Can we have something new. https://t.co/cBZdGEGeyv
    Apr 4, 2023, 1:46 PM
  • RT @deliciousmag: Cacio e pepe, but make it buns! These seriously cheesy bread rolls from @TheBoyWhoBakes are inspired by his favouri… https://t.co/oDZlaDgnN2
    Apr 2, 2023, 11:08 AM
  • RT @TheDailyShow: Congrats to Donald Trump on finally winning a majority of votes! https://t.co/ezP55HZgl0
    Mar 31, 2023, 12:43 AM

Instagram

This weeks bonus recipe, for subscribers to my newsletter, is this gorgeous sour cherry and coconut gateau basque. The crust is a buttery cross between pastry and cake, think a cakey cookie. The filling is a layer of sour cherry topped with a rich coconut custard. A real fun one to make too! Link to my newsletter can be found in my bio - #gateaubasque #pastrycream #coconut #sourcherry
In this months @olivemagazine (out today) the team came and photographed my petit kitchen and we talked about how we put our stamp on the place, without spending a fortune. We hated the bland kitchen that we inherited but, as it was relatively new an
In this months @olivemagazine (out today) the team came and photographed my petit kitchen and we talked about how we put our stamp on the place, without spending a fortune. We hated the bland kitchen that we inherited but, as it was relatively new and in good condition, it felt a waste to rip it out and we also didn’t want to spend the money it would take to rip out the whole thing and replace it (it’s a howdens shell so we could have done something cheaper like @plykeakitchens @holte.studio @madebyhusk) so instead I painted all of the cabinets, using @makeitrustoleum kitchen cabinet paint, to give it some personality and lighten the whole thing. Check out the magazine for the full run down. - #kitchendesign #kitchenremodel #rustoleumcabinettransformations #rustoleumkitchencupboardpaint #kitcheninspiration #theboywhobakes #olivemagazine
Are you making scones all wrong? Maybe, maybe not? But I do want to show you how I make them! This recipe is based on the method I learnt at @belmondlemanoir 12 years ago when I did a stage, and it makes the absolute lightest scones. And shock horror, it involves kneading the dough, albeit very lightly. You can get the full recipe in this weeks newsletter (free) linked in my bio. - #scones #bakingday #worldbakingday #afternoontea #hightea #englishscones #clottedcream #creamtea #theboywhobakes
facebook
  • Contact

The Boy Who Bakes

Edd Kimber

facebook