The Boy Who Bakes

Edd Kimber
  • Home
  • Recipes
  • My Books
  • Blog
  • Recipe Index
  • About
  • Home
  • Recipes
  • My Books
  • Blog
  • Recipe Index
  • About

Recipes

  • All
  • baking
  • Biscuits and Cookies
  • Breads and Quickbreads
  • Bundts
  • Cakes
  • Chocolate
  • Dessert
  • drinks
  • Holidays
  • Pastry
  • Scones and Quickbreads

Rainbow Craquelin - Pride Eclairs

Edd Kimber June 22, 2022

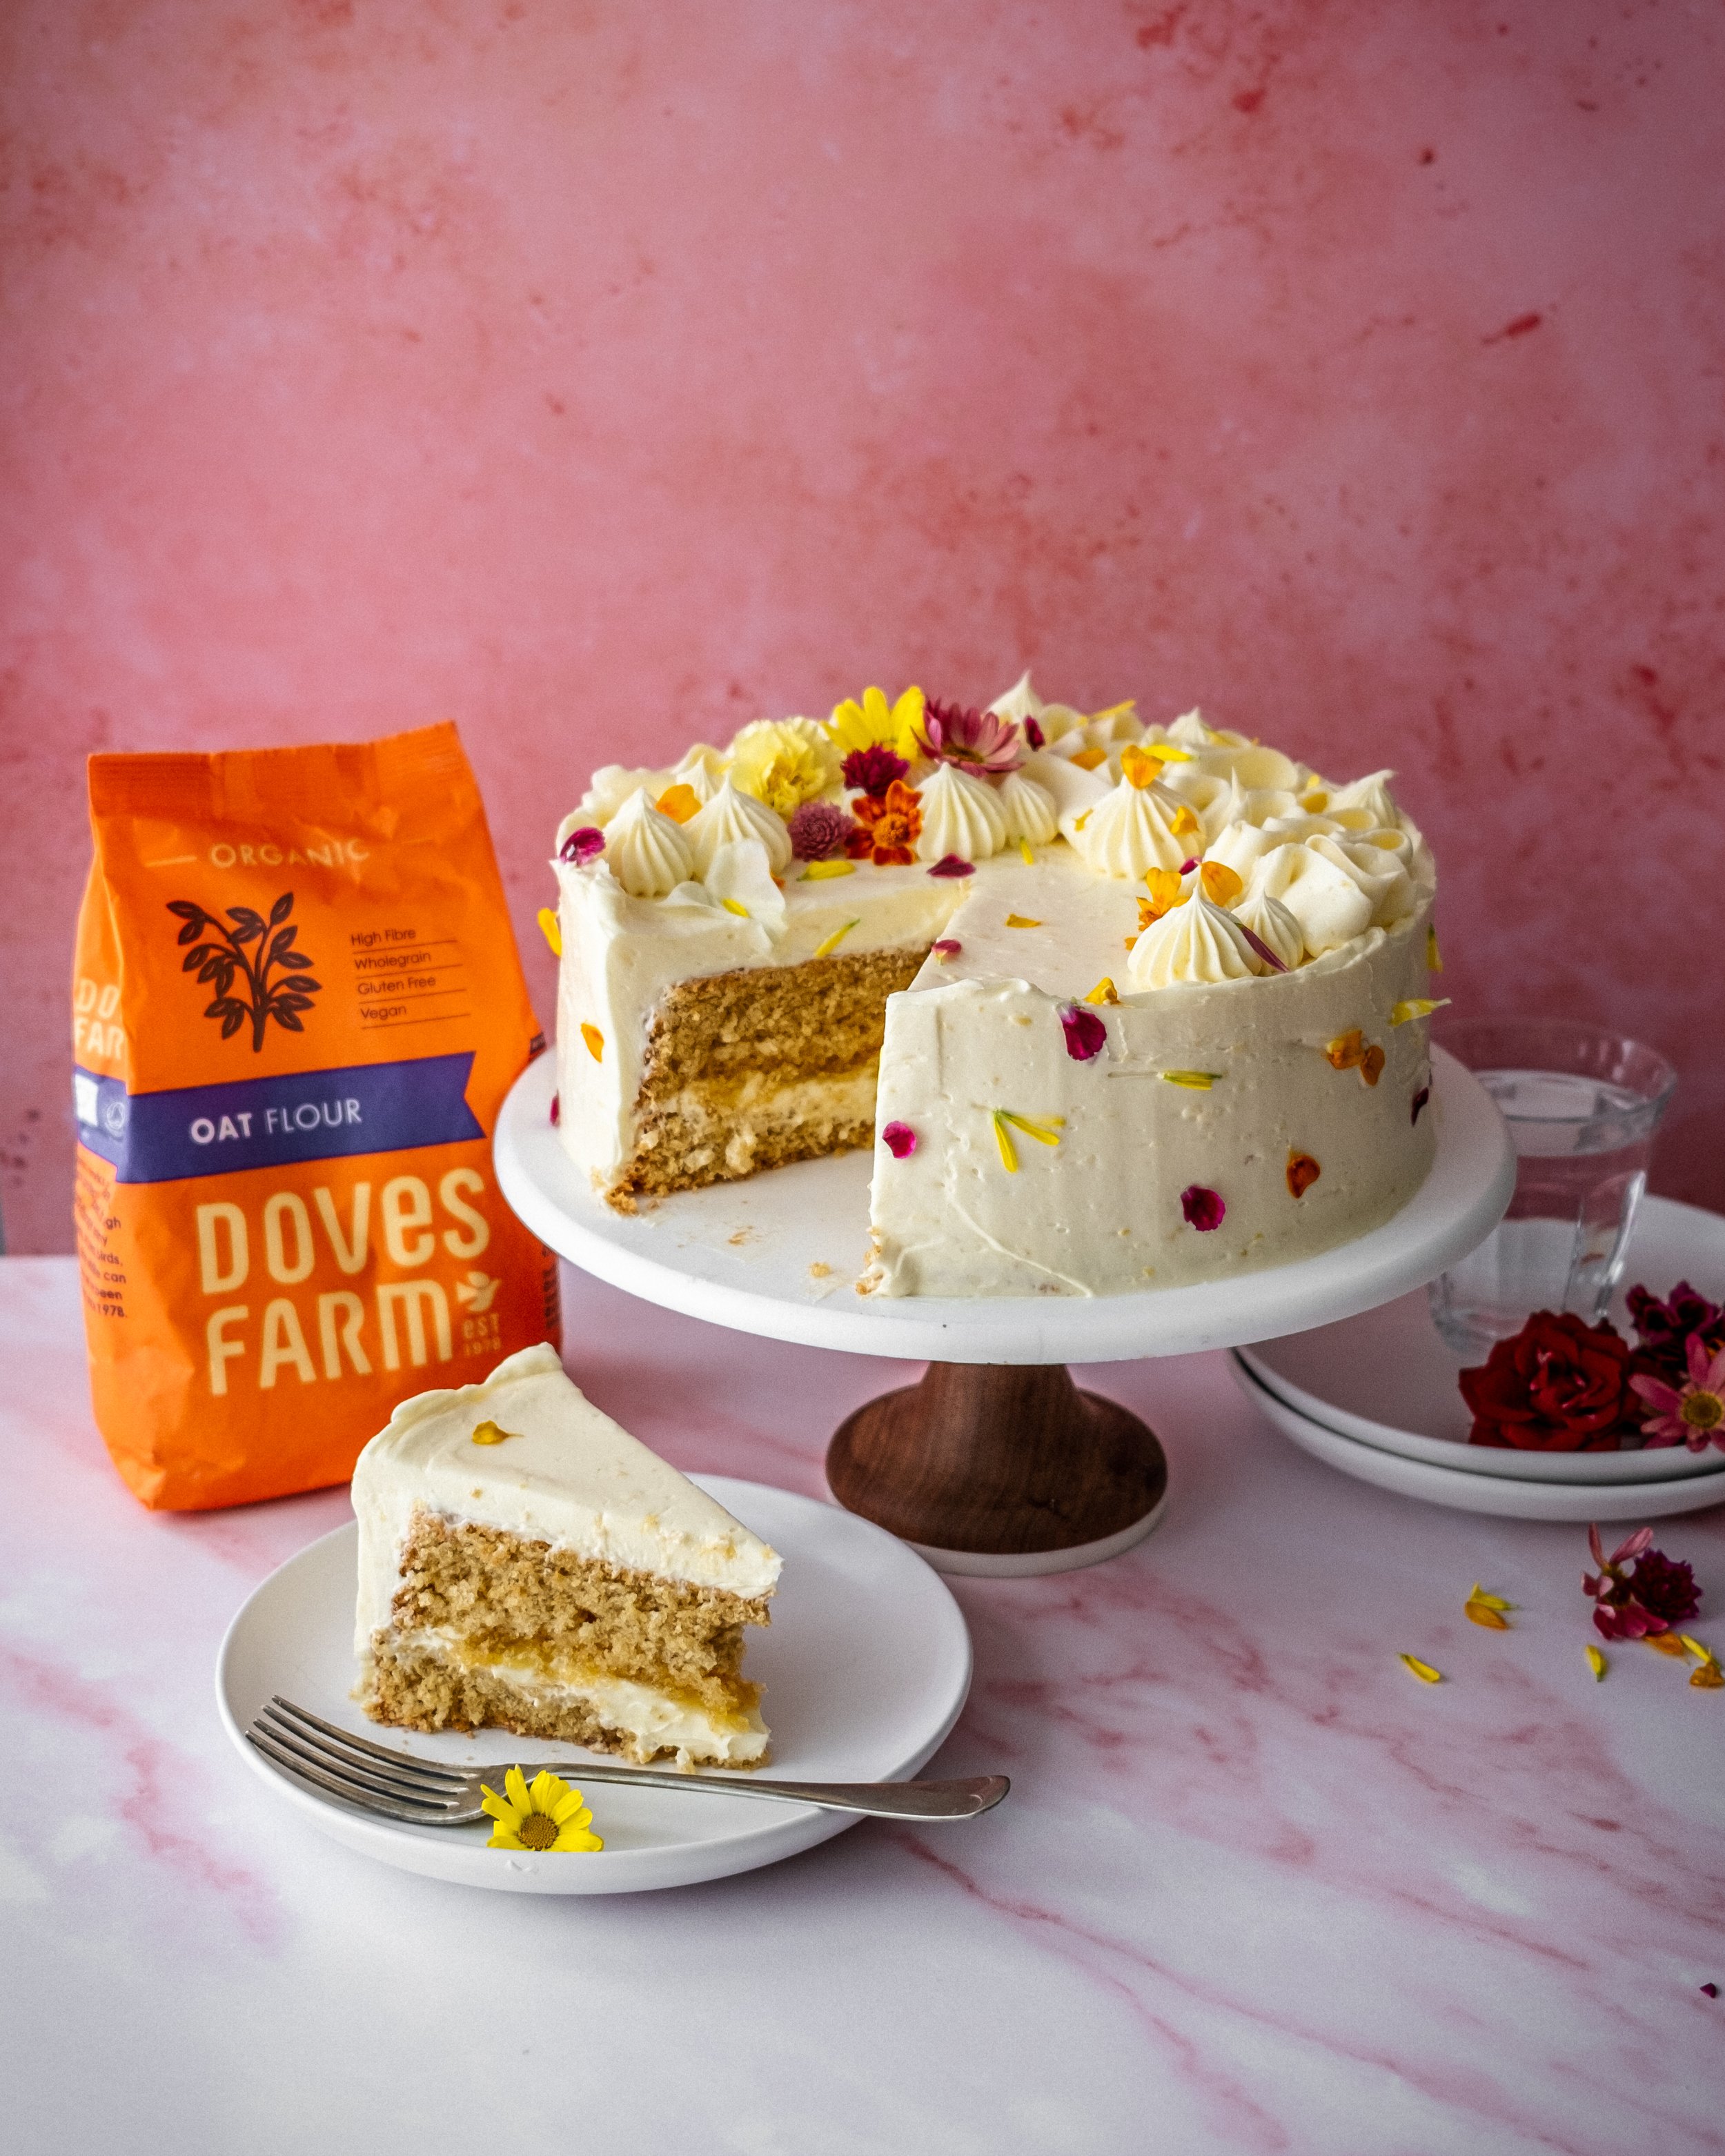
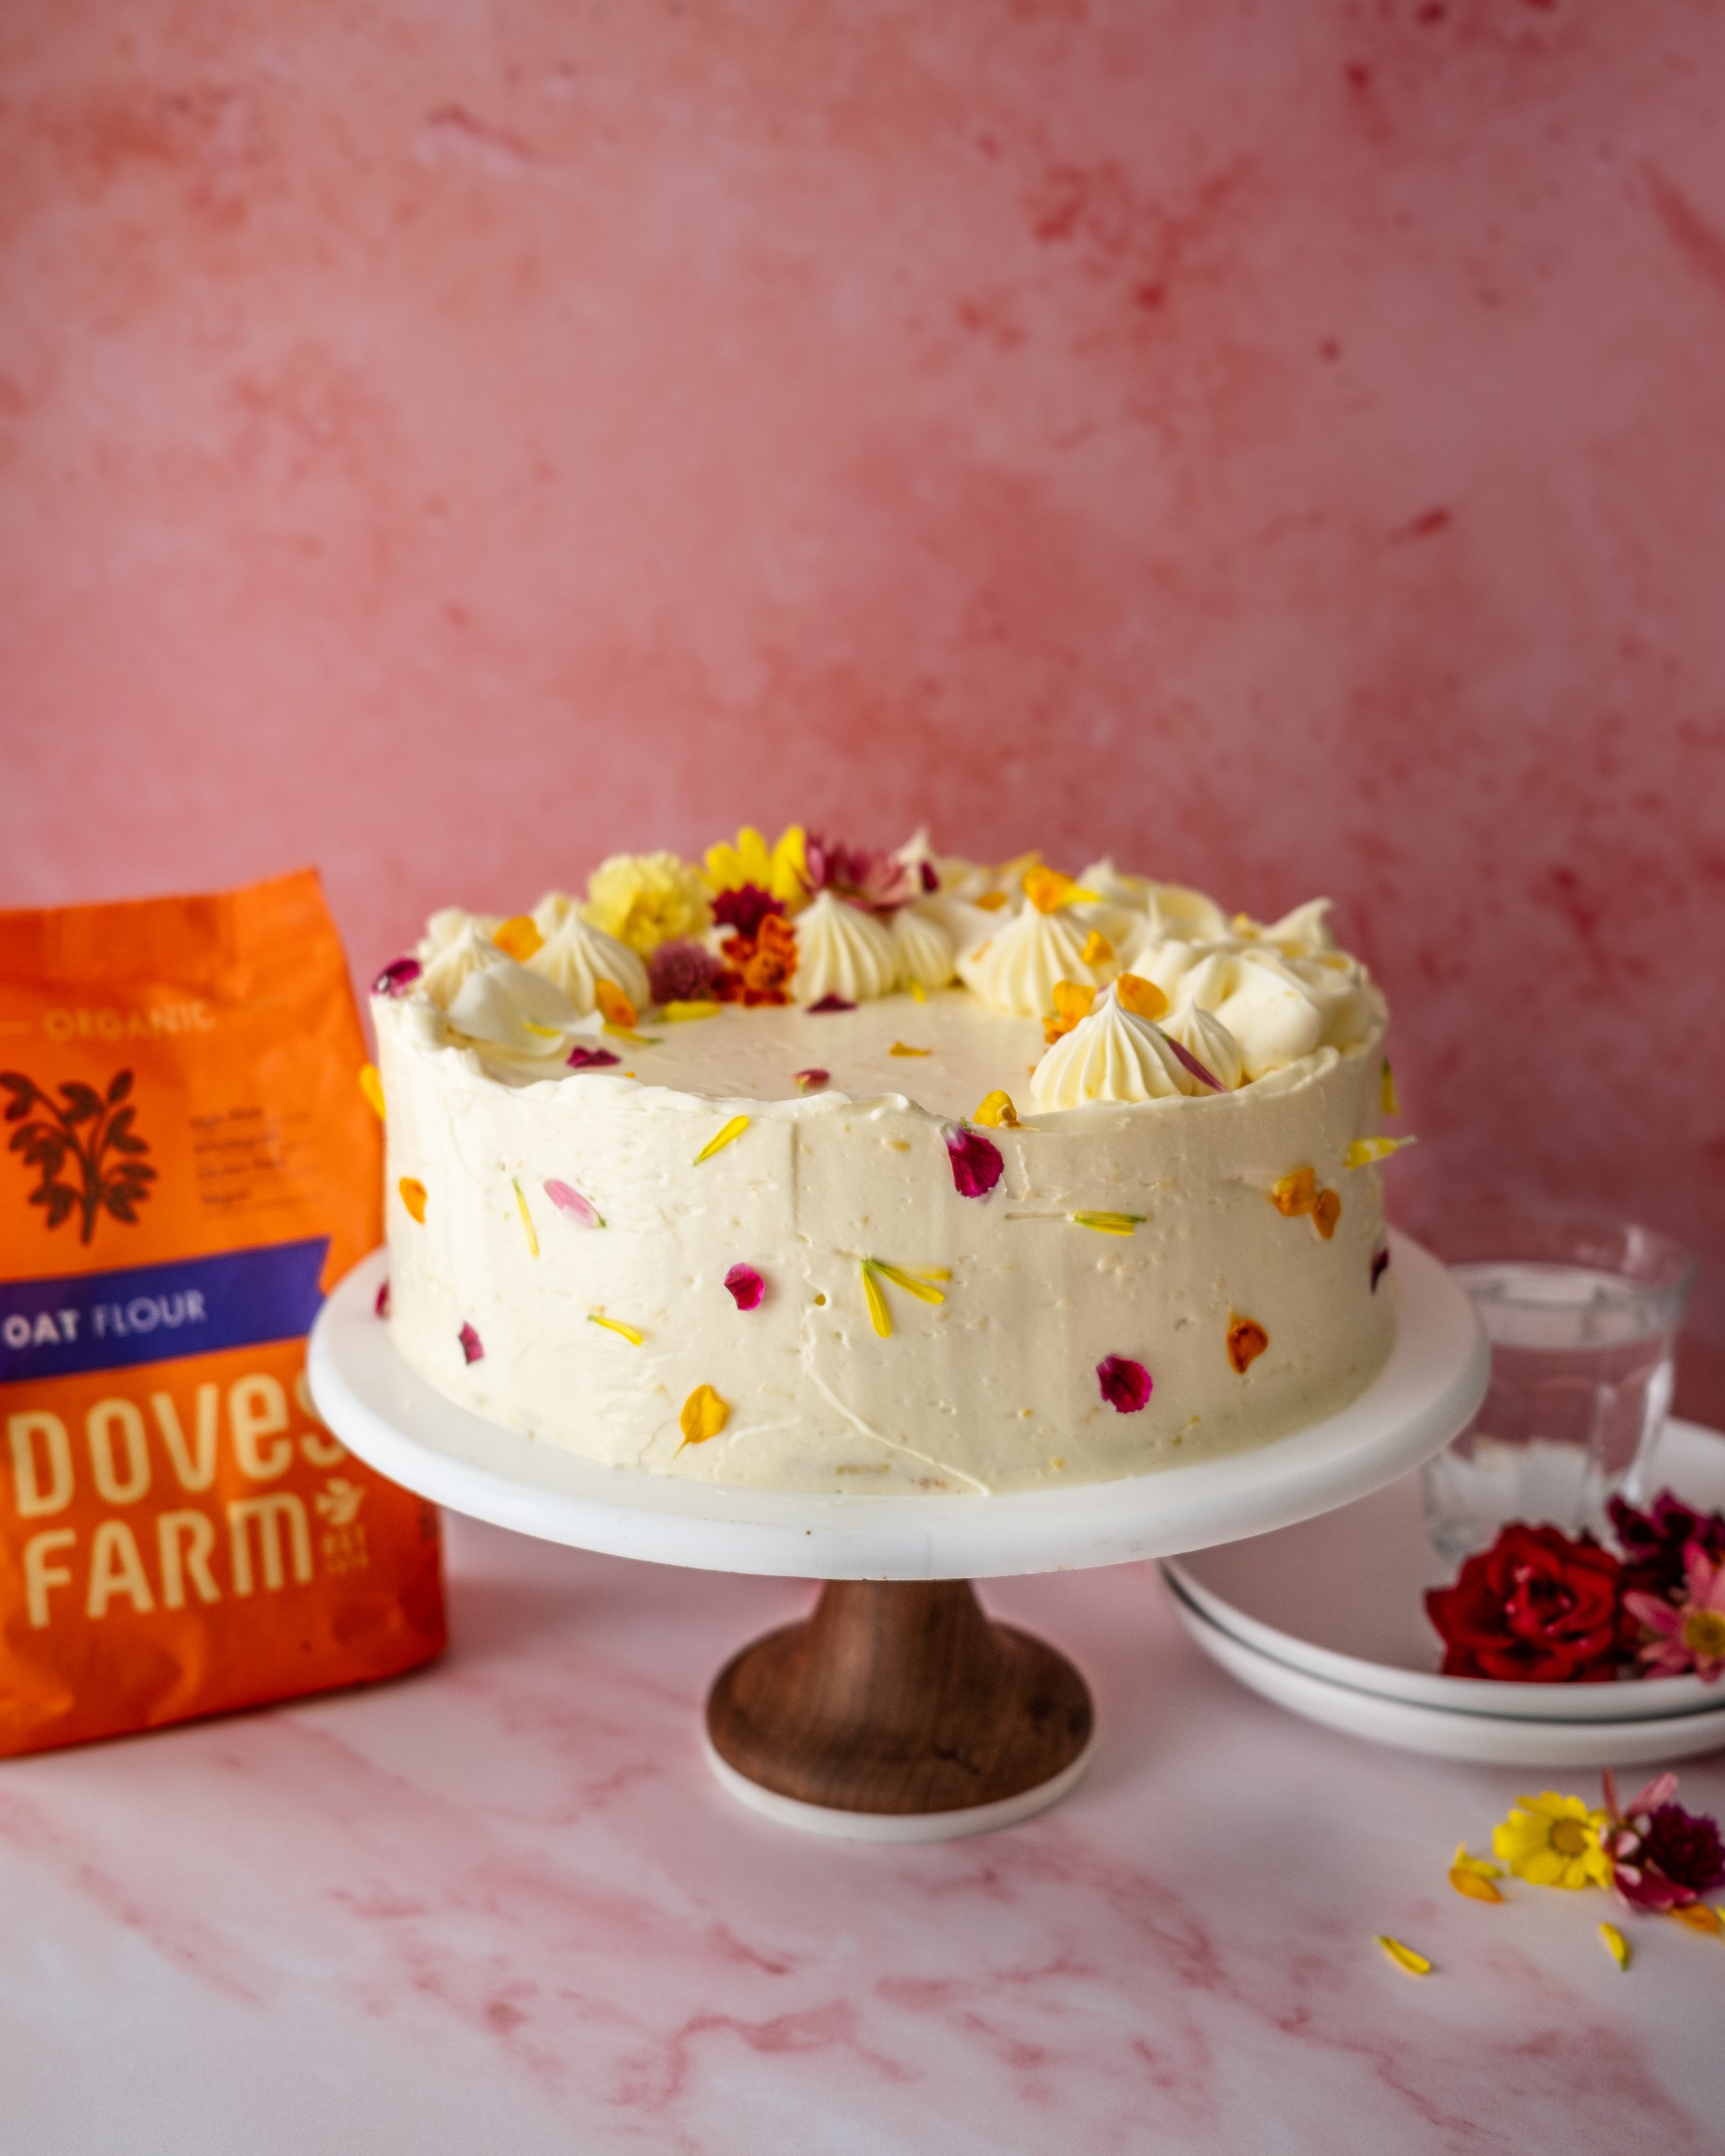
Okay, strap in, this recipe has quite a few steps but if you perceiver and work your way through each element, step by step, you’ll be awarded by a batch of twelve stunning eclairs filled with strawberries, lemon and whipped cream. Not only will they be fruity, creamy and utterly delicious they’ll also be beautiful as they’re made with a layer of craquelin coloured to look like the lgbt+ Pride flag, in honour of Pride month.

If you’ve never made eclairs, or you have and they ended up looking a little ugly and misshapen, craquelin might seem like a lot of extra work but trust me, its worth it, the craquelin almost acts as insurance against user error. When choux, made without craquelin, rises in the oven the heat of the oven sets the choux. Sometimes the pastry on the outside will set before the inside is cooked and whilst it still has lots of moisture. This can cause cracking and misshapen choux. When you add a layer of craquelin it slows this process down, the outside of the choux sets slower because the heat of the oven has to get through the craquelin before it can dry out the choux. This means your choux pastry opens up more before it sets. This means better shaped choux and hollow choux, perfect if your making eclairs or really any time of choux bun. The rainbow colours obviously adds to the process and does make it more about intensive but if you make it without colouring, or maybe just with one or two colours, it really is very little extra work and absolutely worth trying.

The lemon cream is a French creation, I believe the original method comes from the famed pastry chef Pierre Herme. A type of lemon curd, Lemon Cream is made in a similar fashion but with two major differences. Firstly the cream has a higher butter content. Secondly, and most importantly, the butter is also added in a different manner. When making a classic lemon curd the butter is either added with all the other ingredients and cooked together or it is added as soon as the lemon custard has been made. Either way this leads to the butter melting into the curd. With this method the curd is cooled down for 15 minutes before the butter is slowly blended into the curd a piece at a time. This results in the butter never melting, instead it is emulsified into the curd and once chilled it becomes incredibly thick and luscious. It is perfect when you want a filling that is thicker than a traditional curd, and something that can hold it shape.

Lemon Cream
150ml lemon juice
zest of 3 lemons
2 large eggs
2 large egg yolks
150g caster sugar
225g unsalted butter, diced and at room temperature

Craquelin
150g unsalted butter, diced and at room temperature
150g caster sugar
150g plain flour
gel food colouring, in rainbow colours

Choux Pastry
70ml water
70ml whole milk
1/2 tsp fine sea salt
1/2 tsp caster sugar
70g unsalted butter, diced
70ml plain flour
2 large eggs

To Fill
250g strawberries, diced
2 tbsp strawberry jam
600ml double cream
1 tsp vanilla bean paste

To make the lemon cream, add the lemon juice, lemon zest, eggs, egg yolks and caster sugar into a heatproof bowl set over a pan of simmering water and cook, stirring regularly until the mixture reaches 80ºC on an instant read thermometer. The temperature is key because it needs to be fully cooked like a custard so the finished cream holds the correct texture. I have said here to do this stage in a bain marie but half of the time I just place the ingredients directly into a saucepan and do this over a low heat stirring constantly. It is quicker than the bain marie method but it is also more prone to catching and overcooking so if you decide to do it this way be very careful and keep the heat down low. 

Once the custard is cooked pour it into a large jug, through a fine sieve to remove the lemon zest and any cooked egg bits, allowing to cool for 15 minutes, when it should be 60c or lower. Using some form of blender (traditional jug style or stick blender both work great) blend in the butter a piece at a time. If using a stick blender do this in the jug you cooled the curd, the depth of the jug means you wont end up incorporating too much air which you're trying to avoid (the same reason it is best not to use a food processor). Once all of the butter has been incorporated pour the cream into a container, press a sheet of clingfilm onto the surface of the custard and refrigerate for at least fours hours, until the mixture thickens up. 

At this point the cream can be refrigerated for up to 5 days.

To make the craquelin beat the butter in a bowl until soft and creamy. Add the sugar and beat until smooth and combined. Add the flour and mix to form a uniform dough. Divide the craquelin evenly between 6 small bowls. Add a little food colouring to each bowl, mix until the colouring is evenly mixed. When adding the colouring you’ll need to make the colours very vibrant as they will dull somewhat as the craquelin bakes. Place each piece of coloured dough between two sheets of parchment and roll out until about a couple mm thick. Place all of the sheets of craquelin onto a baking tray and freeze. Once the craquelin pieces are frozen remove them from the freezer and working quickly cut each colour into thin strips. On a fresh piece of parchment paper line up the strips in the order of a rainbow, repeating the pattern as many times as you can. Gently roll over the craquelin with a rolling pin to secure all the strips together to form one large piece of rainbow coloured craquelin. Place back into the freezer whilst you prepare the choux pastry.

Preheat the oven to 195ºC (175ºC Fan).

For the choux pastry place the water and milk into a saucepan and mix in the salt and sugar. Place over low/medium heat and cook until the butter has melted. Turn up the heat and bring the liquid to a rolling boil. Remove the pan from the heat and pour in the flour in one go, mixing immediately forming a soft dough. Place the pan back on the heat and cook for 1-2 minutes more until the dough leaves a fine film on the base of the pan. A tip I learnt from pastry chef Francisco Migoya is that you can also check the pastry is ready by checking its temperature. The point of cooking the choux pastry in this manner is to gelatinise the flour. This happens to the flour when the dough hits between 74-79ºC. At this point scrape the dough into a bowl and beat for a few minutes to cool enough that the dough wont cook the eggs. 

Add the eggs to a small bowl and whisk together to combine. Pour a little of the eggs into the pastry and beat together until fully combined. It may look a little separated or like cottage cheese but keep beating, it will eventually come together. Repeat adding more of the egg until the dough has a sheen and is silky and smooth. When lifted from the bowl using a wooden spoon or spatula the dough should easily fall from the spoon forming a v-shaped ribbon when it does.

Scrape the pastry into a piping bag fitted with a round French star tip.

Line two large baking trays with parchment paper and on the back of each piece of paper draw six 11cm long lines, spaced well apart. Using these lines as your guide pipe the pastry into 12 eclairs, trying to keep your piping as neat and even as possible. Remove the craquelin from the freezer and cut out twelve 11x2.5cm pieces. Lay these atop the eclairs. Bake the eclairs in the oven for 35 minutes. Turn off the oven, open the oven door briefly to allow any steam to escape before closing the door and allowing the eclair shells to cool down slowly in the oven. This helps dry out the eclairs and prevents them collapsing or going soft too quickly. Cool them in the oven for about 30-60 minutes.

Once cool use a serrated knife to carefully slice off the tops of each eclair.

For the filling stir the strawberry jam through the diced strawberries and scrape the lemon cream into a piping bag with the end snipped off. Divide the strawberry mixture between the twelve eclairs, spreading the strawberries out so there is a thin layer in the bottom of each eclair shell. Pipe a layer of lemon cream atop the strawberries and use an offset spatula to smooth into a flat even layer. Place the cream and vanilla into a large bowl and whisk until the mixture has thickened and just holding the barest of soft peaks. If you overwhisk the mixture here it will likely go grainy when piped. Scrape the cream into a piping bag fitted with a plain round piping tip and pipe four rounds of cream atop each eclair. Finish by placing the tops of the eclair atop the cream.

Once assembled the eclairs should be served the same day but all of the elements (except the strawberries and cream) can be made in advance and refrigerated/frozen for a few days ahead of time.

In Pastry Tags pride, lgbt, eclairs, craquelin, choux, choux pastry, pate a choux, rainbow, lemon, lemon curd, lemon cream, patisserie, pride month, french
Comment

Platinum Jubilee Cake - Lemon and Almond Sponge

Edd Kimber May 26, 2022

Sponsored by Doves Farm

It cannot have escaped your attention that the Queen’s Platinum Jubilee is fast approaching, it is in the news constantly and step outside (especially in London) and you’ll be inundated by the newly hung union jack flags everywhere you look. You also may know there has also been a competition to find a recipe to commemorate the occasion. The winner, Jenna Melvin, a copyrighter from Merseyside, created a new take on the classic British trifle, fit for a queen of course. She made the trifle with the classic elements of custard and jelly along with the addition of a lemon curd Swiss roll, a mandarin coulis and amaretti biscuits. A deliciously bright and summery take on the trifle.

Taking inspiration from this winning dessert I have come up with a simple cake that would be a perfect centre piece for any street or garden parties happening for the Jubilee, should you not want to make all the elements for the trifle. The cake element in my recipe is an amazing sponge cake made with Doves Farm Organic Oat Flour. The oat flour gives a wonderful warm and almost caramel like flavour and a perfect balance between a light sponge cake and a classic Victoria sponge. Doves Farm Organic Oat Flour also happens to be certified gluten free, making this cake a great option if you are also catering for anyone following a gluten free diet.

The cake is flavoured with lemon zest and a touch of almond extract and then layered with a lemon white chocolate buttercream and sandwiched together with zingy lemon curd. It is a simple but celebratory cake, sure to be a crowd pleaser. To decorate the cake some buttercream is piped atop the cake in a slightly random matter and then decorated with some edible flowers. It’s a perfect summer time centre piece.

You can buy Doves Farm Organic Oat Flour from www.dovesfarm.co.uk, Ocado, Sainsbury’s, Tesco and Waitrose & Partners

Oat Sponge Cake
150g Doves Farm Organic Oat Flour
1/4 tsp fine sea salt
200g caster sugar
6 large eggs
1/2 tsp almond extract
Zest of 2 lemons
65ml olive oil

Lemon Simple Syrup
Juice of 1 lemon
50g caster sugar

Lemon White Chocolate Buttercream
3 large egg whites
240g caster sugar
Zest of 2 lemons
360g unsalted butter, diced and at room temperature
150g white chocolate, melted and cooled

To Assemble
75g lemon curd
Edible flowers, to decorate

Preheat the oven to 180ºC (160ºC Fan). Line the base of a deep 8-inch round cake pan with parchment paper. You can grease the base of the tin to secure the parchment in place but do not grease the sides.

Add the oat flour and salt to a bowl and whisk together to combine. Place the sugar, eggs and lemon zest into a large bowl and using an electric mixer whisk together on high speed for about 5 minutes. When the beaters are lifted from the bowl the mixture should form a thick ribbon that slowly dissolves back into the batter. Sieve over a third of the oat flour mixture and gently fold together until the flour is combined. Repeat twice more until all the flour is combined and there are no pockets of flour in the batter. Scrape about a quarter of the batter into a separate bowl and mix together with the olive oil and almond extract until the mixture is emulsified. Pour this small amount batter back into the main batter and fold together as before until the two mixtures are uniformly combined. Keep these actions as light and brief as possible to retain as much of the lightness in the batter.

Scrape the batter into the prepared cake pan. Swirl a skewer through the batter to burst any large bubbles to ensure the cake has an even texture. Bake in the preheated oven for about 45 minutes or until the cake has risen and domed but then settled into a flat top. A skewer inserted in the cake should also come out clean. Remove the cake from the oven and whilst the cake is still hot run a thin knife or spatula around the outside of the pan to separate the sides of the cake from the pan. Leave the cake to cool and then turn out and peel of the parchment paper.

For the syrup place the juice and sugar into a small saucepan and place over medium heat and cook until the sugar has dissolved and the mixture has come to a boil. Remove from the heat and set aside until needed.

For the buttercream place the egg whites, sugar and lemon zest into a heatproof bowl set over a pan of simmering water and heat, whilst whisking gently, until the mixture is hot and the sugar is dissolved. If you rub the mixture between your fingers you shouldn’t feel any sugar grains and the mixture should be hot. Remove the bowl from the heat and using an electric mixture whisk on high speed until the mixture has formed a thick and glossy meringue that has cooled to room temperature, this should take about 7 minutes. Once cooled to room temperature add the butter a little at a time, whisking until combined before adding more. Once all the butter has been combined the mixture will have transformed to a buttercream texture. Switch the whisk for the beater attachment and mix on medium speed until smooth and creamy. Pour in the chocolate and mix briefly until combined.

To assemble, use a serrated cake slice the cake into two layers, using a cake board or similar to carefully remove the top layer of cake (this is a relatively delicate cake as it is gluten free and doesn’t contain any xanthan gum so lifting the cake layers without support is not advised). Drizzle the cake layer with some of the lemon syrup and top with a thin layer of buttercream. Spoon on the lemon curd and spread to cover most of the buttercream, leaving a border around the edge of the cake. Drizzle the cut side of the second layer of cake with some syrup and then carefully place cut side down onto the first layer. Spread the remaining buttercream, reserving a little for decoration, over the tops and sides of the cake. For decoration I take a little buttercream and pipe it in a slightly random manner over the top of the cake. To replicate the style I have done with my cake I used a small tear shaped piping tip and a small French star piping tip. Finish by decorating with a few edible flowers.

Once assembled the cake is best served within 1-2 days.

In Cakes Tags gluten free, oat flour, lemon, swiss meringue buttercream, lemon curd, edible flowers, platinum jubilee, simple cake
Comment

Twitter

  • Was 8 original films, 3 spin off films, a two part play not enough. Can we have something new. https://t.co/cBZdGEGeyv
    Apr 4, 2023, 1:46 PM
  • RT @deliciousmag: Cacio e pepe, but make it buns! These seriously cheesy bread rolls from @TheBoyWhoBakes are inspired by his favouri… https://t.co/oDZlaDgnN2
    Apr 2, 2023, 11:08 AM
  • RT @TheDailyShow: Congrats to Donald Trump on finally winning a majority of votes! https://t.co/ezP55HZgl0
    Mar 31, 2023, 12:43 AM

Instagram

This weeks bonus recipe, for subscribers to my newsletter, is this gorgeous sour cherry and coconut gateau basque. The crust is a buttery cross between pastry and cake, think a cakey cookie. The filling is a layer of sour cherry topped with a rich coconut custard. A real fun one to make too! Link to my newsletter can be found in my bio - #gateaubasque #pastrycream #coconut #sourcherry
In this months @olivemagazine (out today) the team came and photographed my petit kitchen and we talked about how we put our stamp on the place, without spending a fortune. We hated the bland kitchen that we inherited but, as it was relatively new an
In this months @olivemagazine (out today) the team came and photographed my petit kitchen and we talked about how we put our stamp on the place, without spending a fortune. We hated the bland kitchen that we inherited but, as it was relatively new and in good condition, it felt a waste to rip it out and we also didn’t want to spend the money it would take to rip out the whole thing and replace it (it’s a howdens shell so we could have done something cheaper like @plykeakitchens @holte.studio @madebyhusk) so instead I painted all of the cabinets, using @makeitrustoleum kitchen cabinet paint, to give it some personality and lighten the whole thing. Check out the magazine for the full run down. - #kitchendesign #kitchenremodel #rustoleumcabinettransformations #rustoleumkitchencupboardpaint #kitcheninspiration #theboywhobakes #olivemagazine
Are you making scones all wrong? Maybe, maybe not? But I do want to show you how I make them! This recipe is based on the method I learnt at @belmondlemanoir 12 years ago when I did a stage, and it makes the absolute lightest scones. And shock horror, it involves kneading the dough, albeit very lightly. You can get the full recipe in this weeks newsletter (free) linked in my bio. - #scones #bakingday #worldbakingday #afternoontea #hightea #englishscones #clottedcream #creamtea #theboywhobakes
facebook
  • Contact

The Boy Who Bakes

Edd Kimber

facebook