The Boy Who Bakes

Edd Kimber
  • Home
  • Recipes
  • My Books
  • Blog
  • Recipe Index
  • About
  • Home
  • Recipes
  • My Books
  • Blog
  • Recipe Index
  • About

Recipes

  • All
  • baking
  • Biscuits and Cookies
  • Breads and Quickbreads
  • Bundts
  • Cakes
  • Chocolate
  • Dessert
  • drinks
  • Holidays
  • Pastry
  • Scones and Quickbreads
chocolate coated madeleines with chopped hazelnuts

Brown Butter Hazelnut Chocolate Madeleines

Edd Kimber August 11, 2022

Following on from the previous recipe for classic madeleines, we can make a few simple changes and make some wonderful Madeleine variations including these fantastic brown butter madeleines stuffed with chocolate hazelnut spread and coated in dark chocolate. The key to keeping the texture of these madeleines the same as with the classic recipe is that once you’ve browned the butter you need to add back the moisture that has been cooked off, otherwise the madeleines dry out very quickly. You can simply add water, as this the butter loses through evaporation, or you can add milk which adds a little extra fat. Make sure you check out the previous blog post for more tips on making the perfect Madeleine.

Hazelnut Brown Butter Madeleines
Makes 15-18 (depending on tin size)

125g unsalted butter, diced
20ml water (or milk)
125g caster sugar
2 large eggs
1 tsp vanilla bean paste
125g plain flour
1 tsp baking powder
Pinch of fine sea salt
35g roasted hazelnuts, roughly chopped

Filling and Topping

100g chocolate hazelnut spread
150g dark chocolate, finely chopped

Place the butter into a small saucepan and place over medium heat. Cook the butter until melted, once melted it will start spattering, this is the water cooking out of the butter, it will then foam up and the milk solids will sink to the bottom of the pan and then brown. Once the butter starts to foam, keep your eyes on the butter because it can go from browned to burnt very quickly. Tip the butter into a small bowl, making sure to scrape out all of the browned milk solids, add the water or milk and then set aside to cool slightly.

To make the batter place the sugar, eggs and vanilla and whisk briefly just until the sugar has dissolved, you don’t need to incorporate any air in this stage.

Sieve the flour, baking powder and salt into the batter and using the whisk stir together until a smooth and thick batter is formed. Pour in the melted browned butter butter and stir until a smooth batter is formed. Scrape the batter into a piping bag then seal either by tying the end in a not or using a sandwich bag clip. Refrigerate the batter for at least an hour but preferably overnight.

When ready to bake preheat the oven to 210ºC (190ºC Fan). Whilst the oven preheats lightly grease a 12-hole Madeleine pan (I prefer traditional metal tins without a non-stick coating) with softened butter and dust with a thin layer of flour. Tip out any excess flour so that you have a very thin coating. Place the tin into the freezer.

To make the madeleines, make the batter as above using the browned butter. Once you have piped the madeleines scatter the chopped hazelnuts over the madeleines before baking. Bake for 10-12 minutes until the madeleines are risen and browned around the edges but still a little pale in the centre. Remove from the oven and allow to cool for a minute or so before turning out from the tin to cool.

When the madeleines have cooled scrape the chocolate spread into a piping bag fitted with a thin narrow piping tip (a Bismarck tip is perfect for this). Stick the piping tip into the middle of the Madeleine and pipe in some of the spread.

To coat the madeleines in chocolate you can simply melt the chocolate or if you want a more polished and professional finish you can also temper the chocolate. Whichever method you choose simply add about a tablespoon of chocolate to each depression in your Madeleine tin and gently press in a Madeleine to each depression. Place the tray into the freezer for 10-15 until the chocolate is set then turn out and enjoy. Because these madeleines are not fully coated in chocolate or a glaze like the lemon madeleines they are best enjoyed as close to baking as possible.

In Cakes Tags madeleines, chocolate coated, chocolate, hazelnut, nutella
Comment

Madeleines

Edd Kimber August 9, 2022

I think it is fair to say that most people know the connection between Marcel Proust and the humble madeleine, a cake the author described as “short, plump little cakes…which look as though they had been been moulded in the fluted scallop of a pilgrims shell”. It was a cake that, for him, immediately brought back happy memories of his aunt, who would feed him madeleines dipped in tea. It is the idea that one taste of something can transport us back to a past moment. Madeleines may not be my Proustian moment, I don’t even remember the first time I tried one, but I do have a soft spot for them.

Madeleines may look fancy and refined but thankfully the skill level required to make them is minimal, they’re straightforward and incredibly quick to pull together and because they require a refrigeration period they’re great if you like preparing ahead of time. With the classic hump shape there are a couple of tricks to help ensure it comes out pronounced and looks picture perfect. Firstly we need to chill the batter, for at least an hour but preferably overnight. We also want to chill the prepared Madeleine tin, again at least for an hour but longer also helps. Why all the chilling? Temperature difference. The oven the madeleines are baked in is hot and by chilling the batter the underside of the batter stays a little cooler meaning it takes a little longer to bake. The top of the madeleines however starts to bake a little quicker. This means that once the batter starts to set, the batter which is still raw and still rising has to force its way through the set crust on the top creating the distinctive hump.

Classic Lemon Madeleines
Makes 15-18 (depending on tin size)

Madeleines
125g caster sugar
Zest of 2 lemons
2 large eggs
1 tsp vanilla bean paste
125g plain flour

1 tsp baking powder
Pinch of fine sea salt
125g unsalted butter, melted and cooled

Lemon Glaze
100g icing sugar
1 tbsp lemon juice

To make the batter place the sugar and lemon zest into a bowl and using your fingertips rub together until the sugar resembles moist sand and there is a fragrant lemon smell. This step helps to release all the oils from the zest making for a more citrussy Madeleine. Add the eggs and vanilla and whisk briefly just until the sugar has dissolved, you don’t need to incorporate any air in this stage.

Sieve the flour, baking powder and salt into the batter and using the whisk stir together until a smooth and thick batter is formed. Pour in the melted butter and stir until a smooth batter is formed. Scrape the batter into a piping bag then seal either by tying the end in a not or using a sandwich bag clip. Refrigerate the batter for at least an hour but preferably overnight.

When ready to bake preheat the oven to 210ºC (190ºC Fan). Whilst the oven preheats lightly grease a 12-hole Madeleine pan (I prefer traditional metal tins without a non-stick coating) with softened butter and dust with a thin layer of flour. Tip out any excess flour so that you have a very thin coating. Place the tin into the freezer.

Humps - the humps on madeleines happen for a very simple reason but getting them to form, so they’re tall and have that classic look, can be tricky. As the batter bakes, like any other cake, it rises. Because the depression the batter sits in is shallow the cake cant rise very high before the edges set but as the batter is still rising it can only go straight up, creating he hump. To ensure this happens there is a couple things you need to bear in mind. Firstly, don’t add too much batter, if you do it will spill over the sides of the mould and create an unwanted crips edge and it will lessen the amount of hump. Secondly you want to use a chilled batter, chilled Madeleine pan and bake in a hot oven. This is the real secret to big beautiful humps. Because the oven is hot the top of the batter bakes and sets quickly, but because the batter itself and the tin was chilled, it takes a little longer for the bottom to bake and this means there is more batter that can push up and cause a big bolder hump.

Once the oven is preheated remove the batter from the fridge and snip off the end of the piping bag. Take the cold tin from the freezer and working quickly, pipe about a heaped tablespoon of batter into each of the Madeleine depressions. You don’t need to spread the batter out, it will conform to the shape of the mould as it bakes. Bake the madeleines in the oven for about 12 minutes or until the cakes are golden brown around the edges and a touch paler on the hump. Remove the tin from the oven and let the madeleines sit for a minute before carefully lifting the cakes from the tin. You don’t want the cakes to fully cool in the tin because as they cool the sugars in the cakes make them stick to the pan.

For the glaze whisk together the lemon juice and icing sugar, whisking until you have a smooth, lump free glaze. You may need to add a tsp or so more lemon juice to make the correct consistency, it needs to be runny but not thin, almost a double cream consistency.

Whilst the madeleines are still warm use a pastry brush to coat the madeleines in glaze, setting onto a parchment lined tray and allowing the glaze to set. I prefer brushing the glaze on instead of dipping them into the glaze because dipping will add a significantly larger amount of glaze make the Madeleine sweeter and less delicate.

If the madeleines will keep for a full 24-36 hours but if only coated on one side or not at all they need to be eaten within the hour to prevent them drying out.

In Cakes Tags lemon, madeleines, French baking, patisserie, lemon glaze
5 Comments

Platinum Jubilee Cake - Lemon and Almond Sponge

Edd Kimber May 26, 2022

Sponsored by Doves Farm

It cannot have escaped your attention that the Queen’s Platinum Jubilee is fast approaching, it is in the news constantly and step outside (especially in London) and you’ll be inundated by the newly hung union jack flags everywhere you look. You also may know there has also been a competition to find a recipe to commemorate the occasion. The winner, Jenna Melvin, a copyrighter from Merseyside, created a new take on the classic British trifle, fit for a queen of course. She made the trifle with the classic elements of custard and jelly along with the addition of a lemon curd Swiss roll, a mandarin coulis and amaretti biscuits. A deliciously bright and summery take on the trifle.

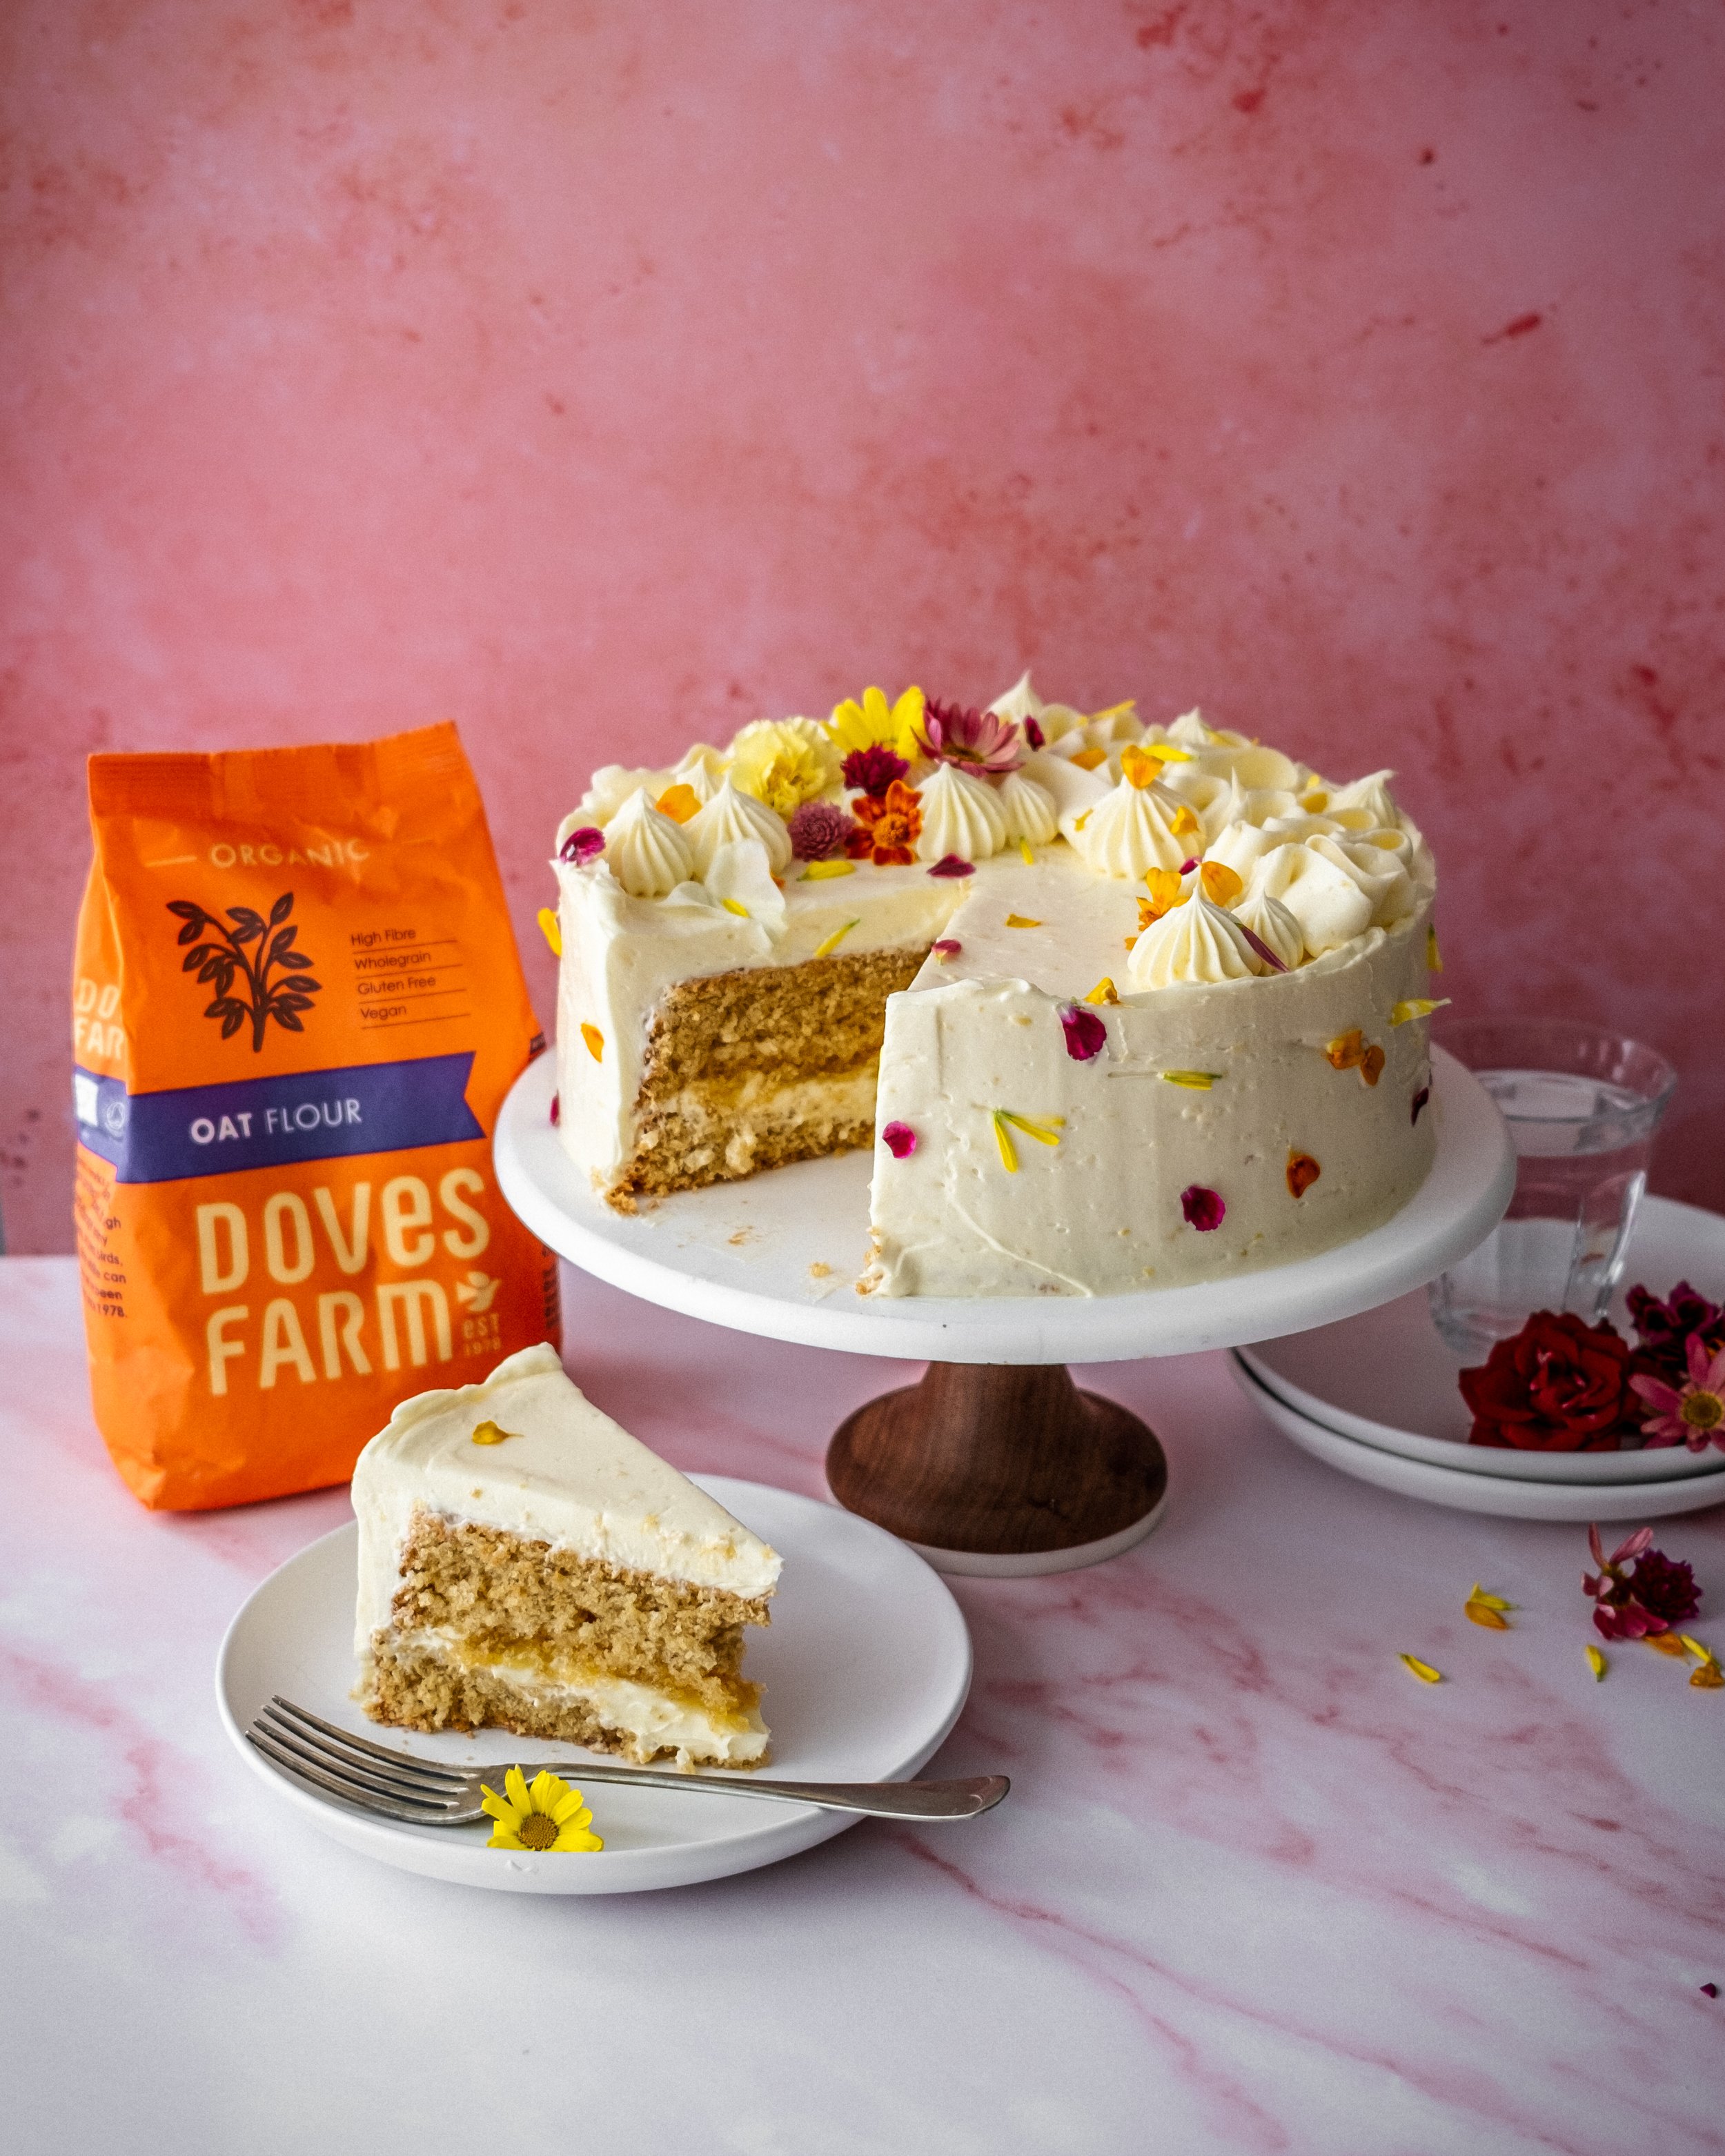
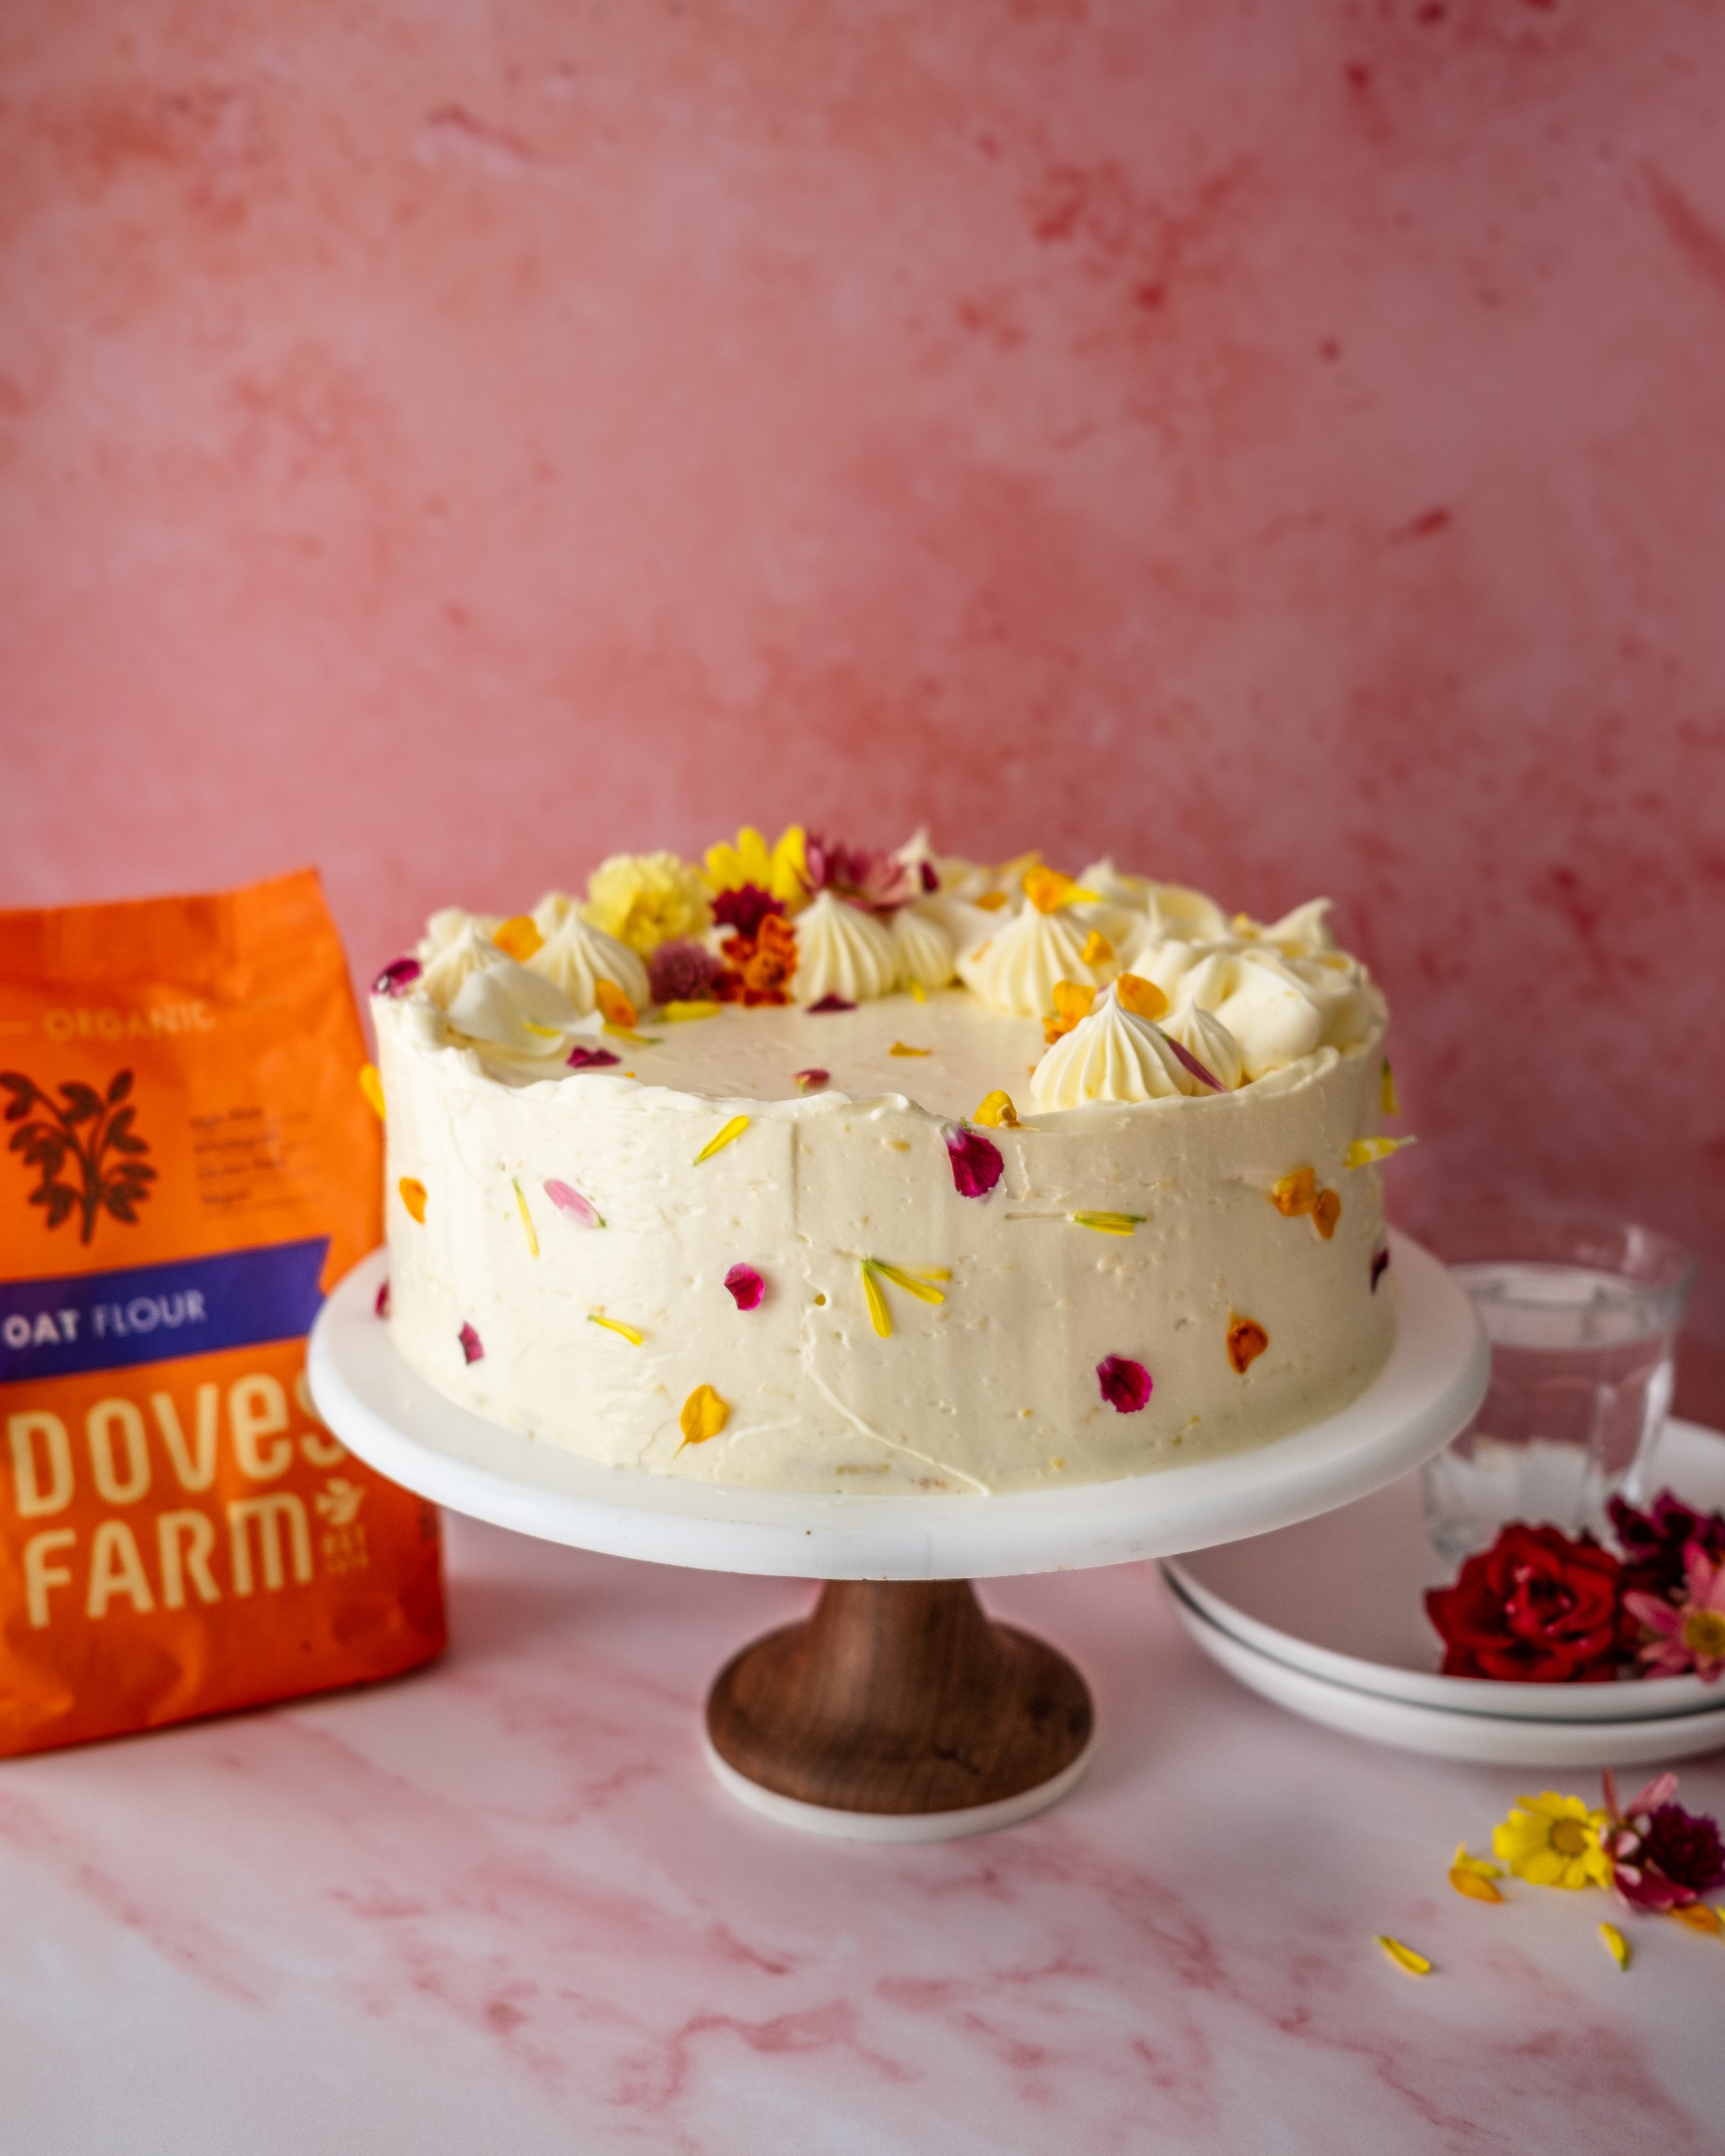
Taking inspiration from this winning dessert I have come up with a simple cake that would be a perfect centre piece for any street or garden parties happening for the Jubilee, should you not want to make all the elements for the trifle. The cake element in my recipe is an amazing sponge cake made with Doves Farm Organic Oat Flour. The oat flour gives a wonderful warm and almost caramel like flavour and a perfect balance between a light sponge cake and a classic Victoria sponge. Doves Farm Organic Oat Flour also happens to be certified gluten free, making this cake a great option if you are also catering for anyone following a gluten free diet.

The cake is flavoured with lemon zest and a touch of almond extract and then layered with a lemon white chocolate buttercream and sandwiched together with zingy lemon curd. It is a simple but celebratory cake, sure to be a crowd pleaser. To decorate the cake some buttercream is piped atop the cake in a slightly random matter and then decorated with some edible flowers. It’s a perfect summer time centre piece.

You can buy Doves Farm Organic Oat Flour from www.dovesfarm.co.uk, Ocado, Sainsbury’s, Tesco and Waitrose & Partners

Oat Sponge Cake
150g Doves Farm Organic Oat Flour
1/4 tsp fine sea salt
200g caster sugar
6 large eggs
1/2 tsp almond extract
Zest of 2 lemons
65ml olive oil

Lemon Simple Syrup
Juice of 1 lemon
50g caster sugar

Lemon White Chocolate Buttercream
3 large egg whites
240g caster sugar
Zest of 2 lemons
360g unsalted butter, diced and at room temperature
150g white chocolate, melted and cooled

To Assemble
75g lemon curd
Edible flowers, to decorate

Preheat the oven to 180ºC (160ºC Fan). Line the base of a deep 8-inch round cake pan with parchment paper. You can grease the base of the tin to secure the parchment in place but do not grease the sides.

Add the oat flour and salt to a bowl and whisk together to combine. Place the sugar, eggs and lemon zest into a large bowl and using an electric mixer whisk together on high speed for about 5 minutes. When the beaters are lifted from the bowl the mixture should form a thick ribbon that slowly dissolves back into the batter. Sieve over a third of the oat flour mixture and gently fold together until the flour is combined. Repeat twice more until all the flour is combined and there are no pockets of flour in the batter. Scrape about a quarter of the batter into a separate bowl and mix together with the olive oil and almond extract until the mixture is emulsified. Pour this small amount batter back into the main batter and fold together as before until the two mixtures are uniformly combined. Keep these actions as light and brief as possible to retain as much of the lightness in the batter.

Scrape the batter into the prepared cake pan. Swirl a skewer through the batter to burst any large bubbles to ensure the cake has an even texture. Bake in the preheated oven for about 45 minutes or until the cake has risen and domed but then settled into a flat top. A skewer inserted in the cake should also come out clean. Remove the cake from the oven and whilst the cake is still hot run a thin knife or spatula around the outside of the pan to separate the sides of the cake from the pan. Leave the cake to cool and then turn out and peel of the parchment paper.

For the syrup place the juice and sugar into a small saucepan and place over medium heat and cook until the sugar has dissolved and the mixture has come to a boil. Remove from the heat and set aside until needed.

For the buttercream place the egg whites, sugar and lemon zest into a heatproof bowl set over a pan of simmering water and heat, whilst whisking gently, until the mixture is hot and the sugar is dissolved. If you rub the mixture between your fingers you shouldn’t feel any sugar grains and the mixture should be hot. Remove the bowl from the heat and using an electric mixture whisk on high speed until the mixture has formed a thick and glossy meringue that has cooled to room temperature, this should take about 7 minutes. Once cooled to room temperature add the butter a little at a time, whisking until combined before adding more. Once all the butter has been combined the mixture will have transformed to a buttercream texture. Switch the whisk for the beater attachment and mix on medium speed until smooth and creamy. Pour in the chocolate and mix briefly until combined.

To assemble, use a serrated cake slice the cake into two layers, using a cake board or similar to carefully remove the top layer of cake (this is a relatively delicate cake as it is gluten free and doesn’t contain any xanthan gum so lifting the cake layers without support is not advised). Drizzle the cake layer with some of the lemon syrup and top with a thin layer of buttercream. Spoon on the lemon curd and spread to cover most of the buttercream, leaving a border around the edge of the cake. Drizzle the cut side of the second layer of cake with some syrup and then carefully place cut side down onto the first layer. Spread the remaining buttercream, reserving a little for decoration, over the tops and sides of the cake. For decoration I take a little buttercream and pipe it in a slightly random manner over the top of the cake. To replicate the style I have done with my cake I used a small tear shaped piping tip and a small French star piping tip. Finish by decorating with a few edible flowers.

Once assembled the cake is best served within 1-2 days.

In Cakes Tags gluten free, oat flour, lemon, swiss meringue buttercream, lemon curd, edible flowers, platinum jubilee, simple cake
Comment

Blueberry Cake Doughnuts with Blueberry Bourbon and Basil Glaze

Edd Kimber May 9, 2022

How do you define a doughnut? You could argue its just fried dough but does that just mean a bread dough? What about cake batter, or choux pastry? Both of those can make great doughnuts, so what really does define a doughnuts? Maybe it’s one of those ‘hard to define but I know it when I see it’ kind of thing? Well, however you define a doughnut, today we are talking about one of the two major types, cake doughnuts. 

You can probably already tell from my use of doughnut instead of donut that I am a Brit and, here in the UK, cake doughnuts are not anywhere near as common as in North America. Bakeries known for doughnuts tend to go down the fried dough route. Of course a brioche doughnut, stuffed full of cream or jam is a beautiful thing but sometimes I want my doughnut craving fulfilled quicker and in an easier manner. The batter which cake doughnuts are made with takes just a couple minutes to make and there is no proofing required. If cake doughnuts are made well I also find they keep better than a brioche doughnut. Whilst all doughnuts are best served as close to frying as possible, these will keep for a day or two and still taste great.

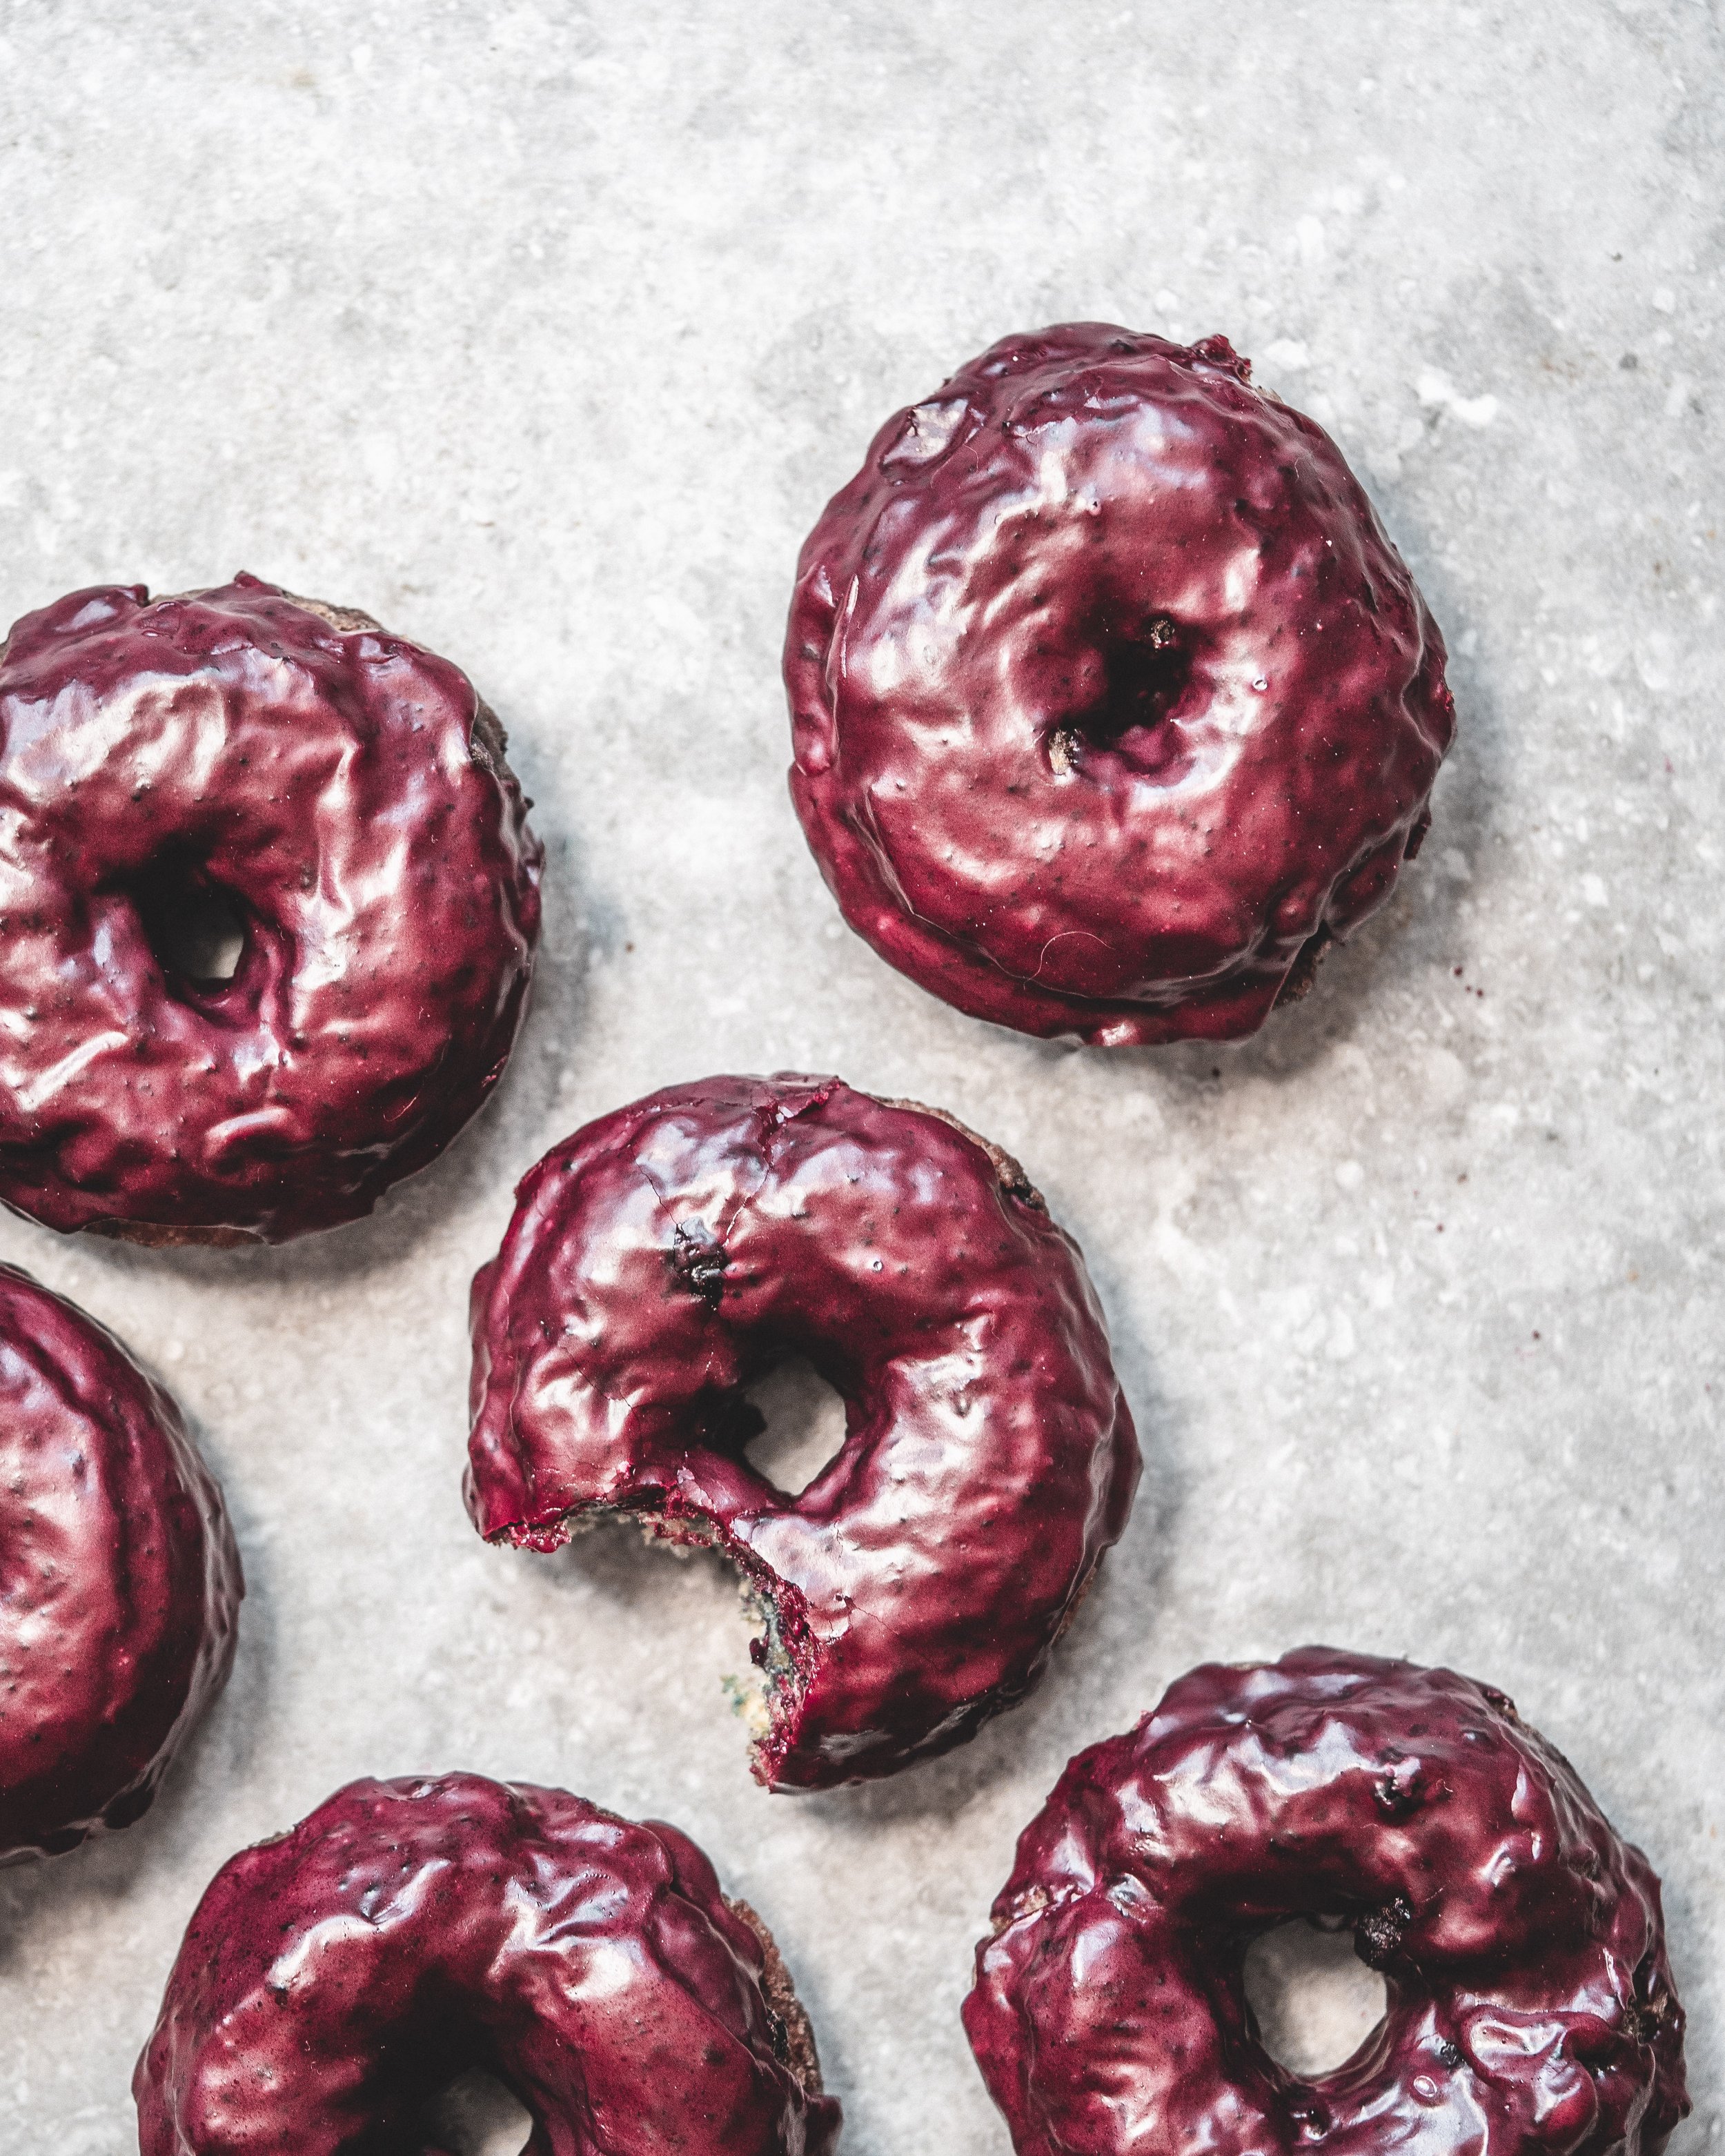
The inspiration for these doughnuts is from Blue Star Doughnuts who make a doughnut with a blueberry basil and bourbon glaze. I took that idea and ran with it, not only does the glaze have blueberries in (paired beautifully with basil and bourbon) the doughnuts themselves are studded with them too. A quick note on blueberries, for this recipe I like to use frozen blueberries as it helps to prevent them turning to mush when mixed into the batter. I also like to use frozen wild blueberries. Wild blueberries have a better flavour and importantly they are very small. The benefit of small berries is that they don’t affect the structural integrity of the doughnuts when cut and fried. I have made them with regular frozen blueberries and they work fine, they just tend to look a little more irregular in shape.

Blueberry Cake Doughnuts
Makes 8

275g plain flour
1 tsp baking powder
1/2 tsp bicarbonate of soda
1/2 tsp fine sea salt
100g caster sugar
zest of 1 lemon
100ml buttermilk
4 large egg yolks
30g unsalted butter, melted and cooled
1 tsp vanilla bean paste
100g frozen wild blueberries

Blueberry Basil and Bourbon Glaze
50g blueberries
1 tbsp lemon juice
3-5 basil leaves
1 tbsp bourbon
Pinch of fine sea salt
1/4 tsp vanilla bean paste
200-225g icing sugar

Making these doughnuts is incredibly easy, so much simpler than a yeasted doughnut. To a large bowl add the flour, baking powder, bicarbonate of soda, salt, sugar and lemon zest and whisk to combine. In a small jug whisk together the buttermilk, egg yolks, butter and vanilla. Pour the buttermilk mixture into the flour mixture and, using a spatula, stir together to form a thick cake batter. Add the blueberries and briefly stir into the batter until evenly distributed. Don’t worry if the blueberries bleed a little into the batter, thats to be expected, and using frozen berries prevents the berries breaking down further as the dough is rolled out.

Line a baking tray with parchment paper and flour liberally. Tip out the cake batter and sprinkle liberally with flour. Using your hands or a rolling pin, press the dough into a 1.5cm thick layer. Transfer the tray to the fridge for abut 2 hours to form up slightly. 

To make the glaze add the blueberries and lemon juice to a small saucepan (a milk pan or butter warmer works perfectly here) and cook over medium heat until the blueberries are breaking down and the liquid is bubbling, cooking for a few minutes more to reduce the amount of liquid a little (this also concentrates the colour). Scrape the blueberry mixture into a jug and add the basil, bourbon, salt, vanilla and about half of the sugar. Use a stick blender to puree until smooth, then add more sugar until you have a thick but pourable glaze. You can adjust the thickness by adding a touch more lemon juice if too thick and more icing sugar if it is too thin. Cover while you fry the doughnuts.

Fill a large saucepan about 1/2 full with vegetable oil and over medium heat bring to about 160-170C. Once at temperature, turn the heat to low. You’ll want to have a thermometer handy so you can regularly check the temperature of the oil so you can adjust the heat as needed to keep it within the 160-170C range. 

Remove the doughnut mixture from the fridge and using a 3 inch round cookie cutter, cut out as many doughnuts as you can. Using a 1 inch round cookie cutter, remove a hole from the middle of each doughnut. You can fry the middles as doughnut holes and the scraps can be pressed back together, re-rolled and cut out as before to get a couple more doughnuts. 

Carefully lift the doughnuts into the oil and fry, 2 or 3 at a time, for about 2 minutes flipping halfway through cooking to ensure even browning. When the doughnuts are golden brown use a slotted spoon to remove them from the oil. The doughnuts should feel light, if they feel heavier than you expect they are likely undercooked and need a little longer in the oil. Transfer the doughnuts to a wire rack set atop a baking tray. Once all your doughnuts are fried pour over the glaze, covering as much as you can. Leave the glaze to set for 15-20 minutes and then enjoy!

Whilst doughnuts of any sort are truly at their best as soon as they are cool enough to eat, these cake doughnuts will keep for at least a day after frying. 


In Cakes Tags blueberry, donuts, doughnuts, bluestar donuts, bourbon, basil, cake, cake doughnuts, cake donuts, fried
2 Comments
  • Recipes
  • Older
  • Newer

Twitter

  • Was 8 original films, 3 spin off films, a two part play not enough. Can we have something new. https://t.co/cBZdGEGeyv
    Apr 4, 2023, 1:46 PM
  • RT @deliciousmag: Cacio e pepe, but make it buns! These seriously cheesy bread rolls from @TheBoyWhoBakes are inspired by his favouri… https://t.co/oDZlaDgnN2
    Apr 2, 2023, 11:08 AM
  • RT @TheDailyShow: Congrats to Donald Trump on finally winning a majority of votes! https://t.co/ezP55HZgl0
    Mar 31, 2023, 12:43 AM

Instagram

This weeks bonus recipe, for subscribers to my newsletter, is this gorgeous sour cherry and coconut gateau basque. The crust is a buttery cross between pastry and cake, think a cakey cookie. The filling is a layer of sour cherry topped with a rich coconut custard. A real fun one to make too! Link to my newsletter can be found in my bio - #gateaubasque #pastrycream #coconut #sourcherry
In this months @olivemagazine (out today) the team came and photographed my petit kitchen and we talked about how we put our stamp on the place, without spending a fortune. We hated the bland kitchen that we inherited but, as it was relatively new an
In this months @olivemagazine (out today) the team came and photographed my petit kitchen and we talked about how we put our stamp on the place, without spending a fortune. We hated the bland kitchen that we inherited but, as it was relatively new and in good condition, it felt a waste to rip it out and we also didn’t want to spend the money it would take to rip out the whole thing and replace it (it’s a howdens shell so we could have done something cheaper like @plykeakitchens @holte.studio @madebyhusk) so instead I painted all of the cabinets, using @makeitrustoleum kitchen cabinet paint, to give it some personality and lighten the whole thing. Check out the magazine for the full run down. - #kitchendesign #kitchenremodel #rustoleumcabinettransformations #rustoleumkitchencupboardpaint #kitcheninspiration #theboywhobakes #olivemagazine
Are you making scones all wrong? Maybe, maybe not? But I do want to show you how I make them! This recipe is based on the method I learnt at @belmondlemanoir 12 years ago when I did a stage, and it makes the absolute lightest scones. And shock horror, it involves kneading the dough, albeit very lightly. You can get the full recipe in this weeks newsletter (free) linked in my bio. - #scones #bakingday #worldbakingday #afternoontea #hightea #englishscones #clottedcream #creamtea #theboywhobakes
facebook
  • Contact

The Boy Who Bakes

Edd Kimber

facebook